bookitlive uses the clients email address as a unique reference to identify each client. email addresses are used as they provide a unique identifier and is why the email is general used for most online software.
In some situations, a Client may need to be booked who does not have an email address or the email address is not known at time of booking.
bookitlive can cater for this situation by allowing a client record to be created without providing an email address. bookitlive automatically will generate a unique email address for this situation using the bookitlive domain.
Creating a client record without an email address
- From the Dashboard or Client page select Add Client
- Instead of entering a client email address select "No email address" tick box
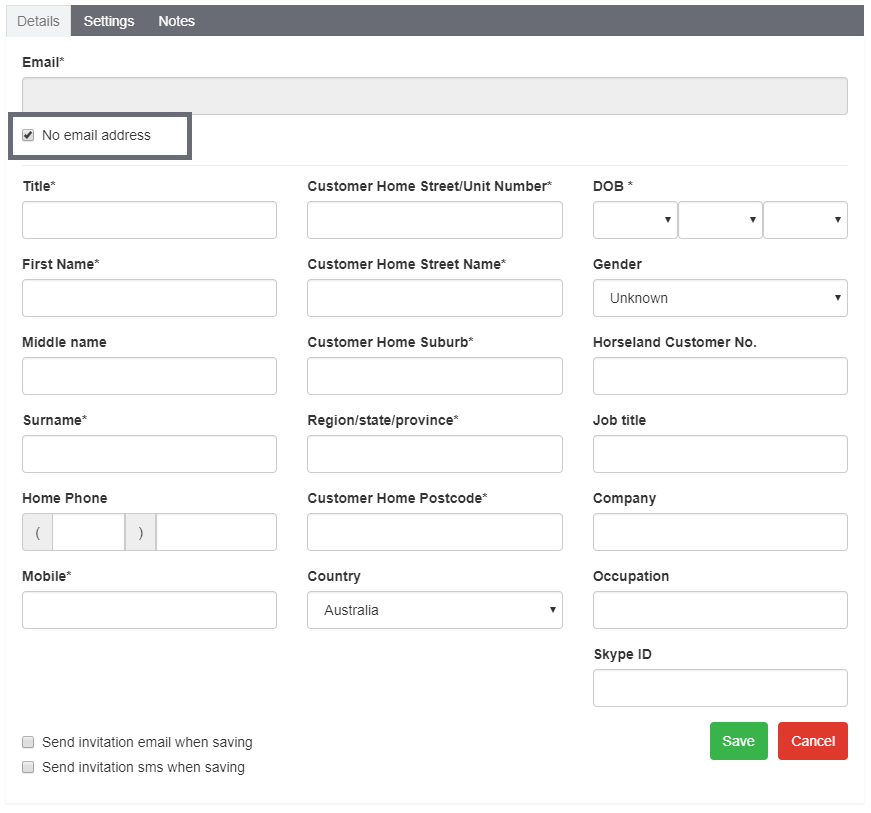
- Enter in the other client details and Save.
A Client record is then added using an email address generated by bookitlive in the format "_xxxxxx@bookitlive.net" with each "x" representing a unique, randomly-generated numeric character.
Note: a BookItLive email address generated this way is not a real address and thus cannot be used to send or receive emails.
You can see the generated email address by editing the client. the email address can then be updated with the correct address later.
As bookitlive will use the client email address to send out notification, Clients with bookitlive generated email addresses will not receive email notifications and the email will fail to be delivered. To stop email failures the client record can be updated and email notifications switched off.
Updating client email addresses
- From the Client page search for the client to update
- Select the clients name to edit the client record
- Update the email address
- Save
Switching off email notifications for clients
- From the Client page search for the client to update
- Select the clients name to edit the client record
- Select the Settings tab
- Deselect the email notification options
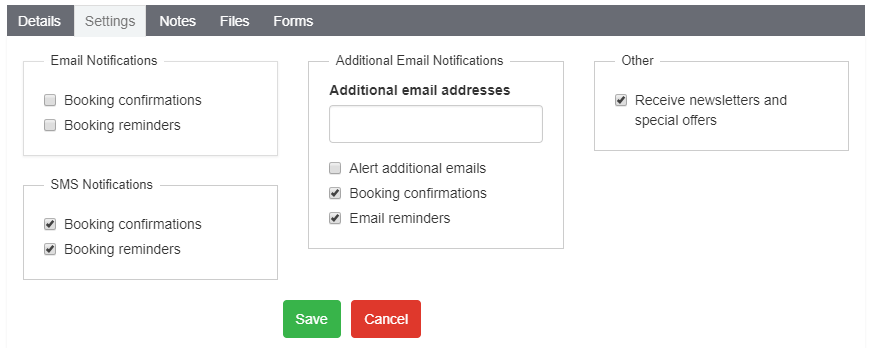
- Save.
Was this article helpful?
That’s Great!
Thank you for your feedback
Sorry! We couldn't be helpful
Thank you for your feedback
Feedback sent
We appreciate your effort and will try to fix the article