What BookItLive's system can do for your business
BookItLive is a hands-off booking software that automates your business' bookings with online payment, reminder and scheduling features.
Create intuitive booking pages for multiple business offerings (what BookItLive calls "Services"), employees ("Resources"), packages, products and gift vouchers ("Products"). Set these pages up from account creation and let our system worry about handle the booking and payment process for you, and report the booking confirmation, reminder and follow-up back to you without lifting a finger!
Whenever customers book and pay online, your Dashboard immediately updates your availability and all booking and payment details in real-time.
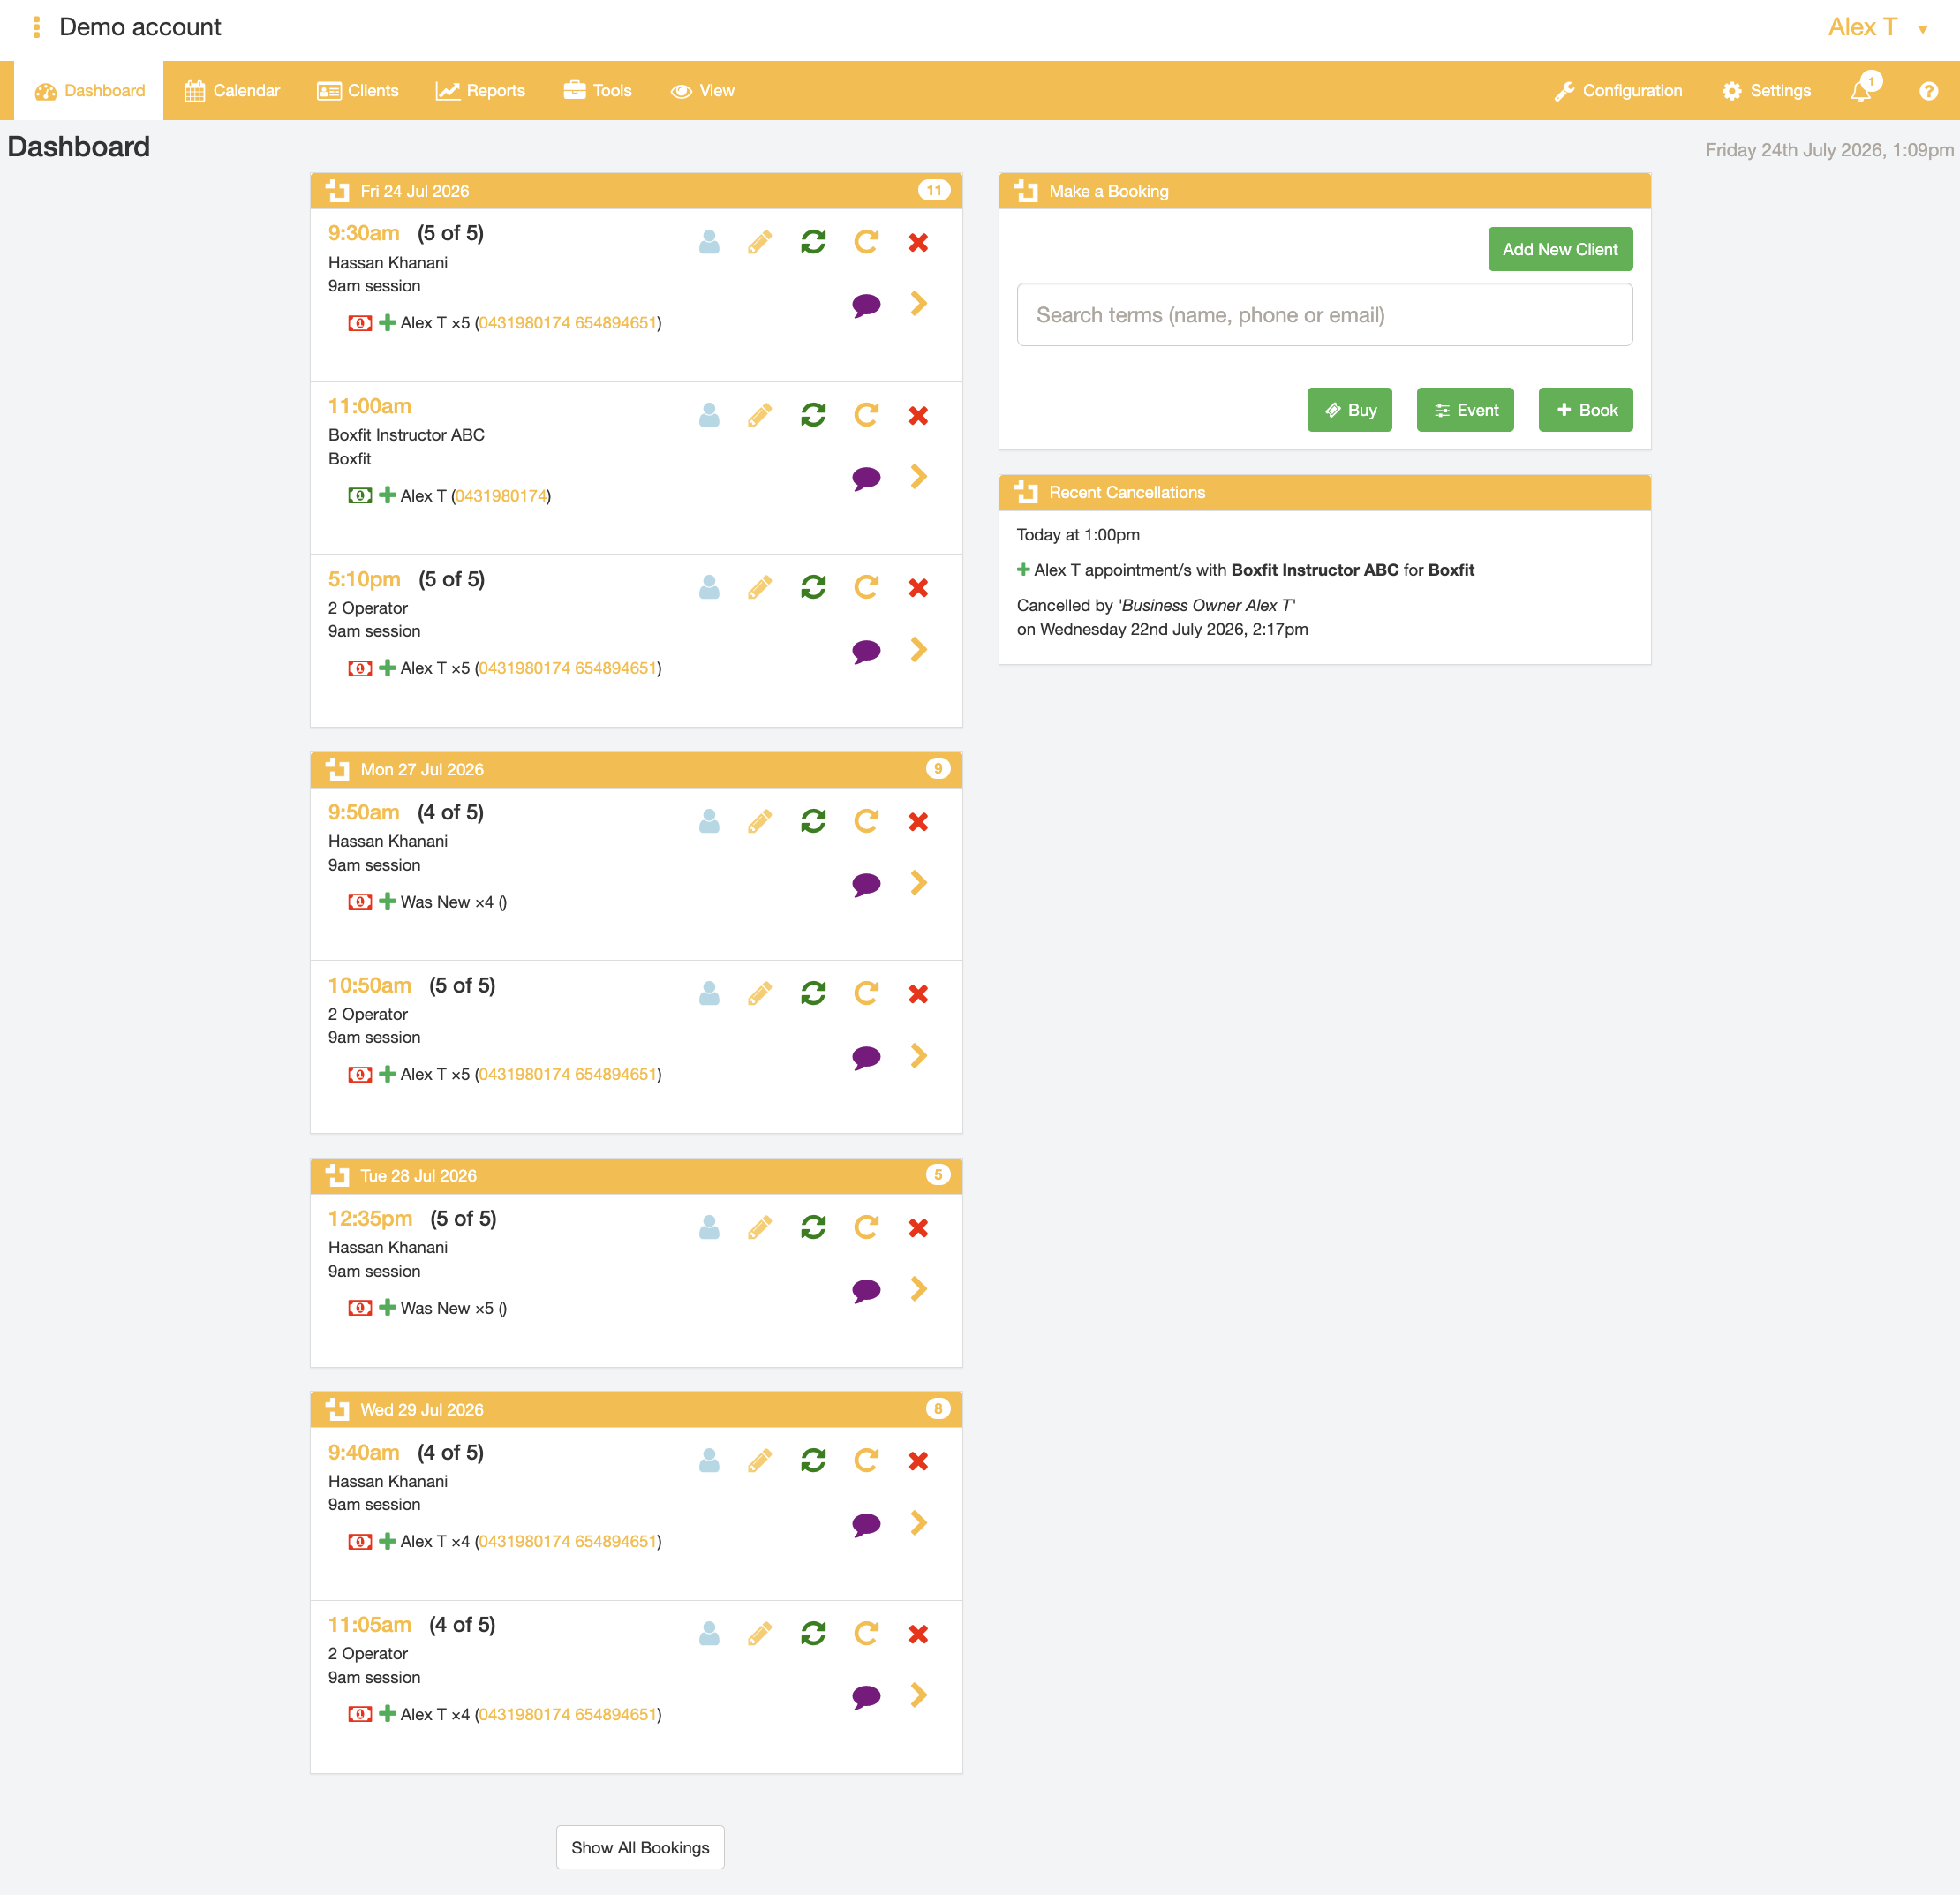
bookitLive have booking solutions for a range of service businesses and is suited to organisations of all sizes, from small businesses to medium-sized not-for-profits to large enterprises.
How to get started
Sign up for 14-day trial account from the BookItLive sign up page. Choose the subscription plan that best suits your organisation's booking needs by clicking the "Start Your Trial" button of the Subscription Plan name.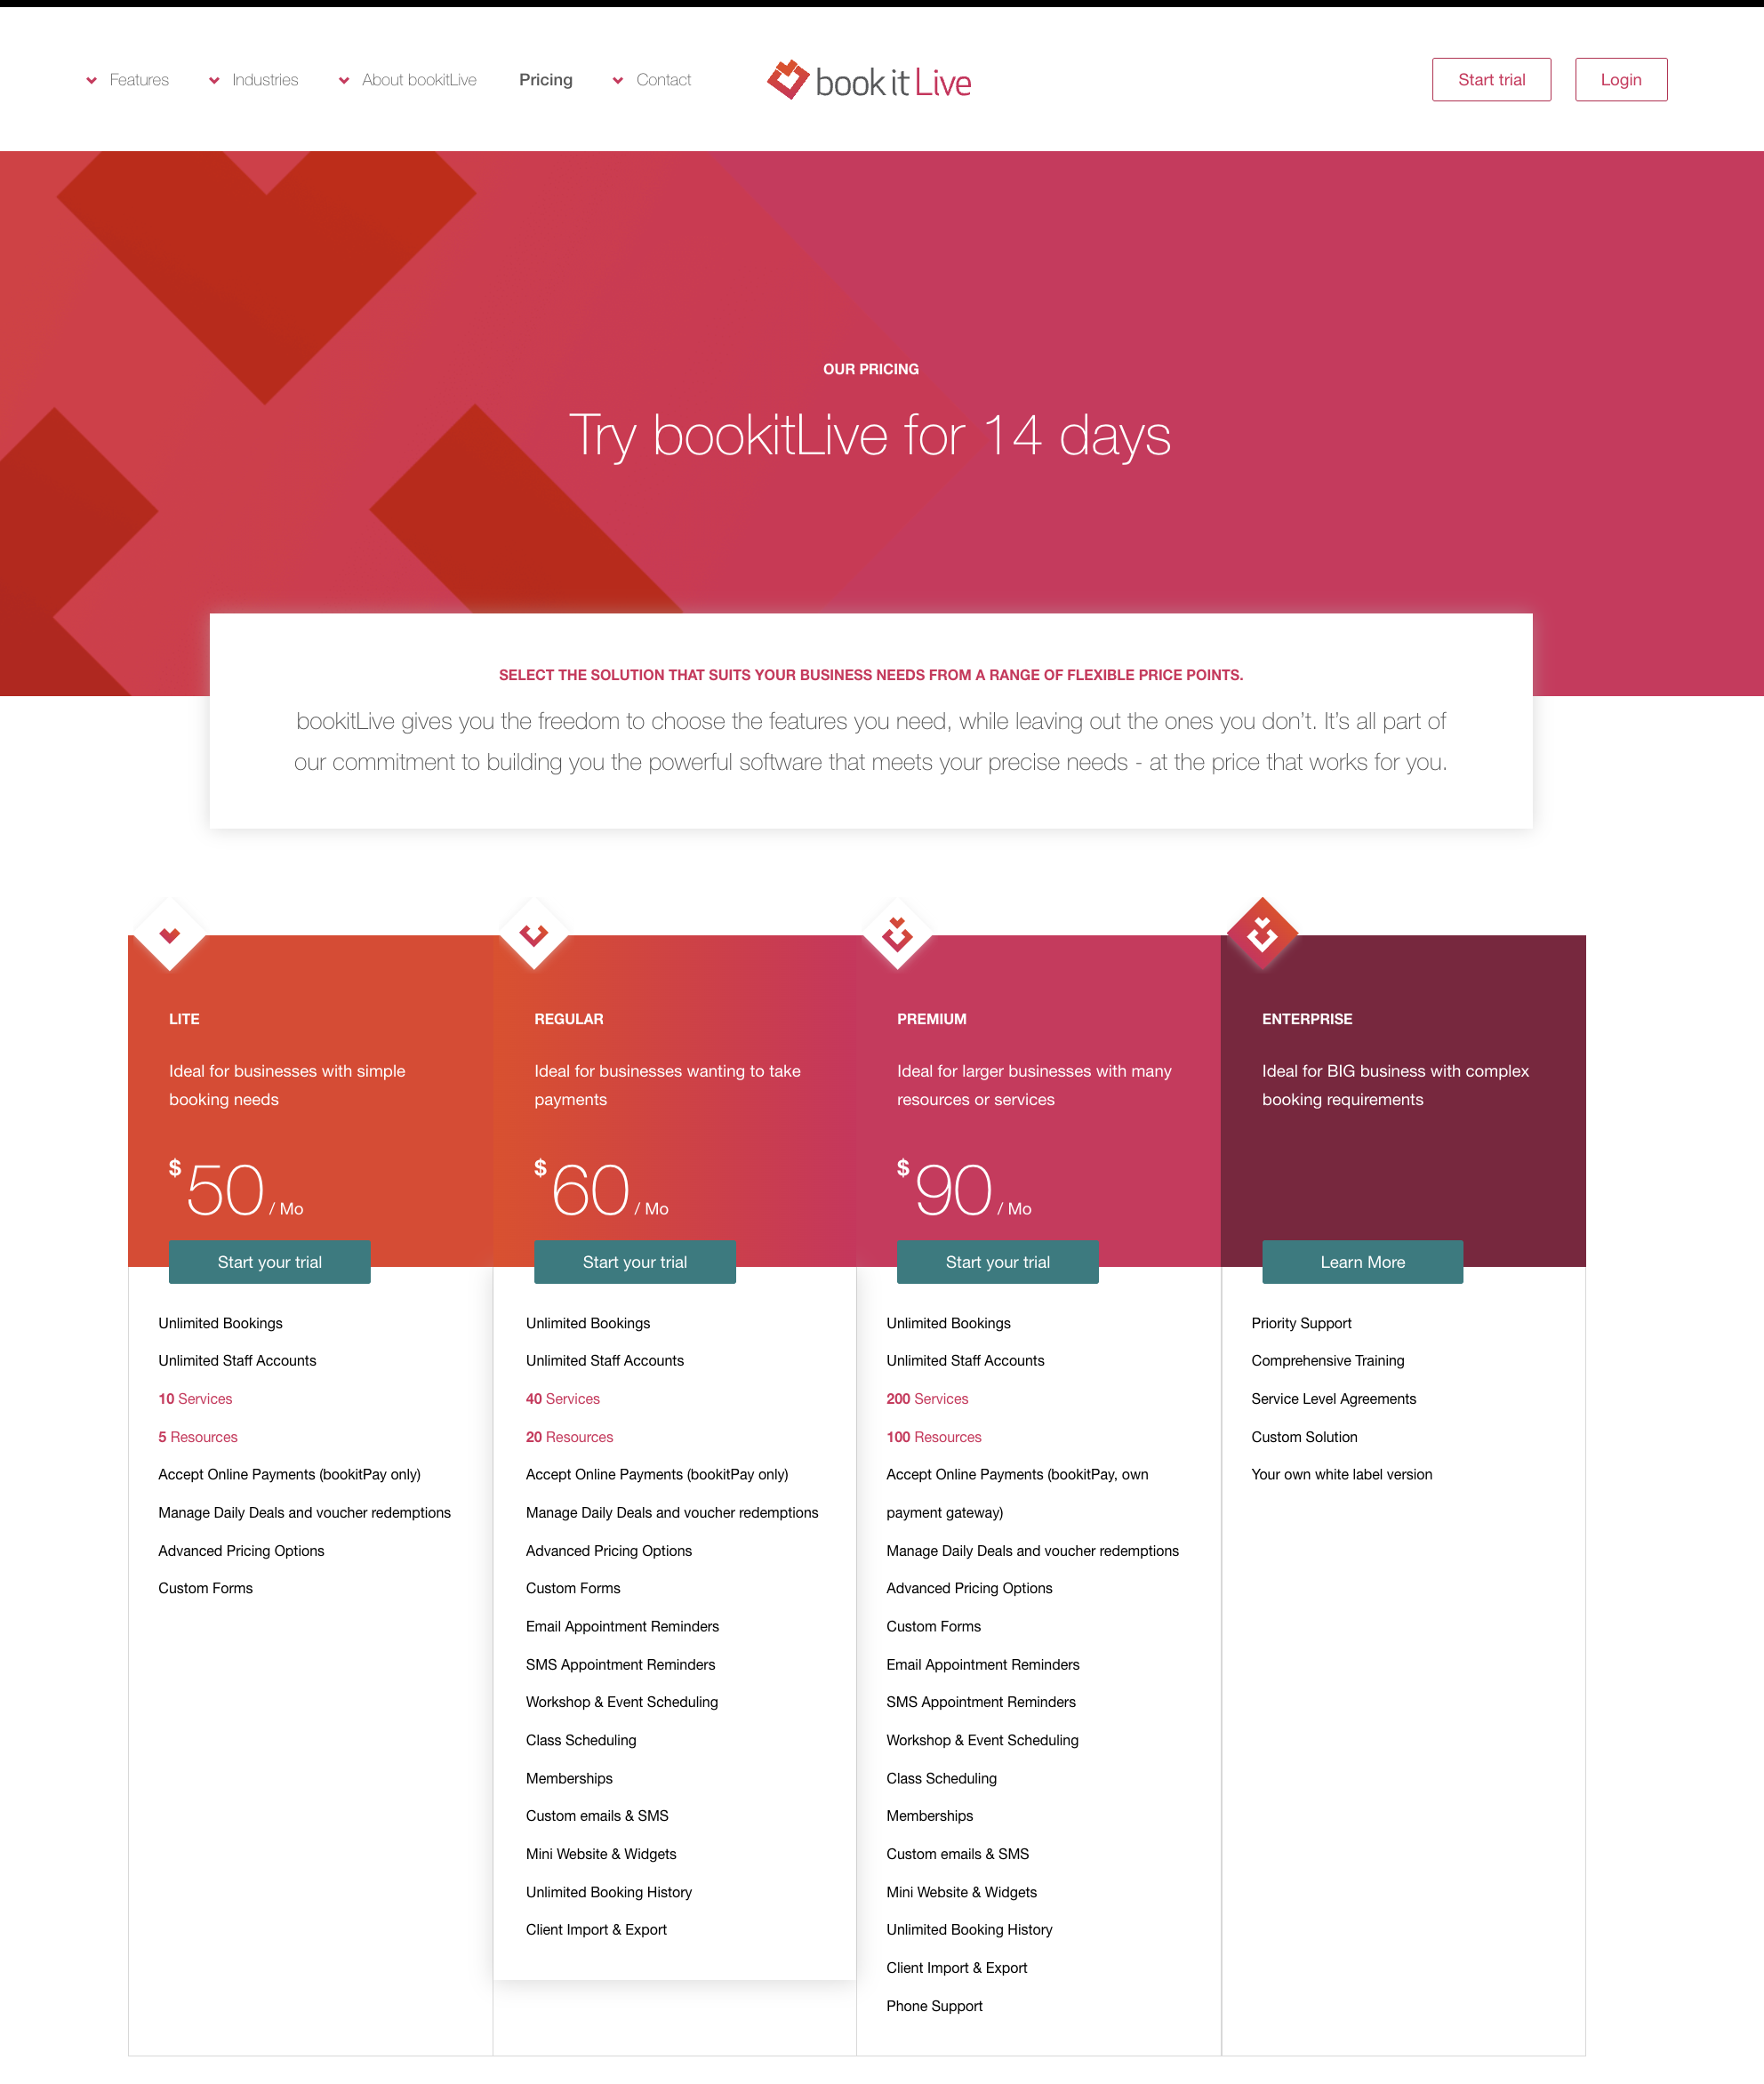
Complete the account creation process by entering your business details and submitting the relevant card details.
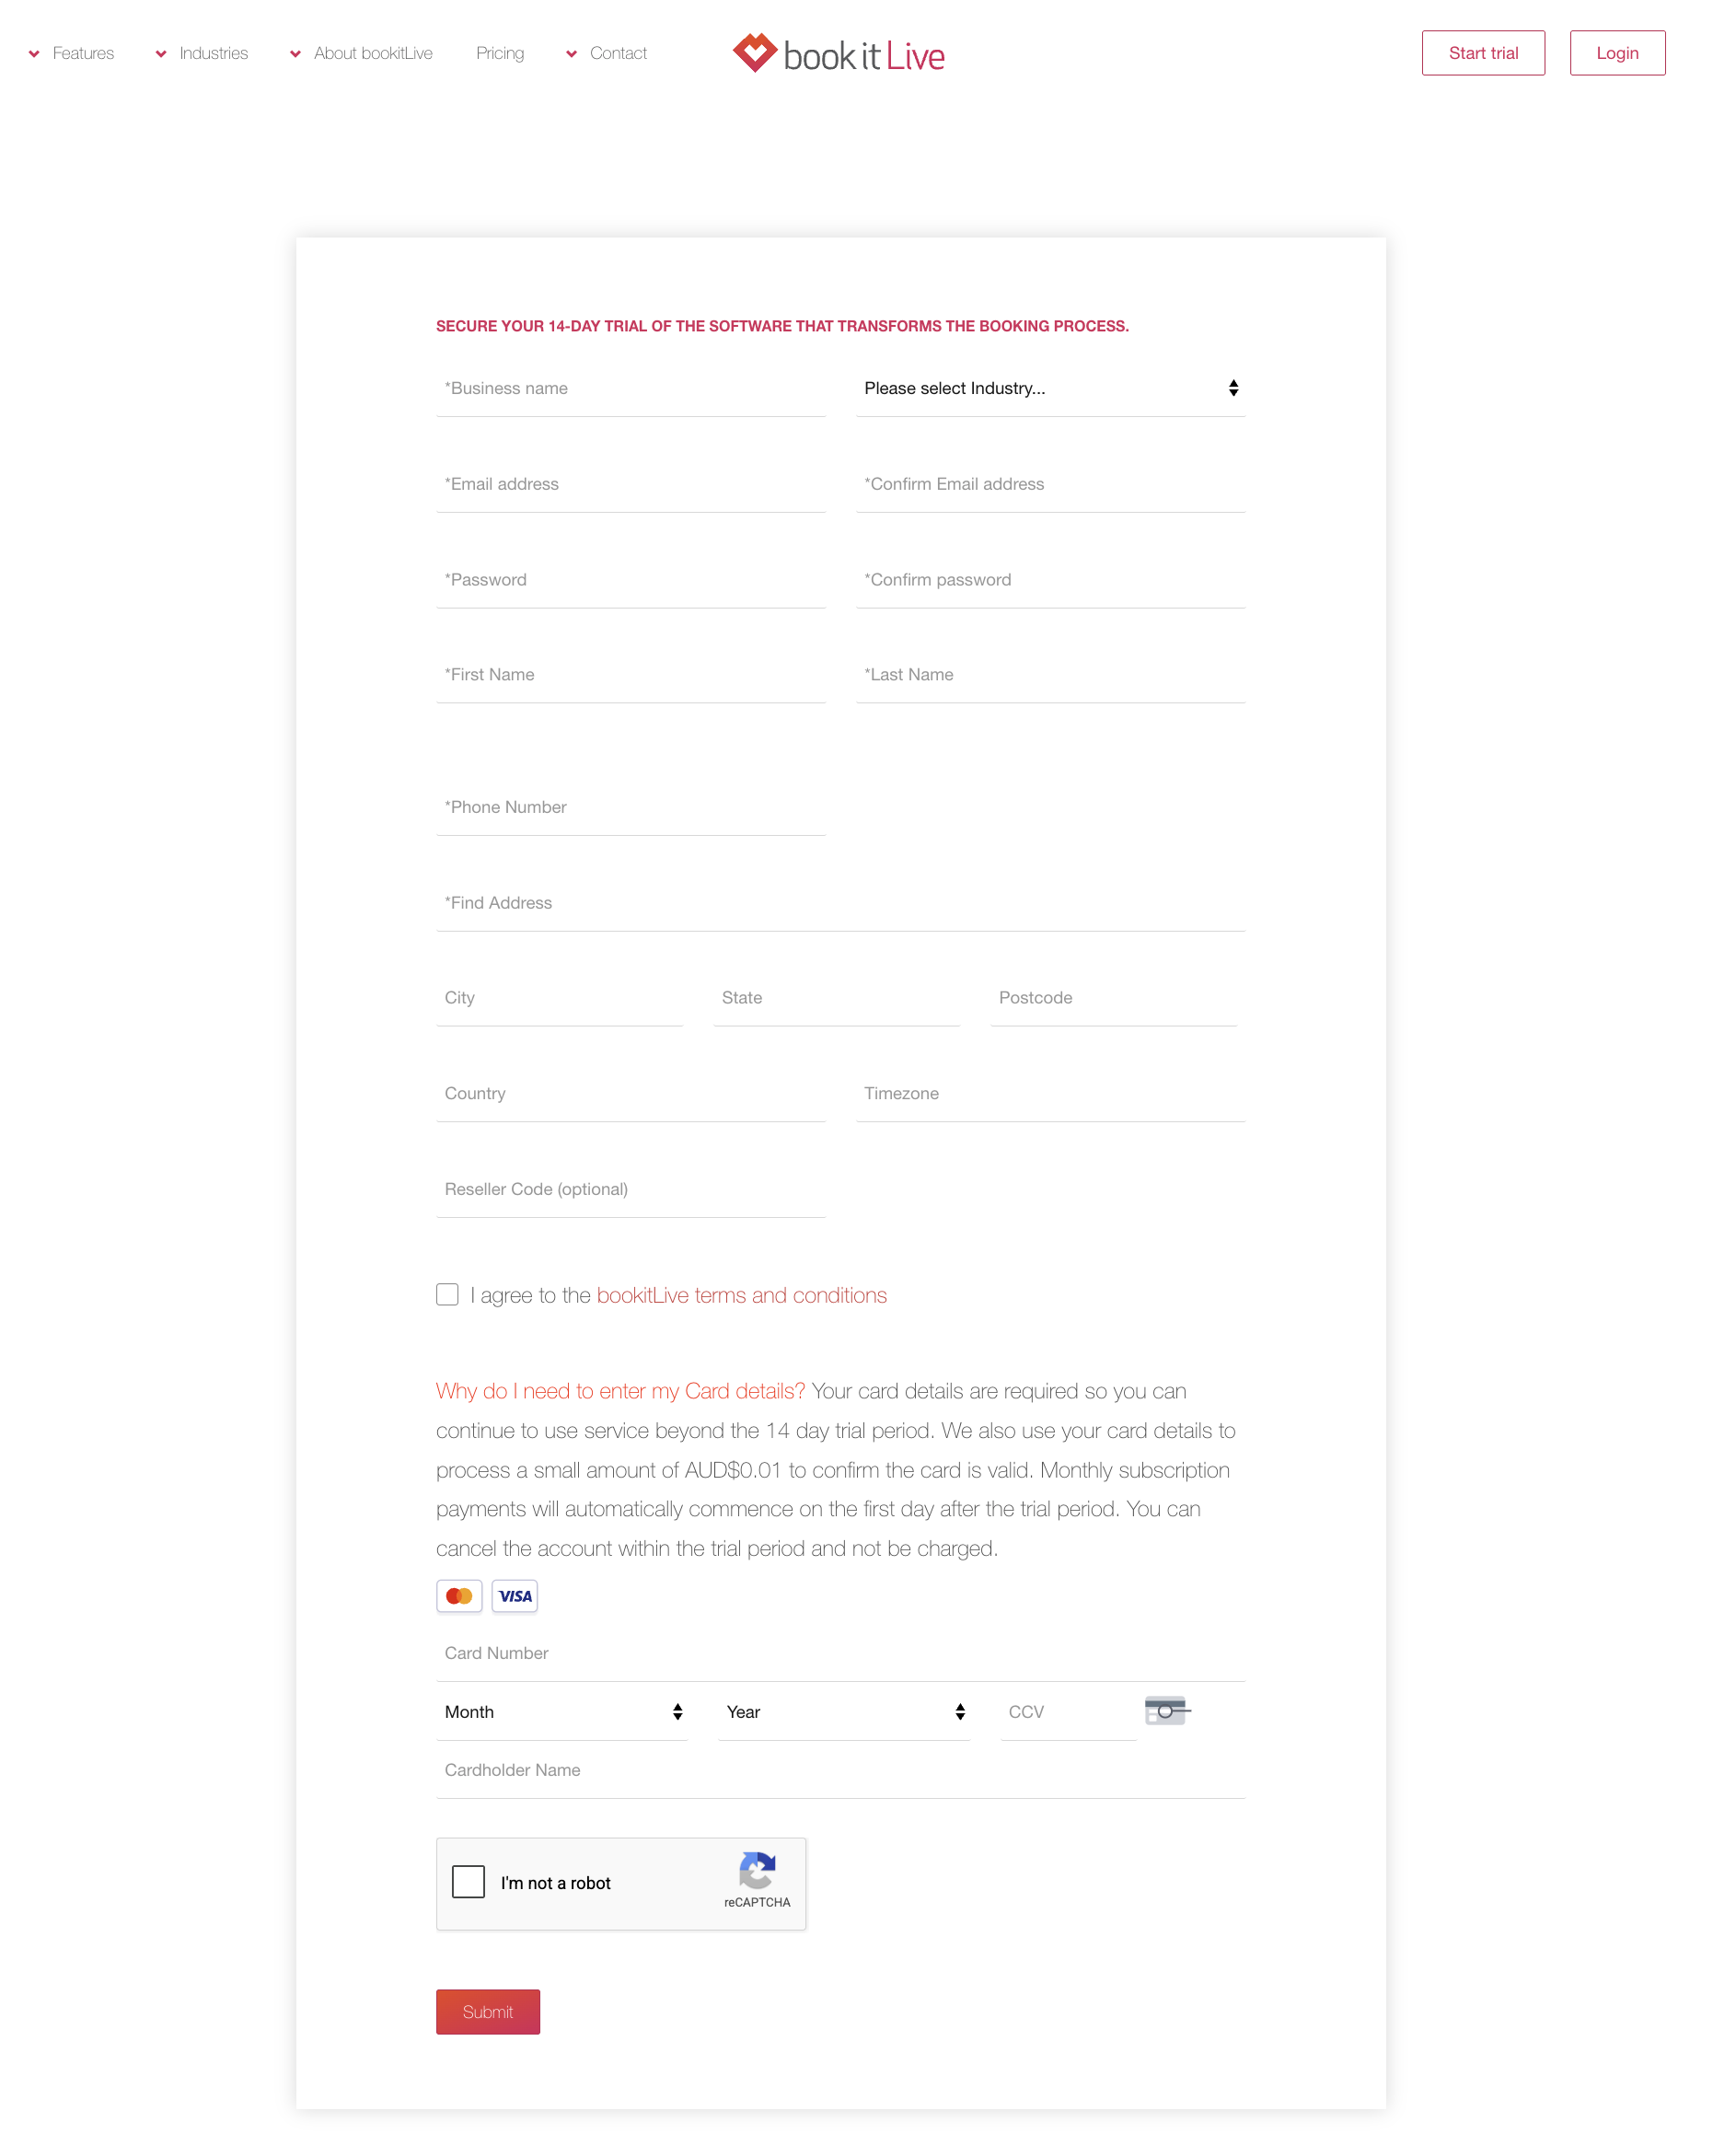
You're now ready to set up your account to manage your business' bookings!
Layout and Menu
- Upper bar - Three-dot button shows/hides your business' Subscription/billing package, link to the business Dashboard and Bookings.
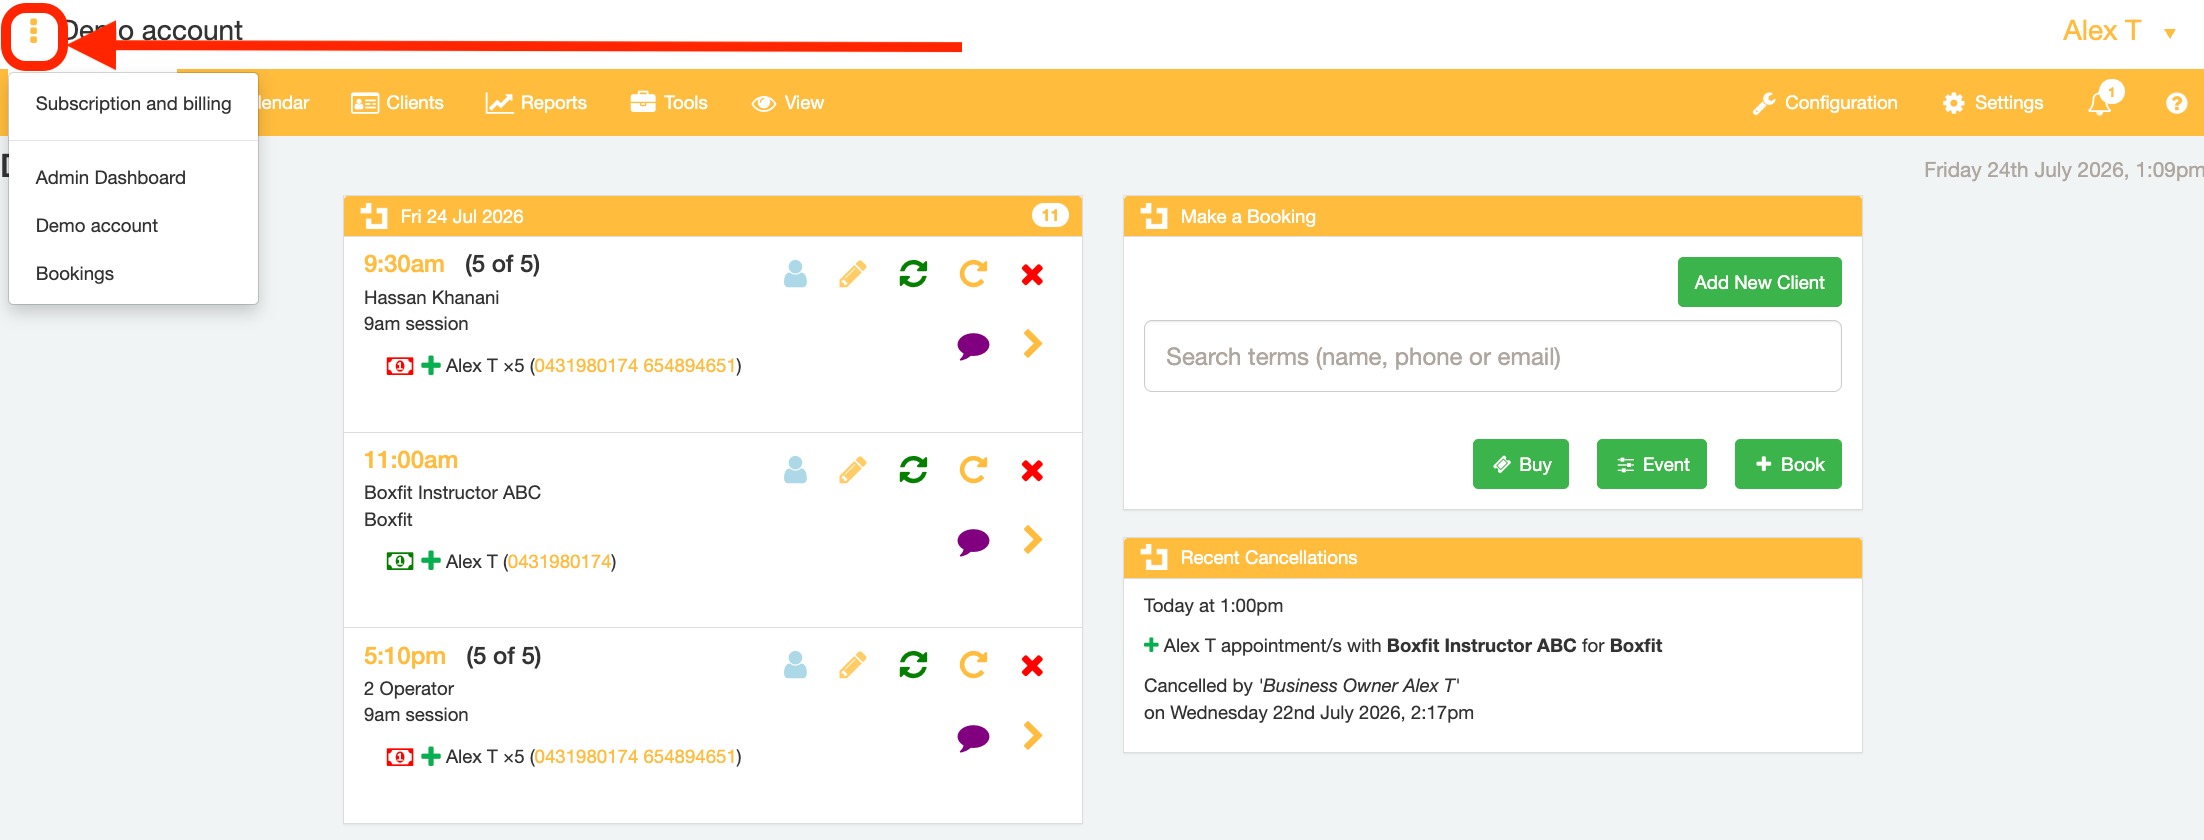 Latest in-app notifications are marked by the bell on the top right. The BookItLive admin team may provide notifications from time to time to inform you about news, updates, or upcoming scheduled outages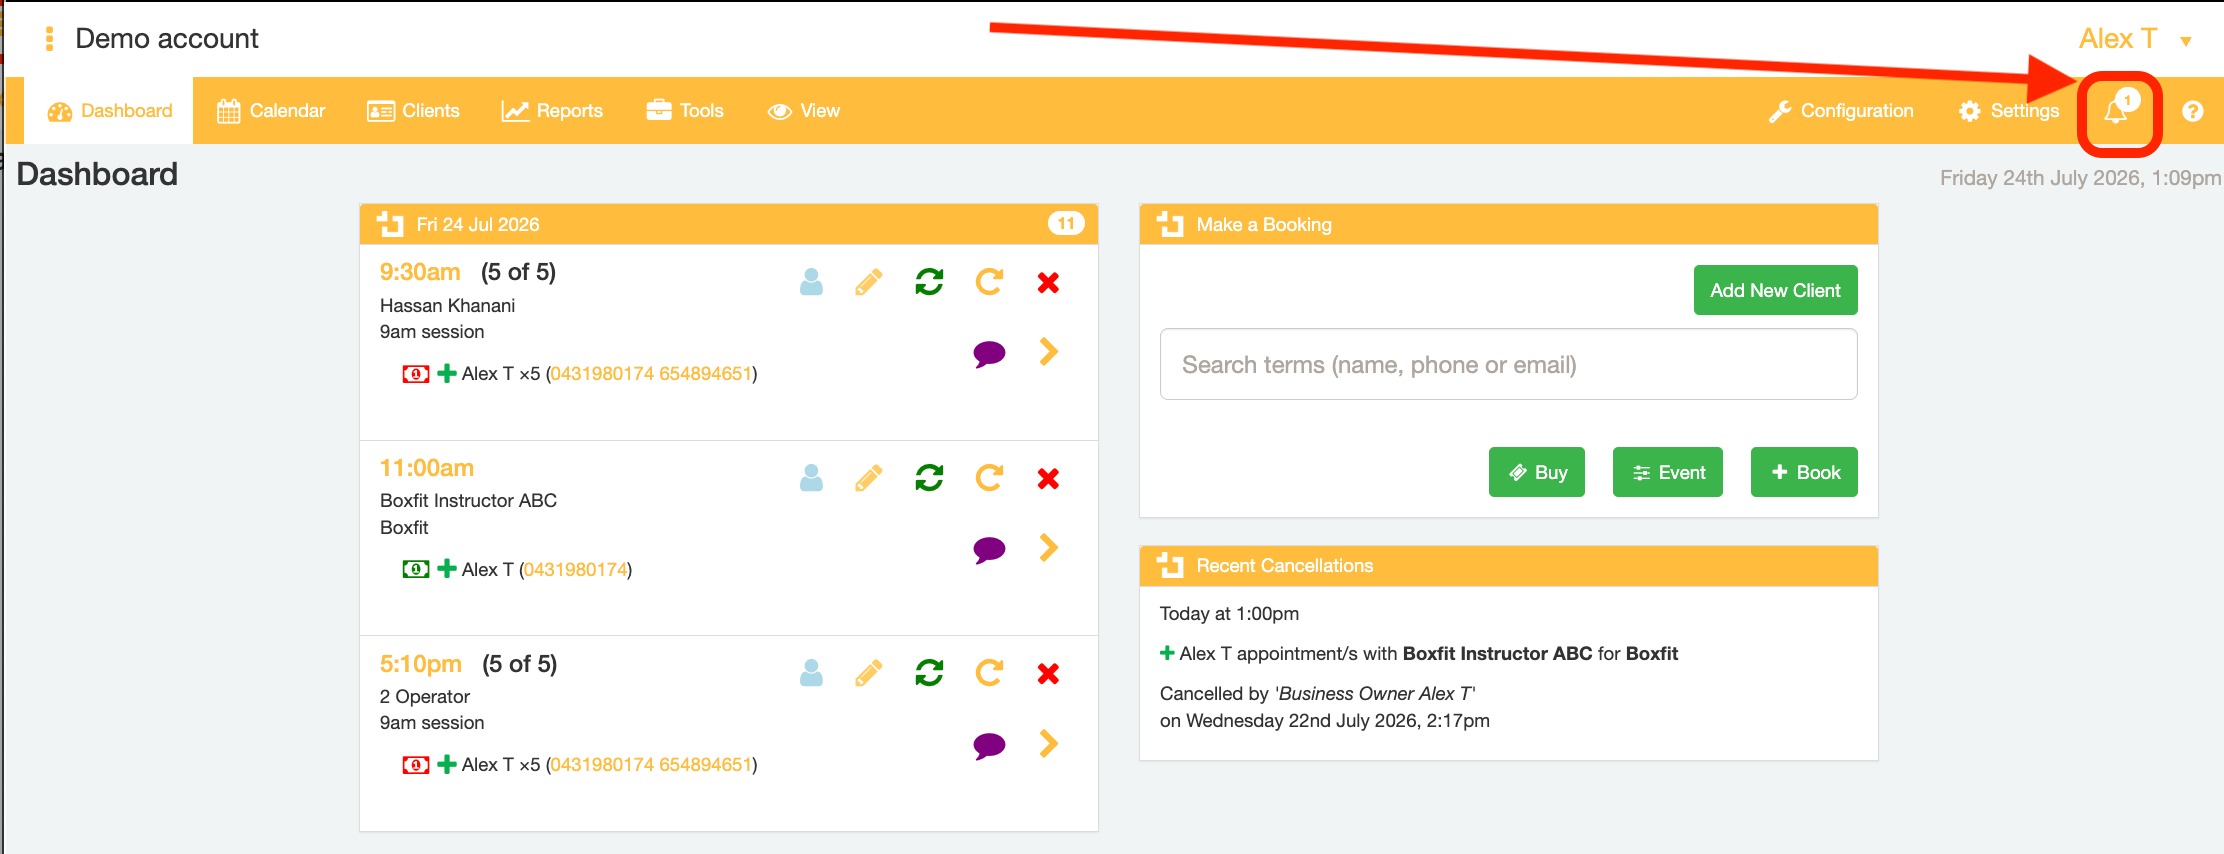
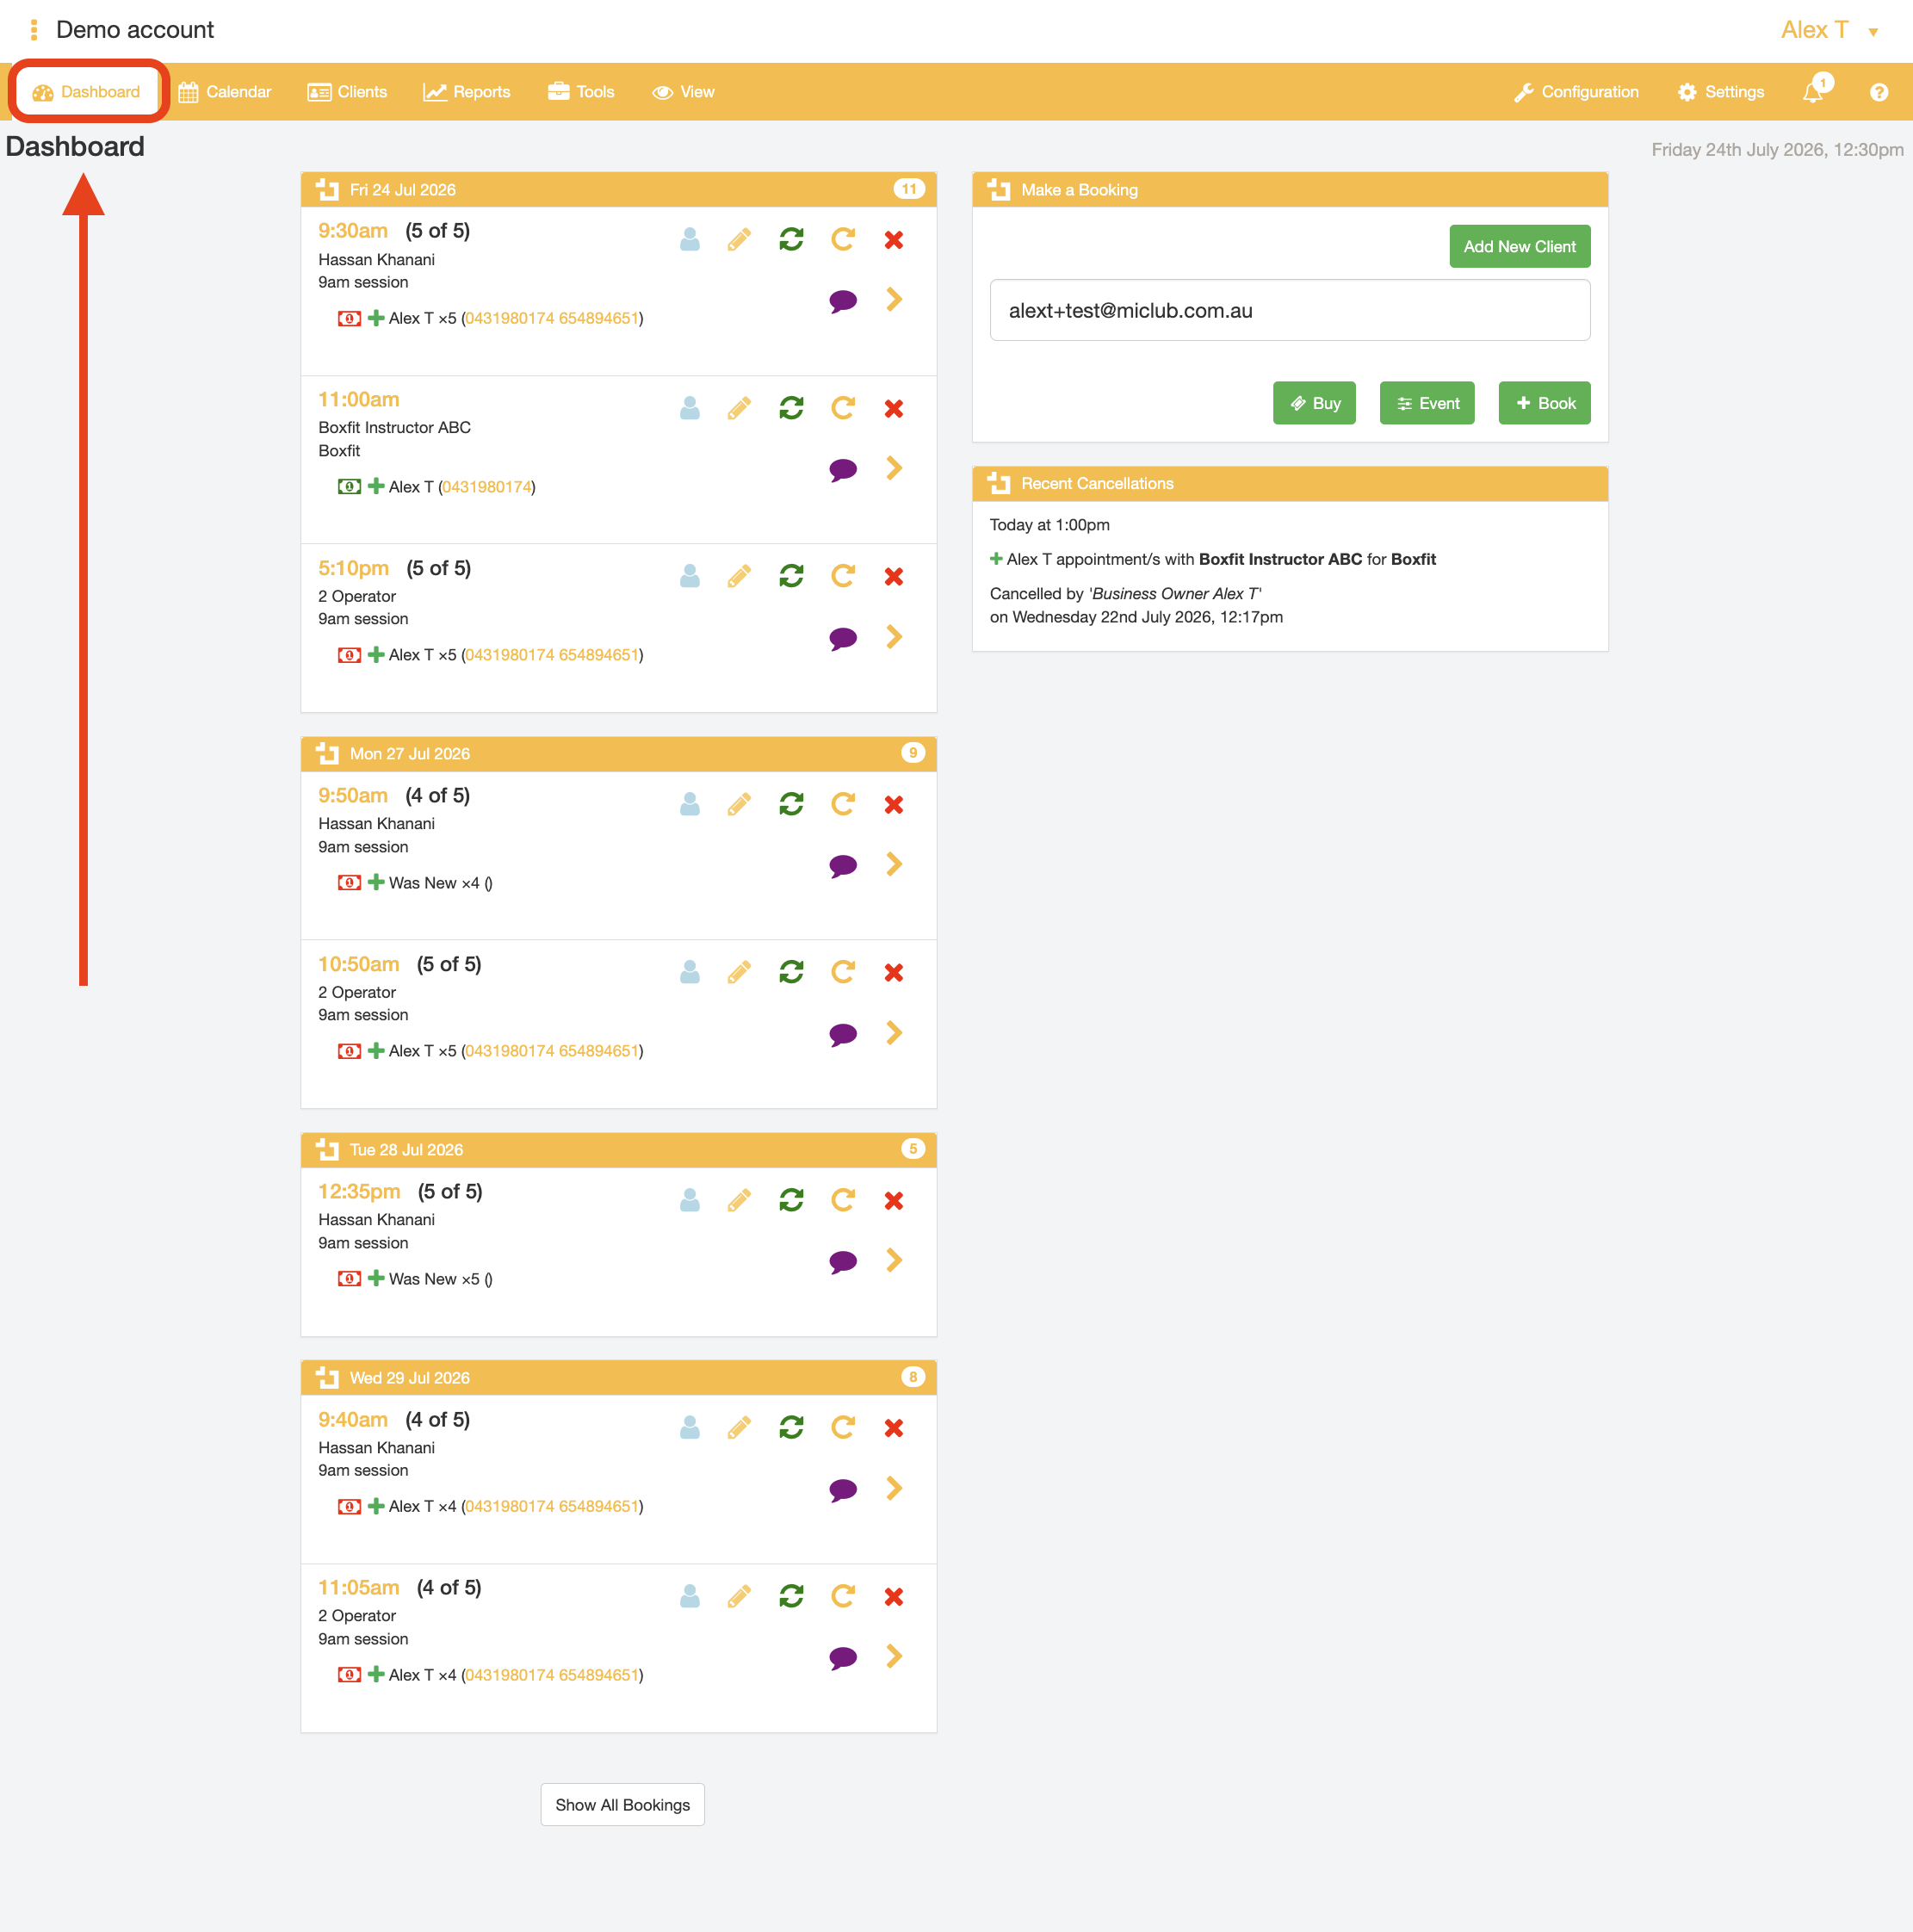
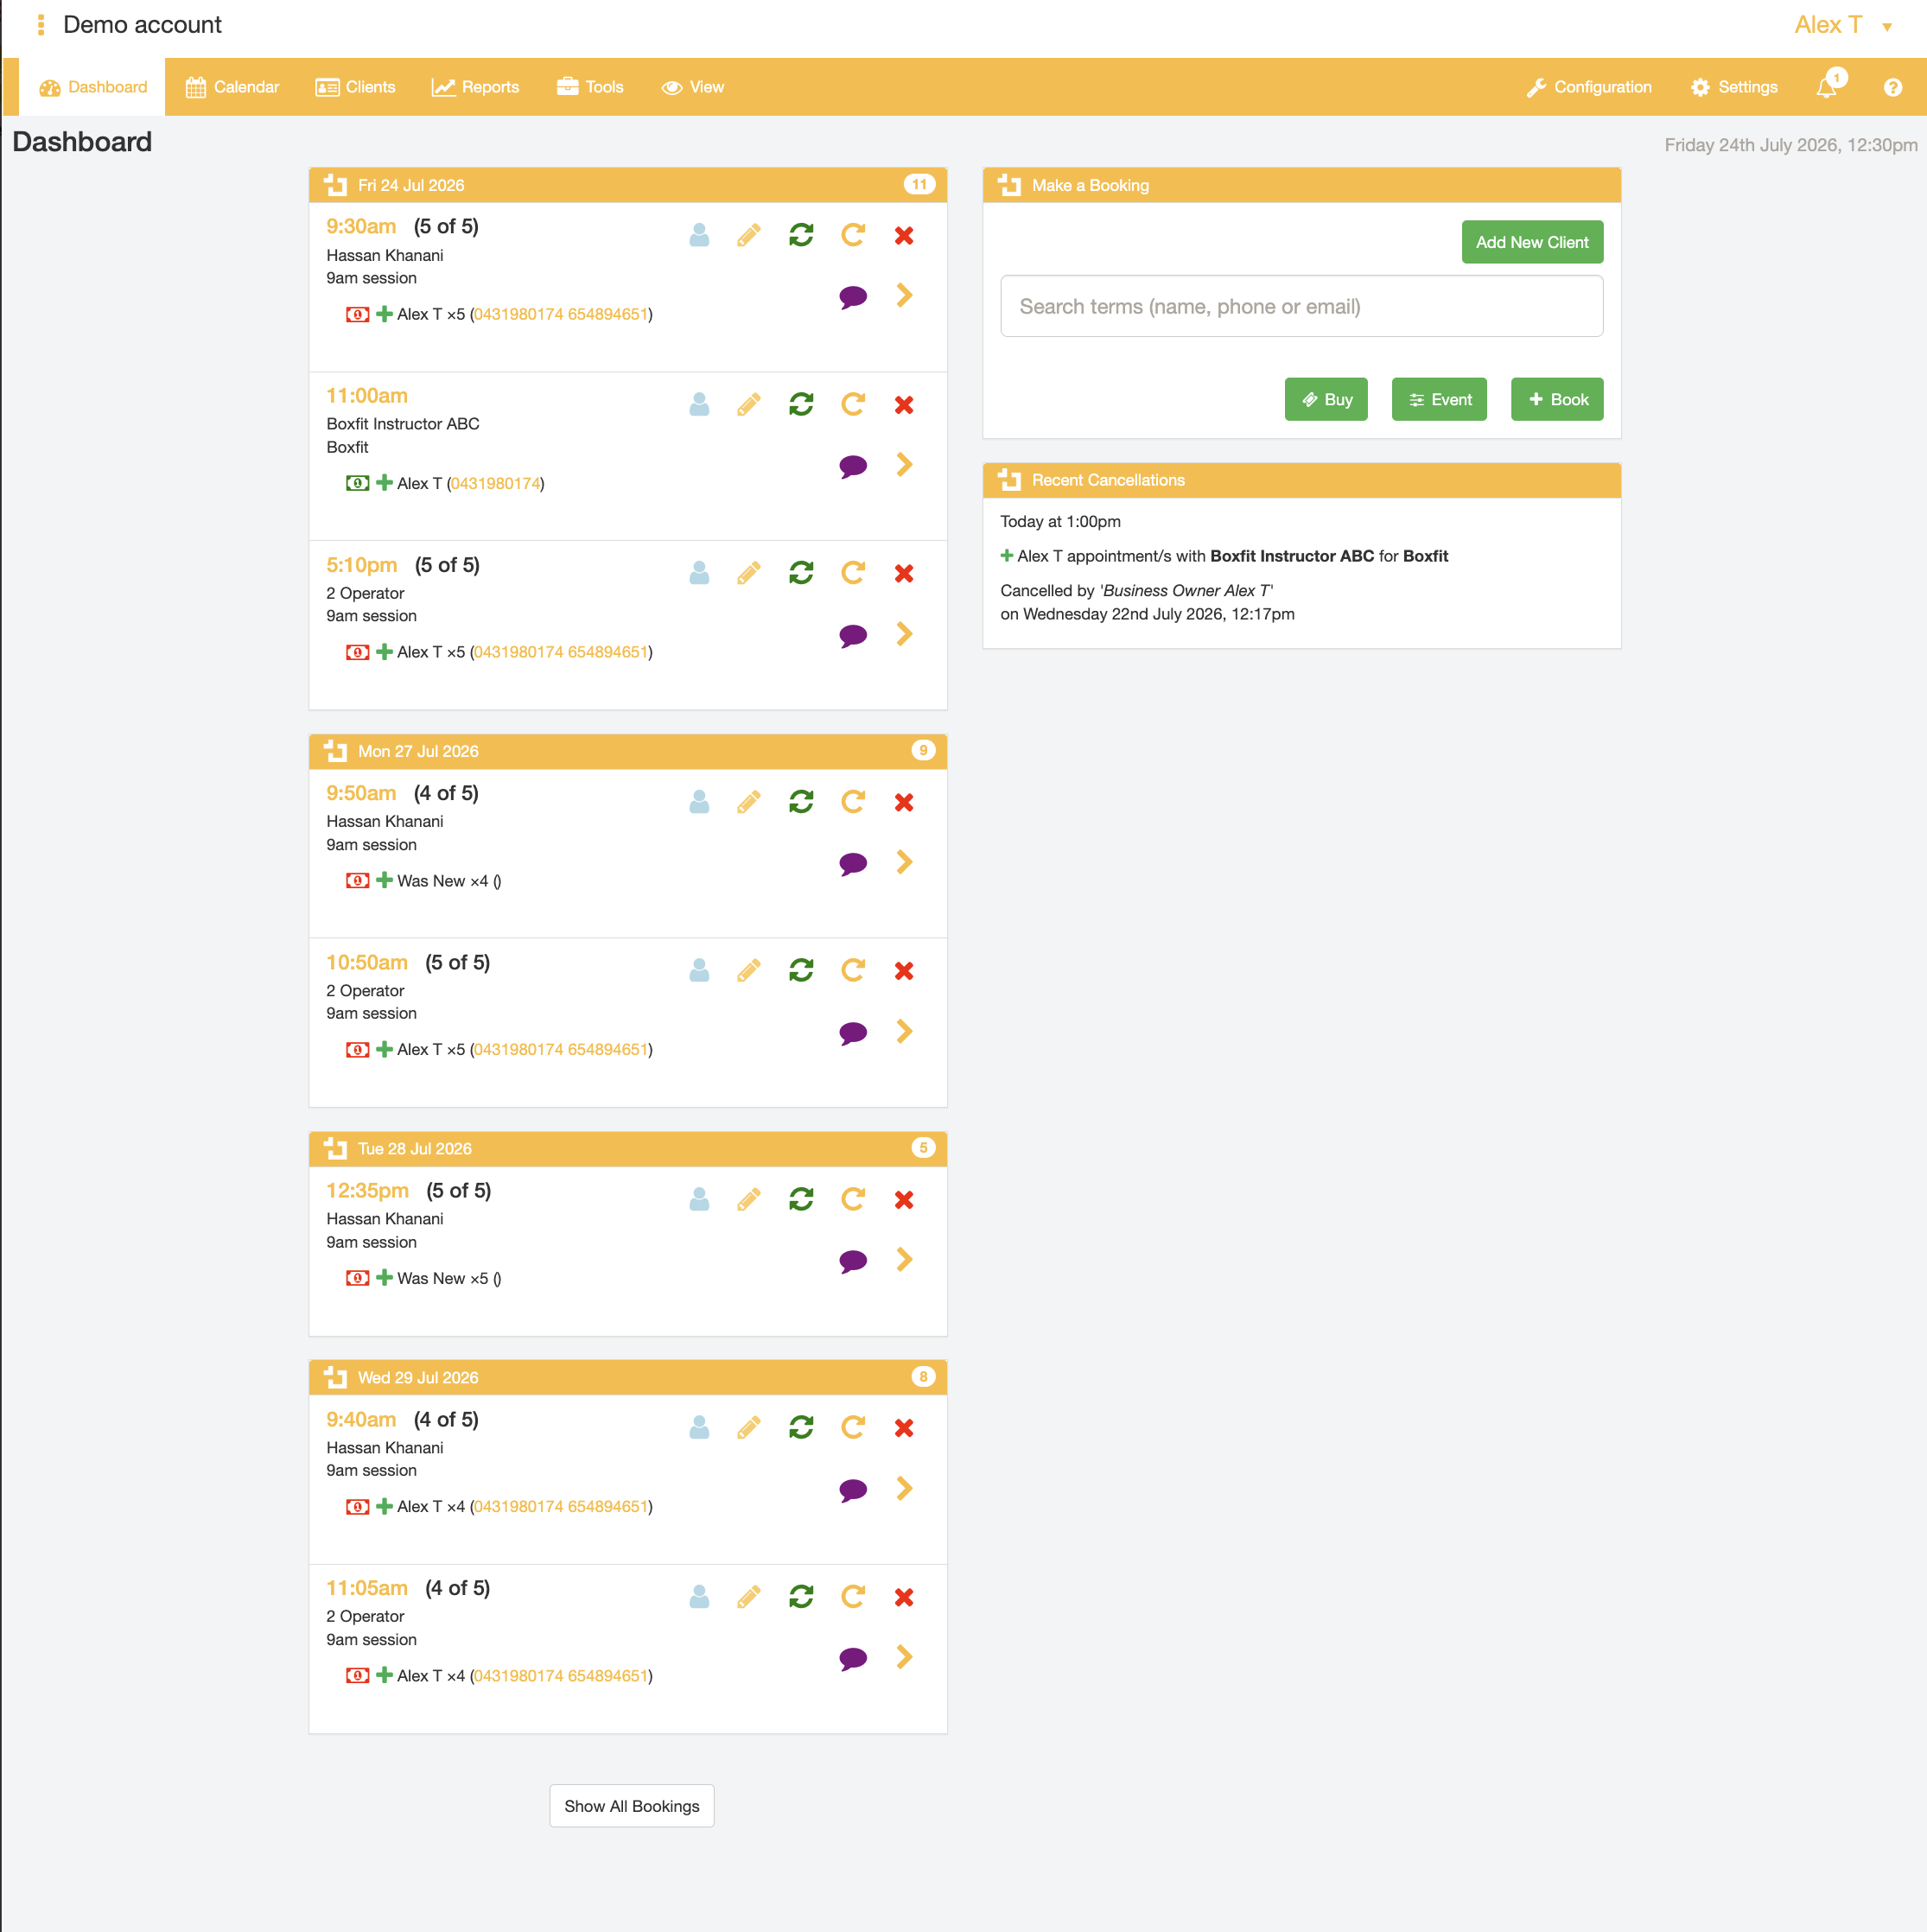
- Dashboard tab - contains information about upcoming bookings, and allows you to quickly add new customers, or make bookings and purchases on behalf of your customers. You can also modify and cancel upcoming bookings from the Dashboard if desired. Client information, booking notes, and booking modification/cancellation can be accessed by selecting the various symbols shown against each booking record card.
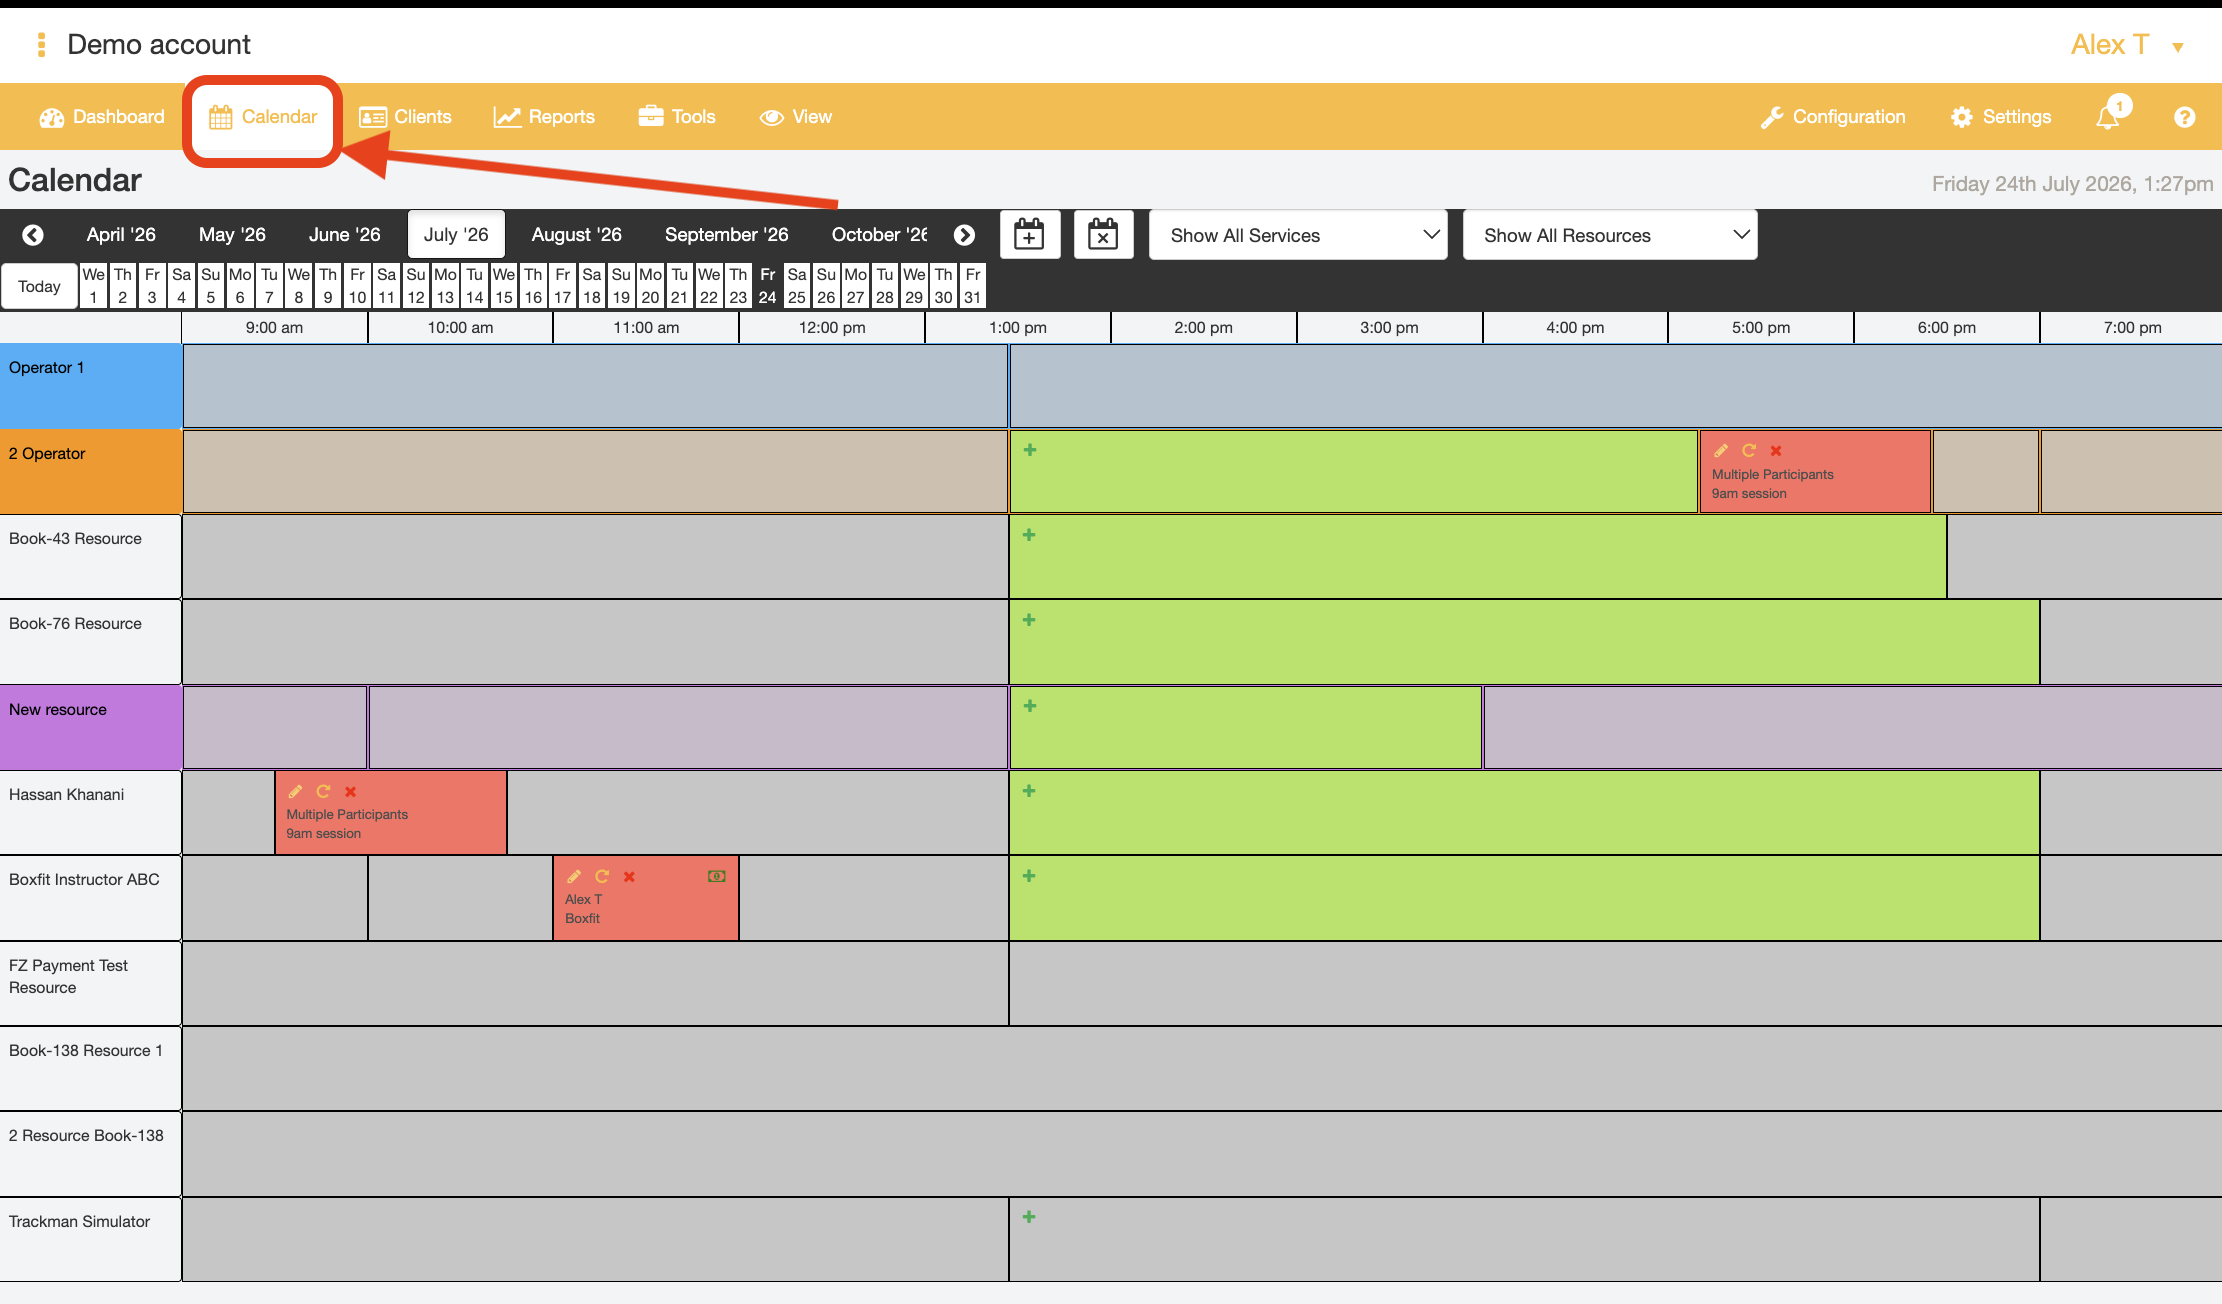
- Calendar tab - a visual representation of each Resource's schedule/diary for the selected date. Bookings can be viewed, created, modified, or cancelled from here. Adding (or blocking) additional (ir)regular (un)availability for Resources can also be done from here.
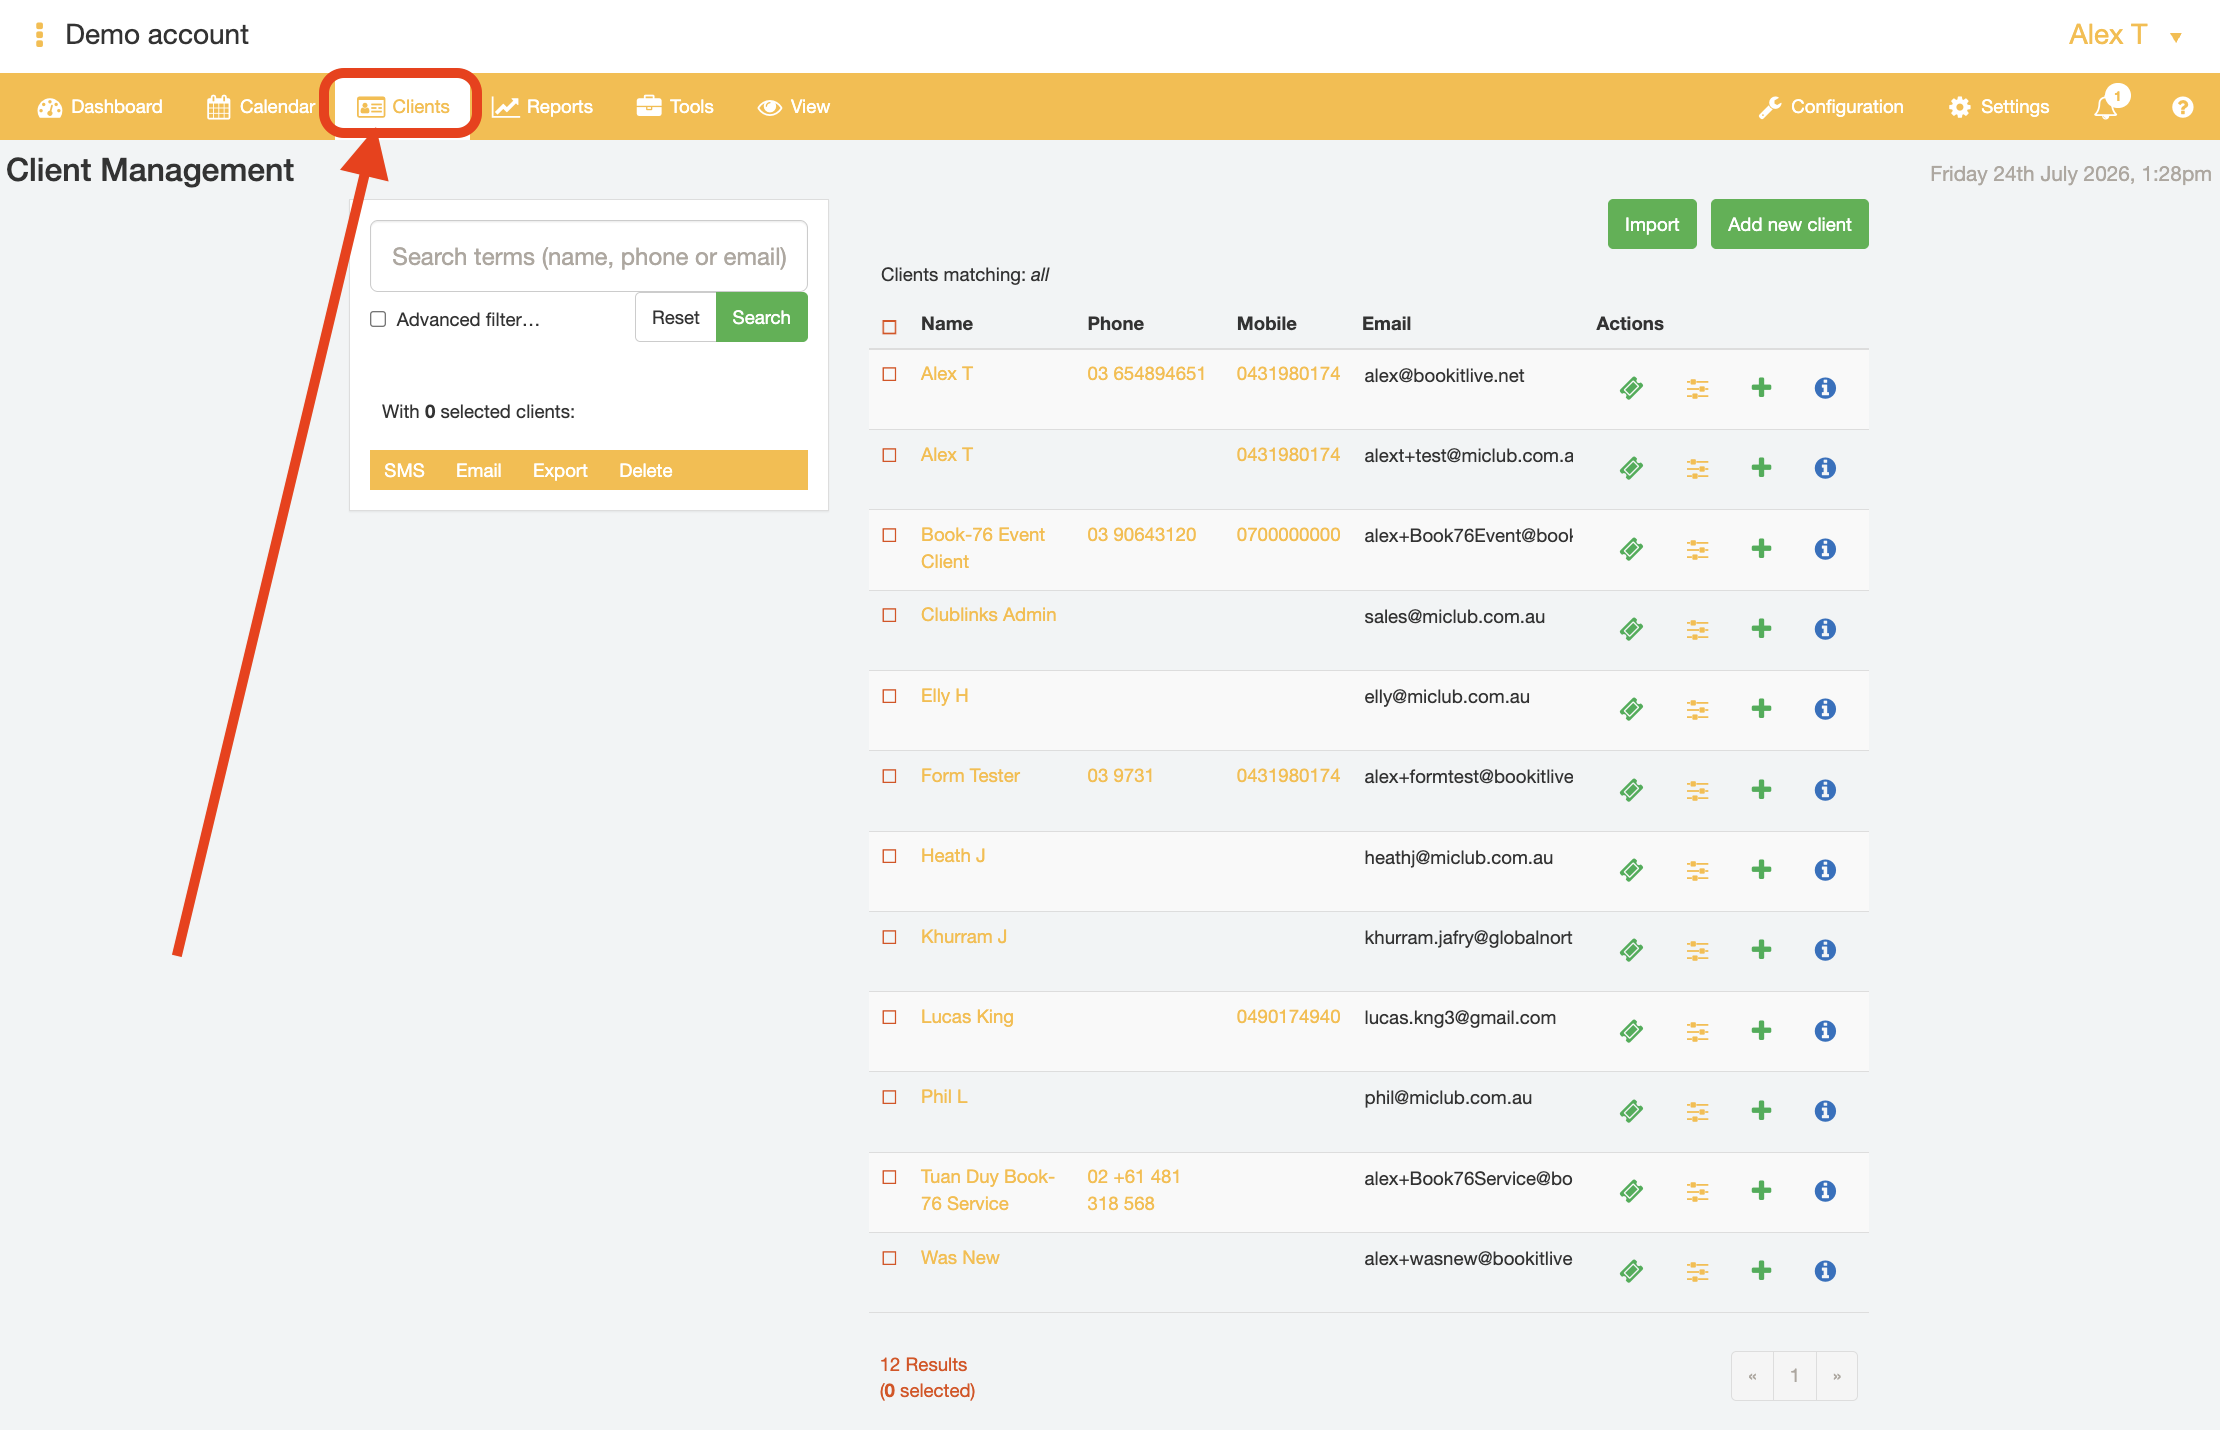
- Clients tab - Search, add, edit, and delete client information. You can also contact clients via email or SMS messaging through this tab.
- Reports tab - Contains different kinds of statistics you may wish to analyse and review from your clients, for example bookings made and voucher codes used.
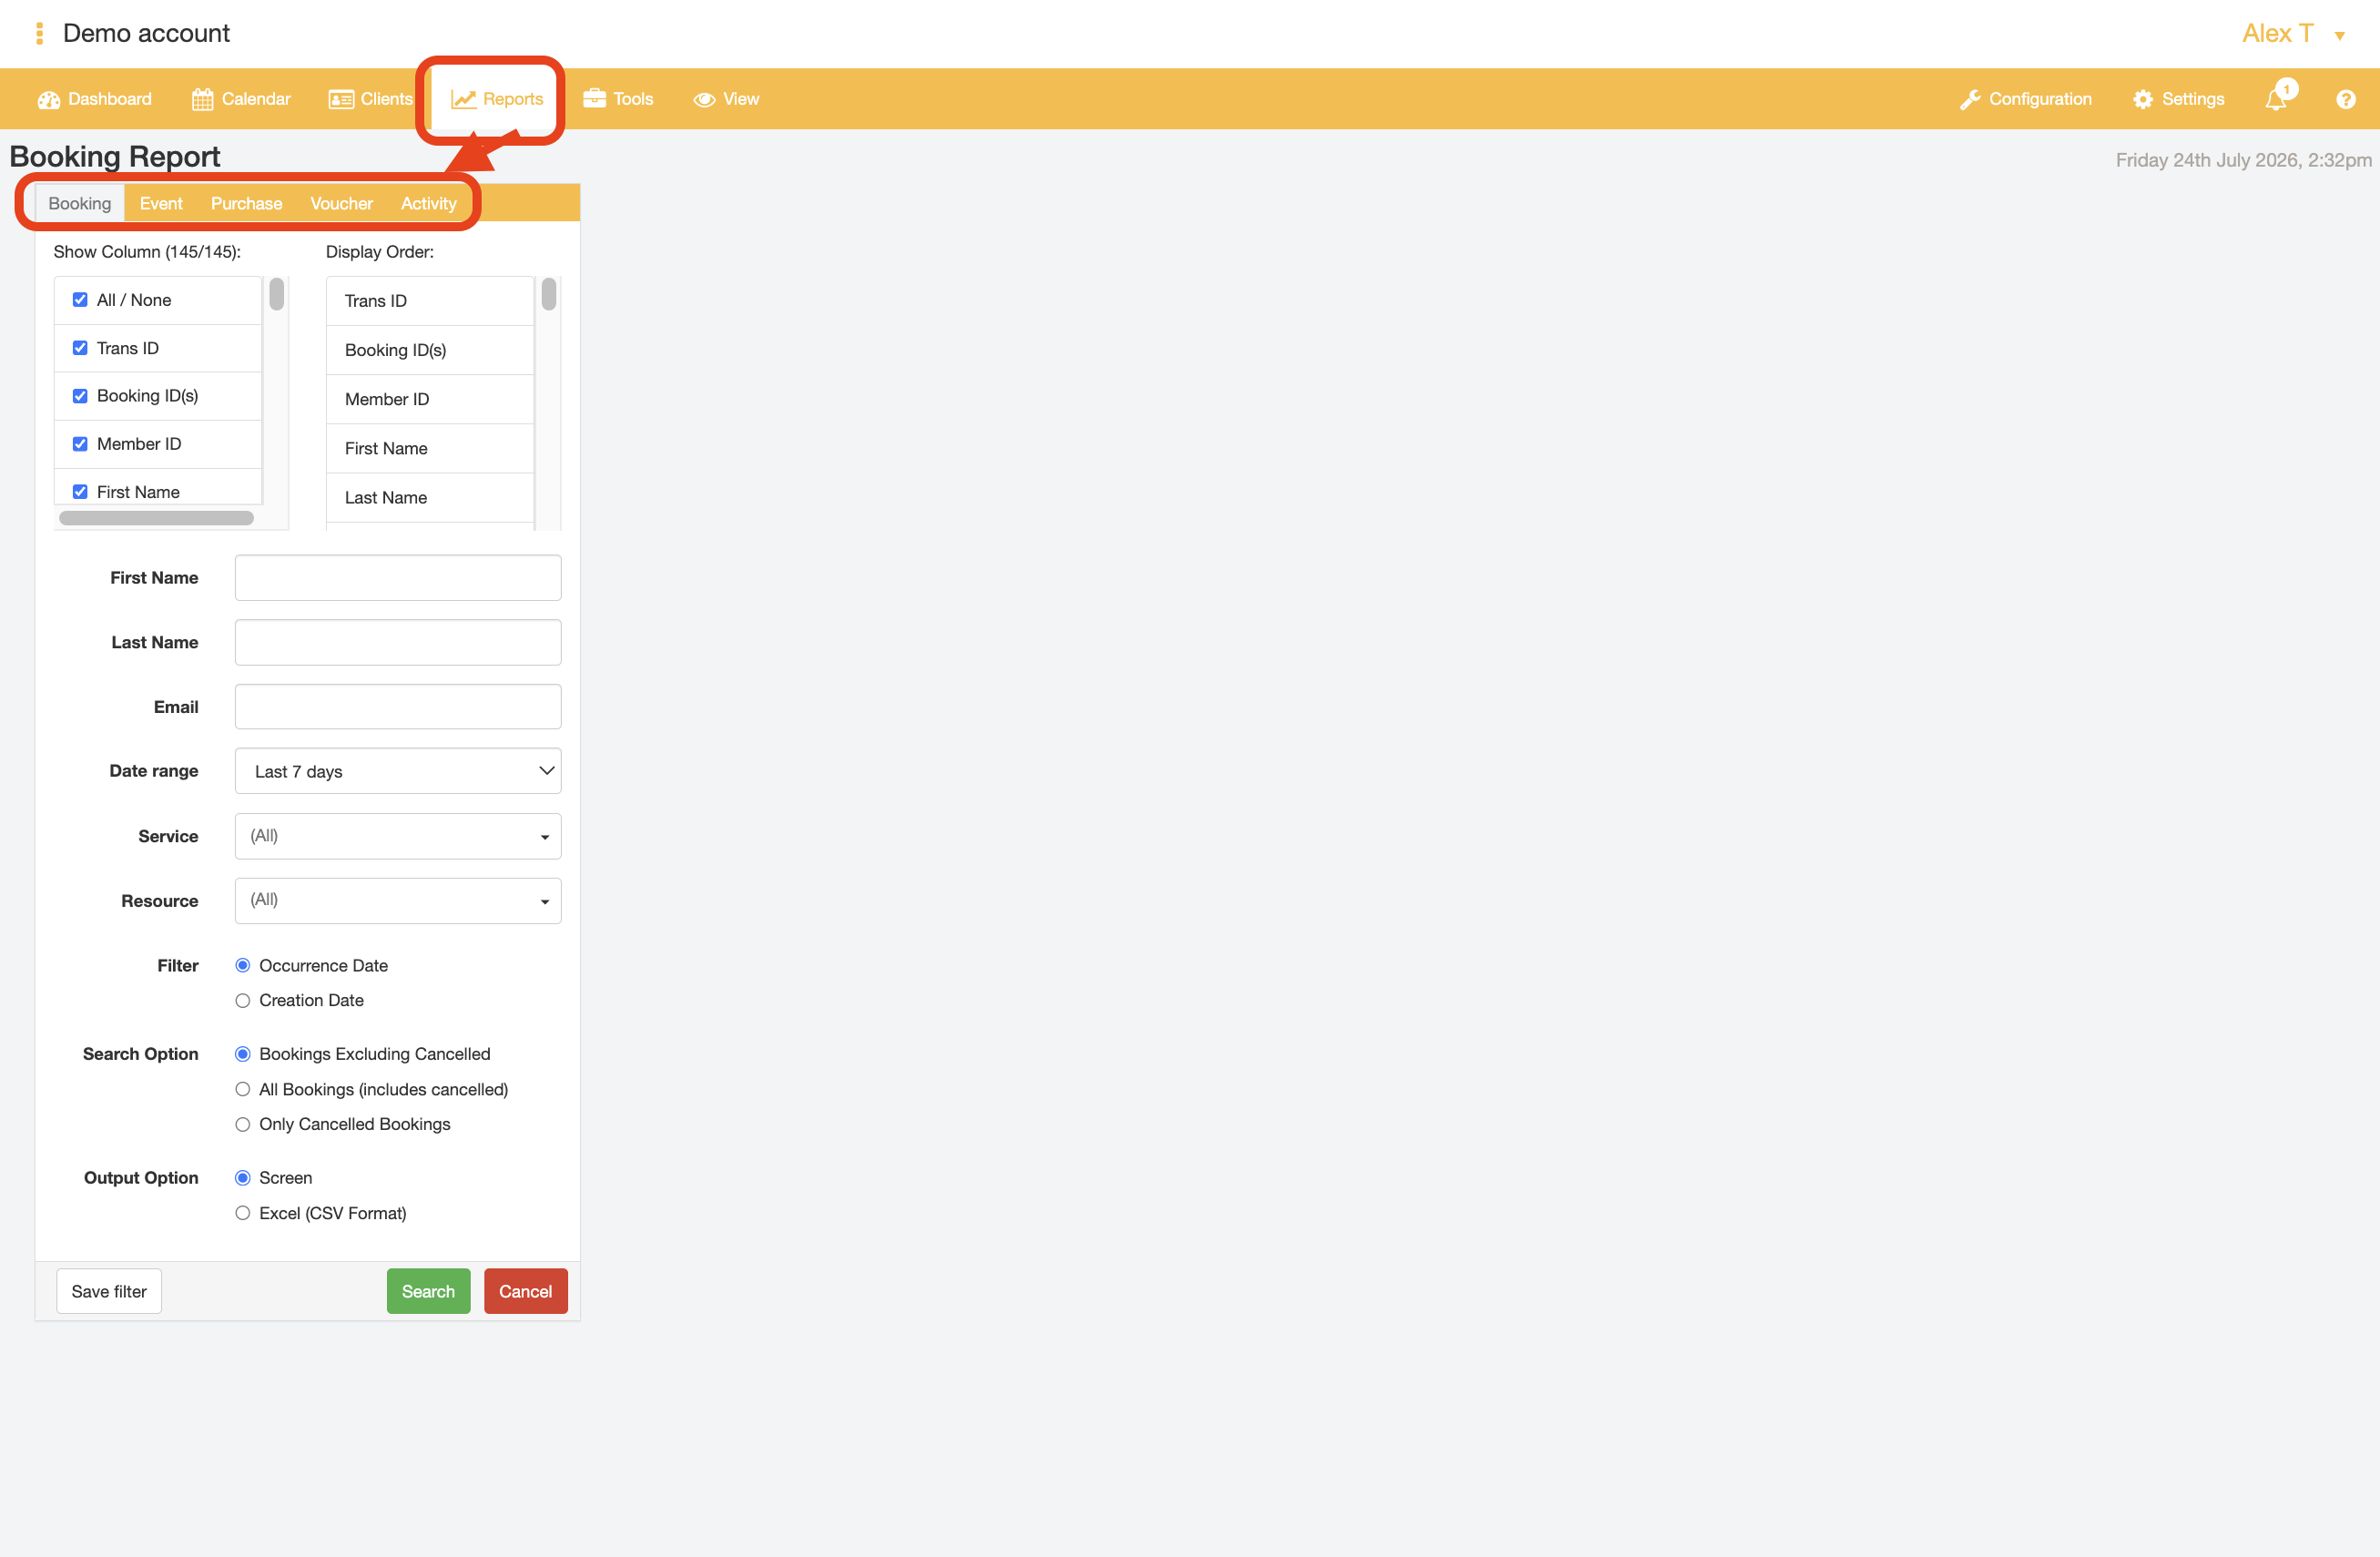
- Tools tab - Allows you to set schedules or block regular staff availabilities, view information regarding Service waitlists, and audit business account user activity. It also contains various general options for your account such as adding messages on behalf of staff members to the bookings page for specific Services, and export Offline Backups of future bookings.
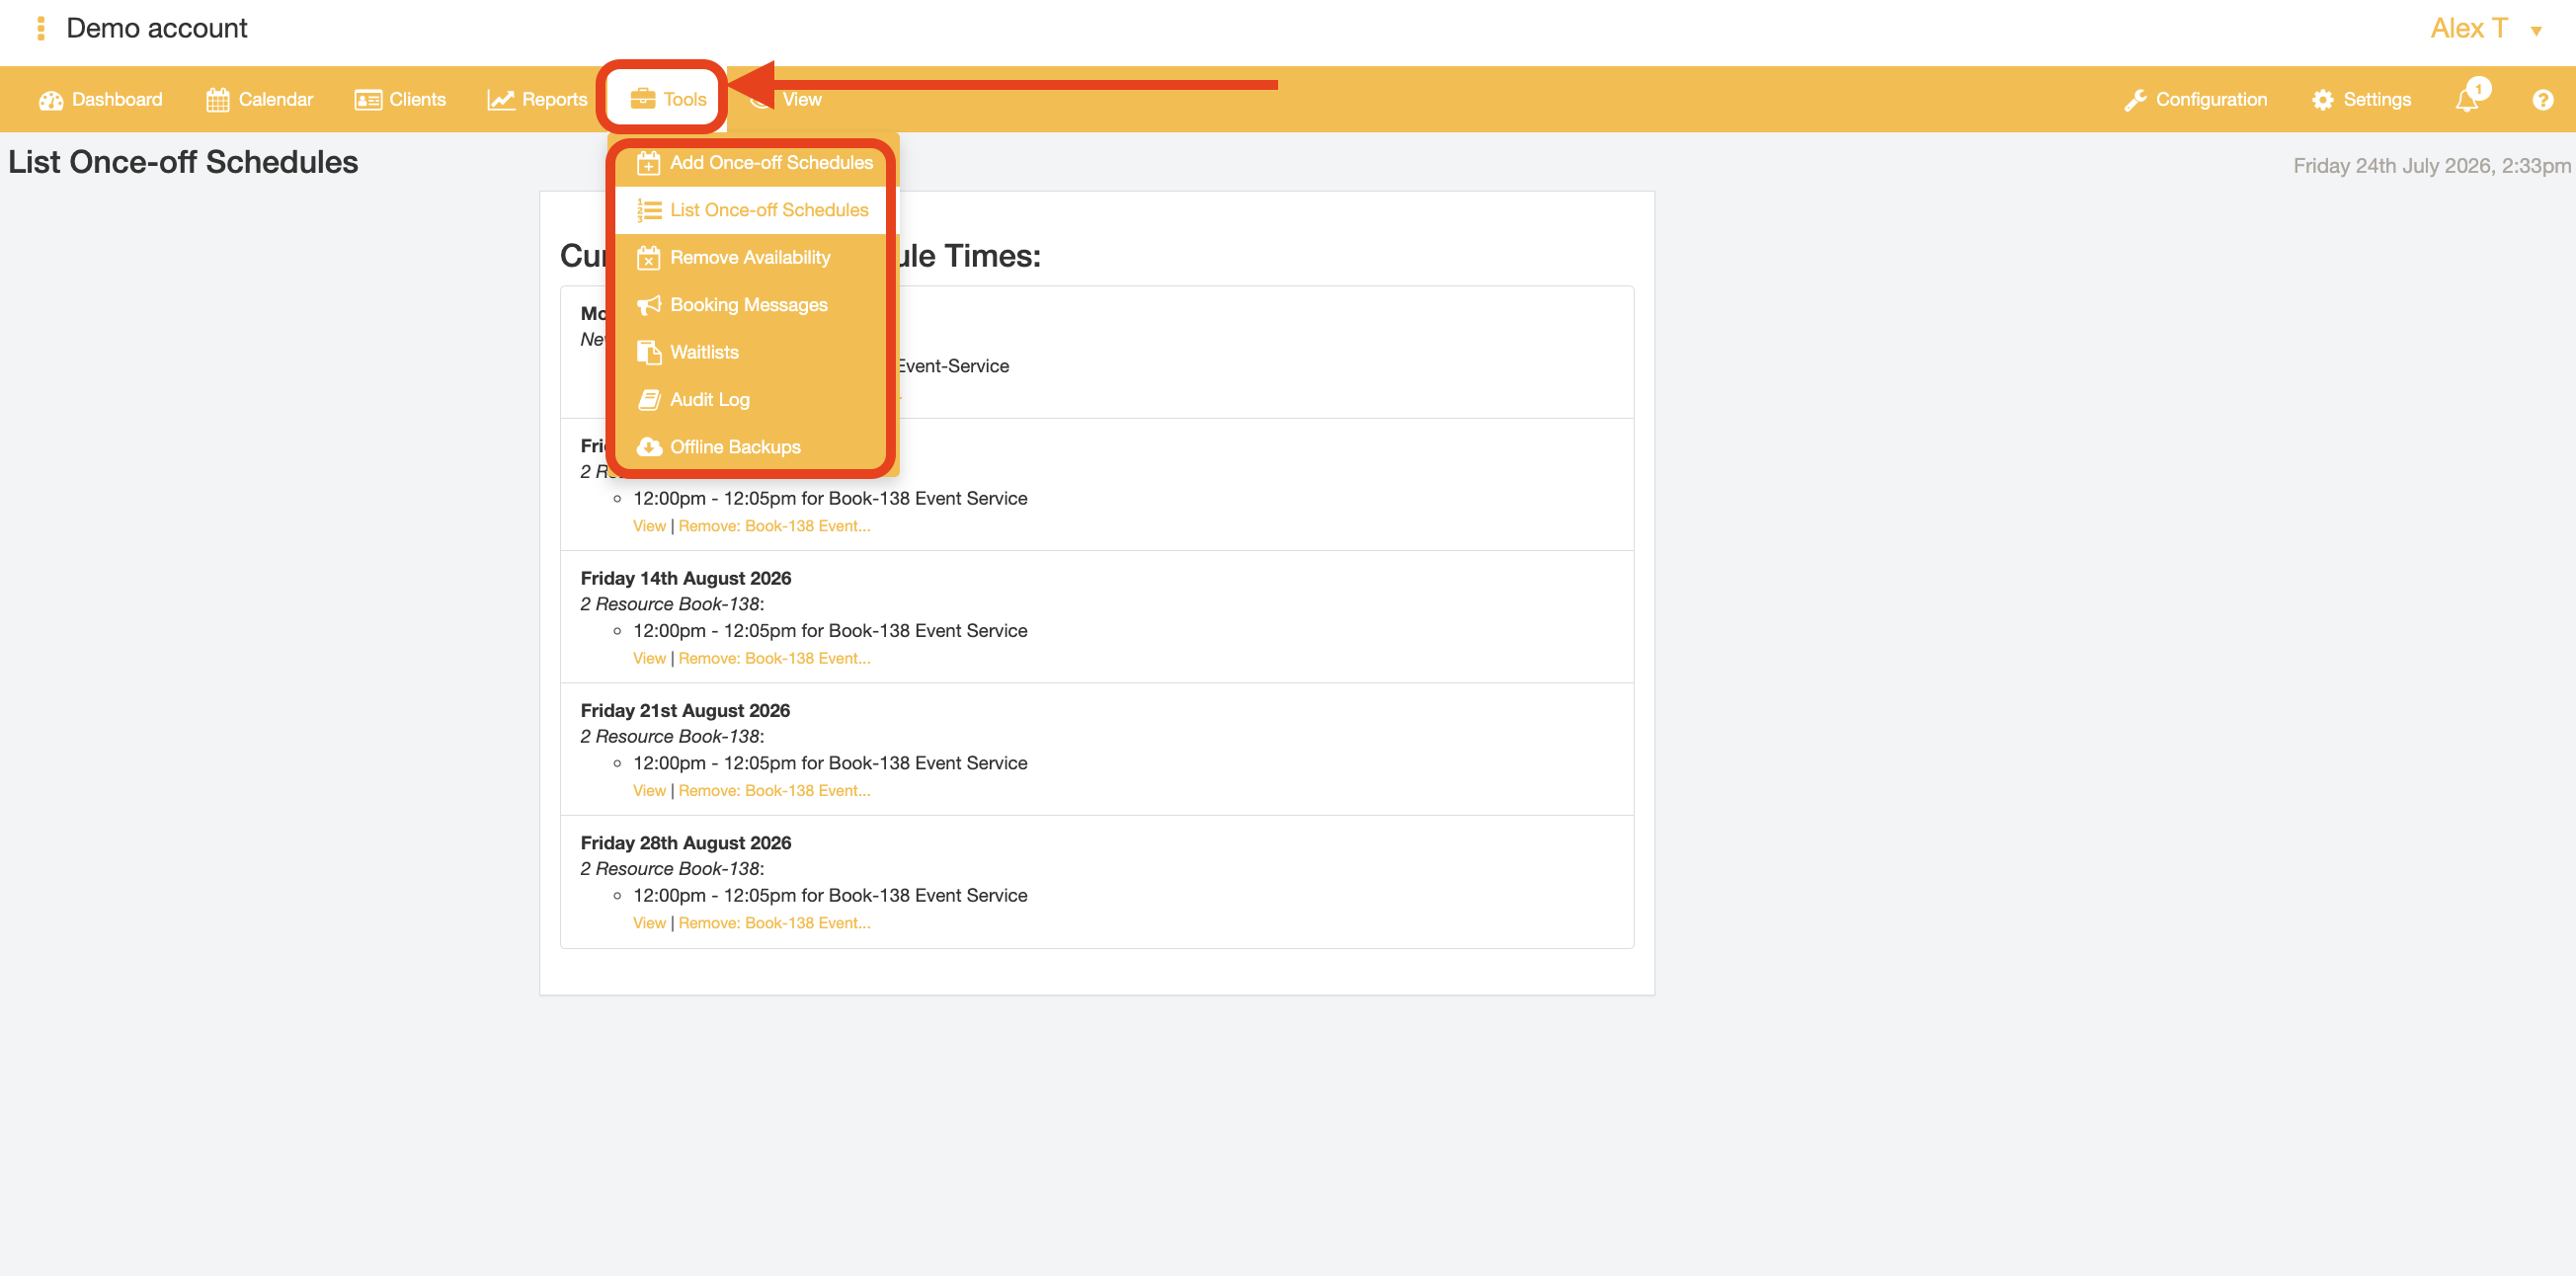
- View tab - previews what visiting customers will see when they access your business' Public Booking and Purchasing pages
- The Mini Website displays the entire combined catalogue of publicly-listed Services, Events, and Products that your business provides to public visitors (new and return customers).
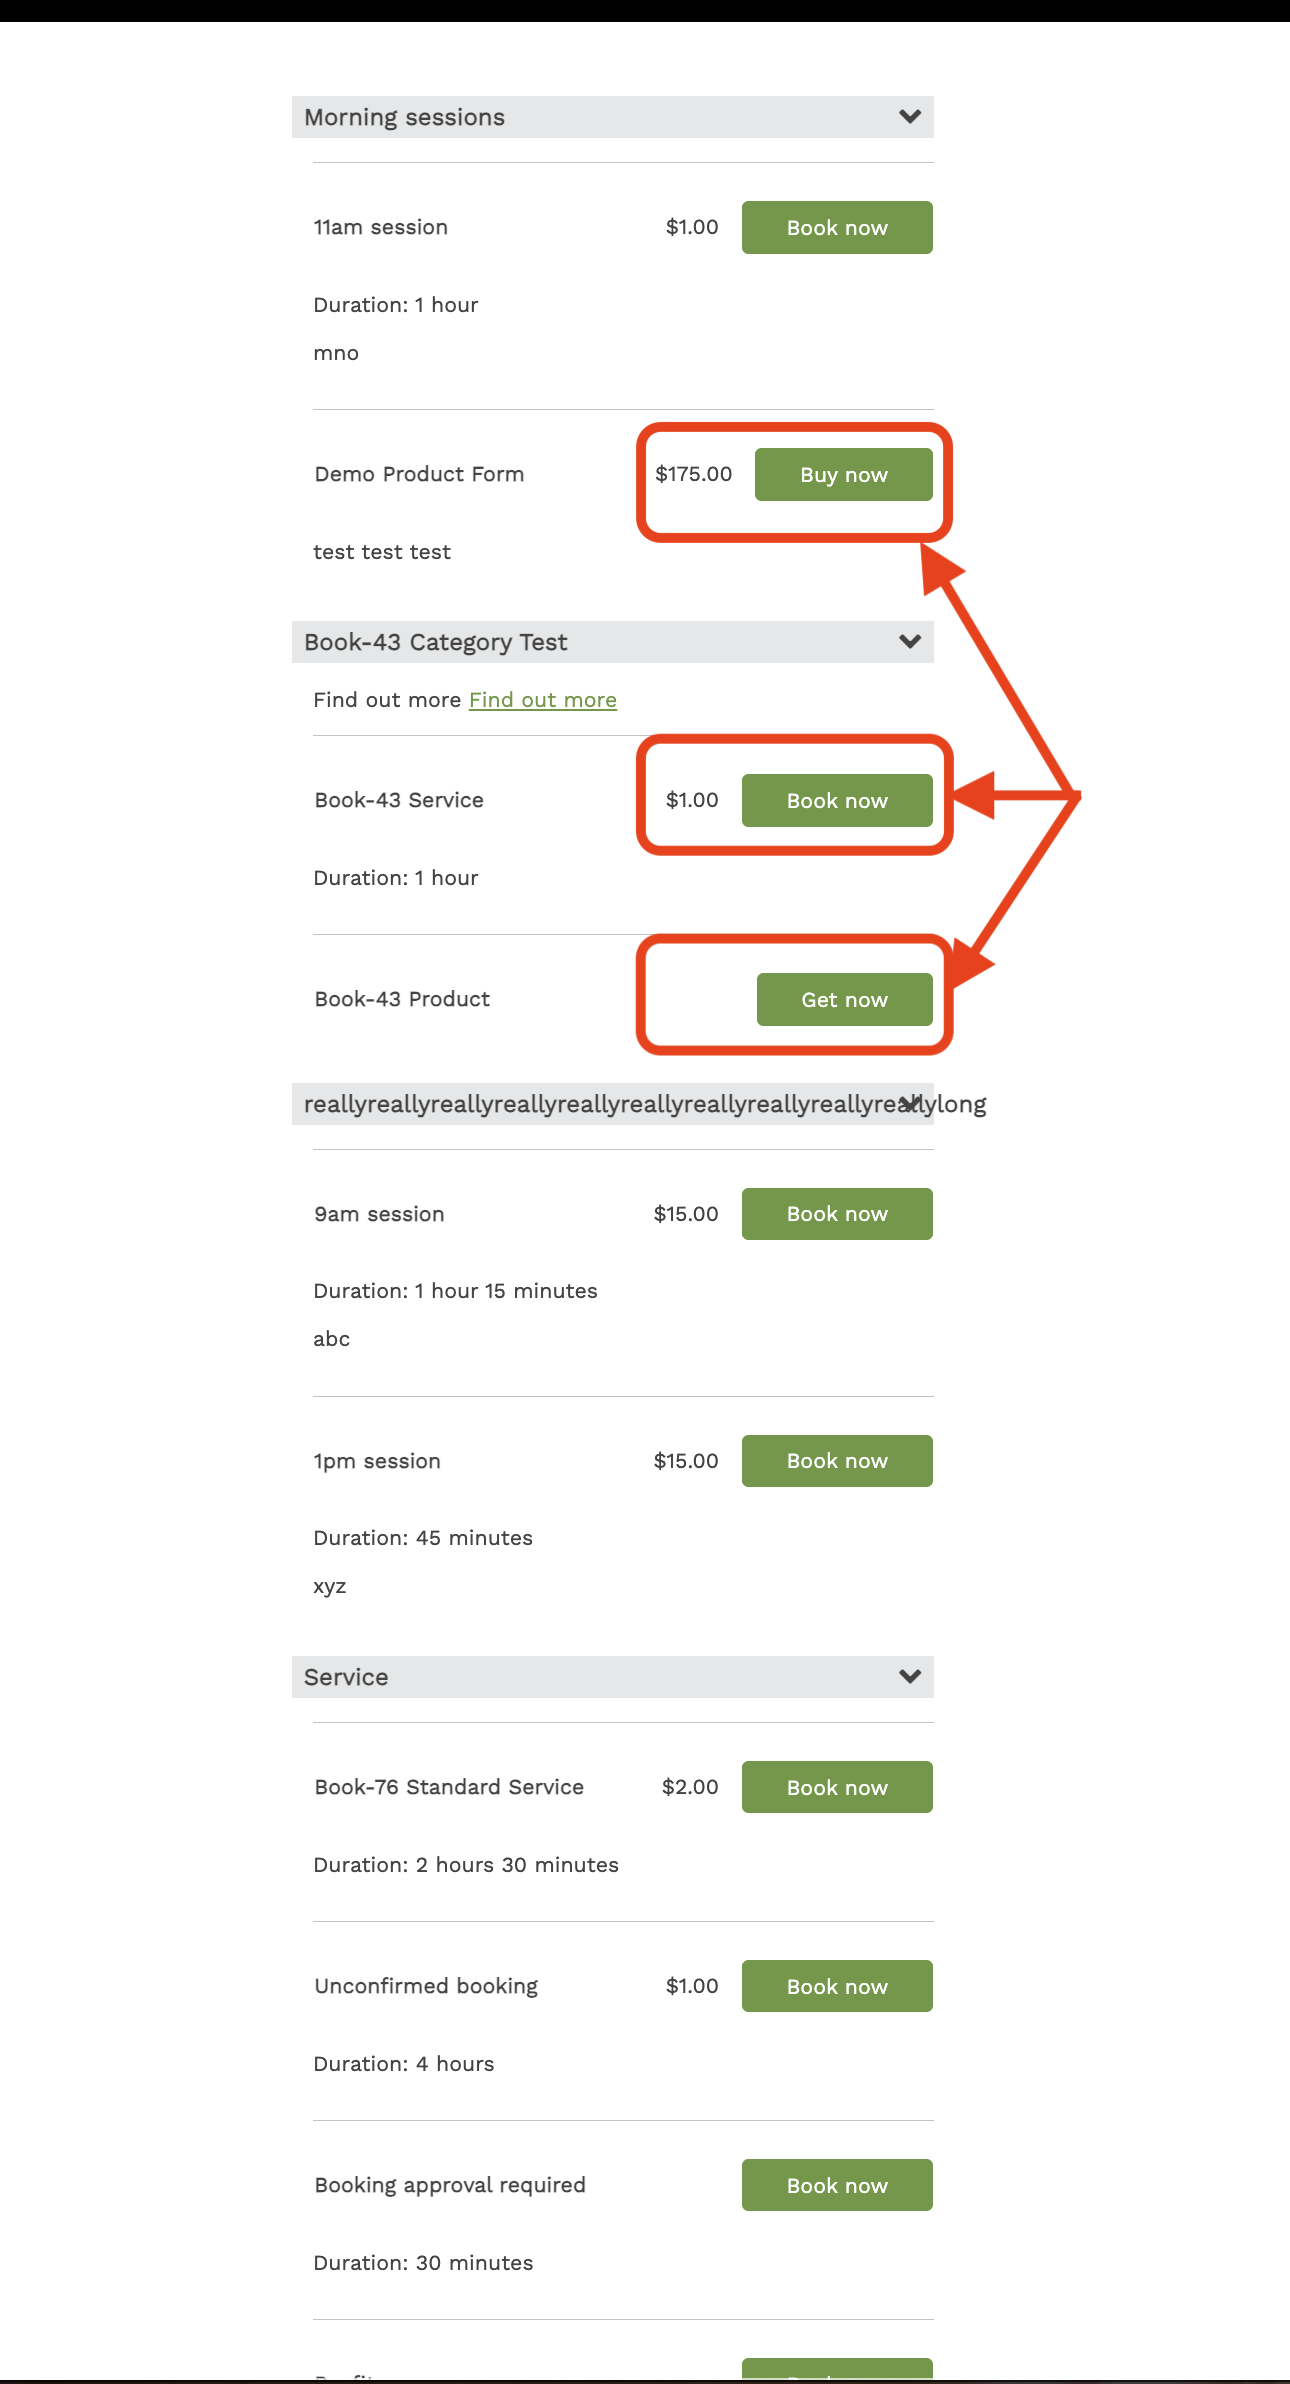
- The Public Booking page allows visitors to peruse your full list of publicly-listed Services and make Service bookings
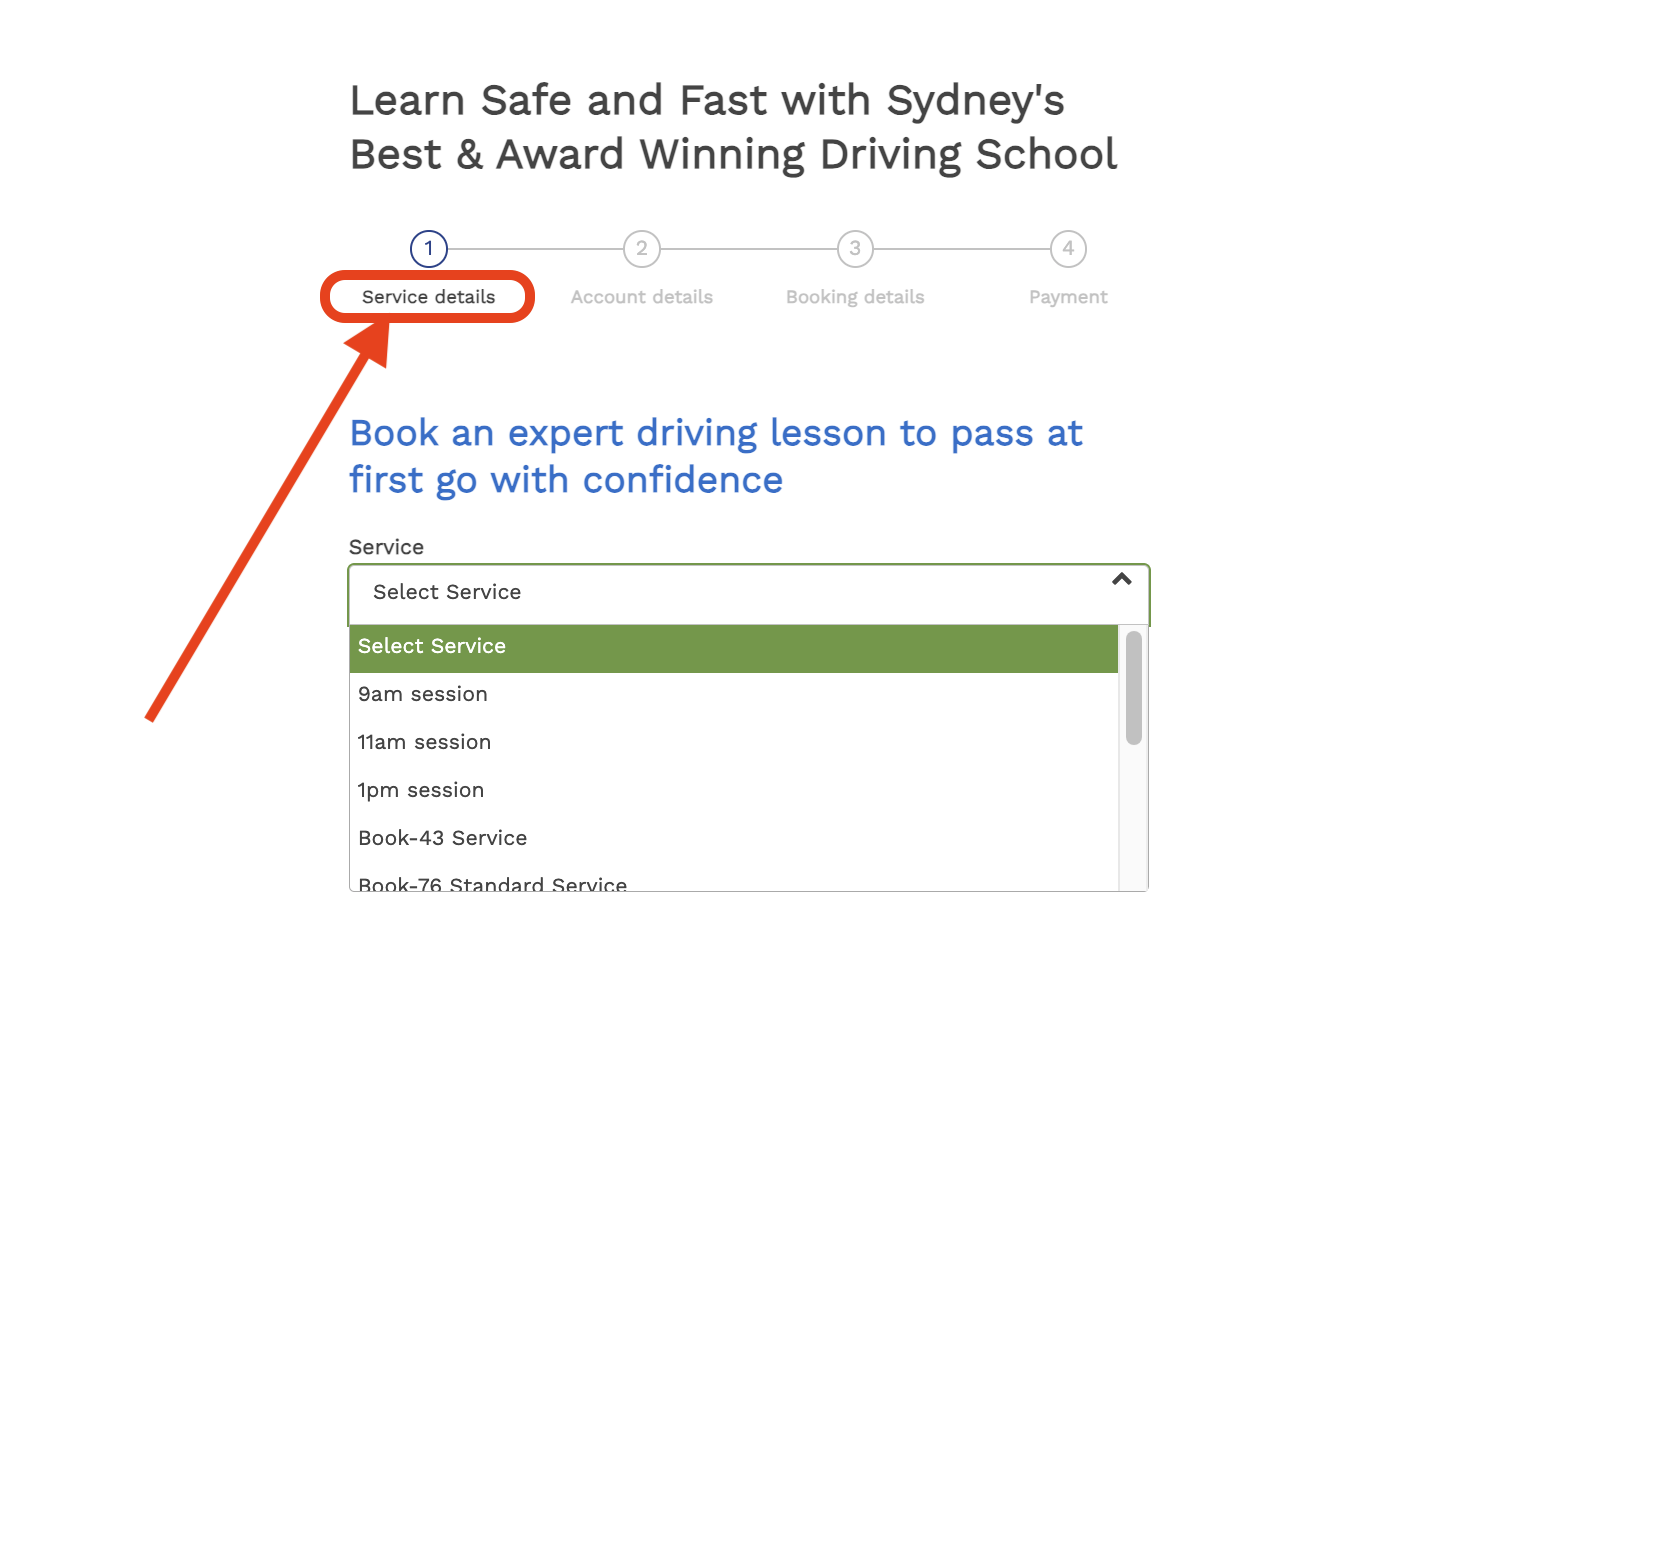
- The Products page allows visitors to explore your full list of publicly-listed products and make purchases for Vouchers and Membership Subscriptions.
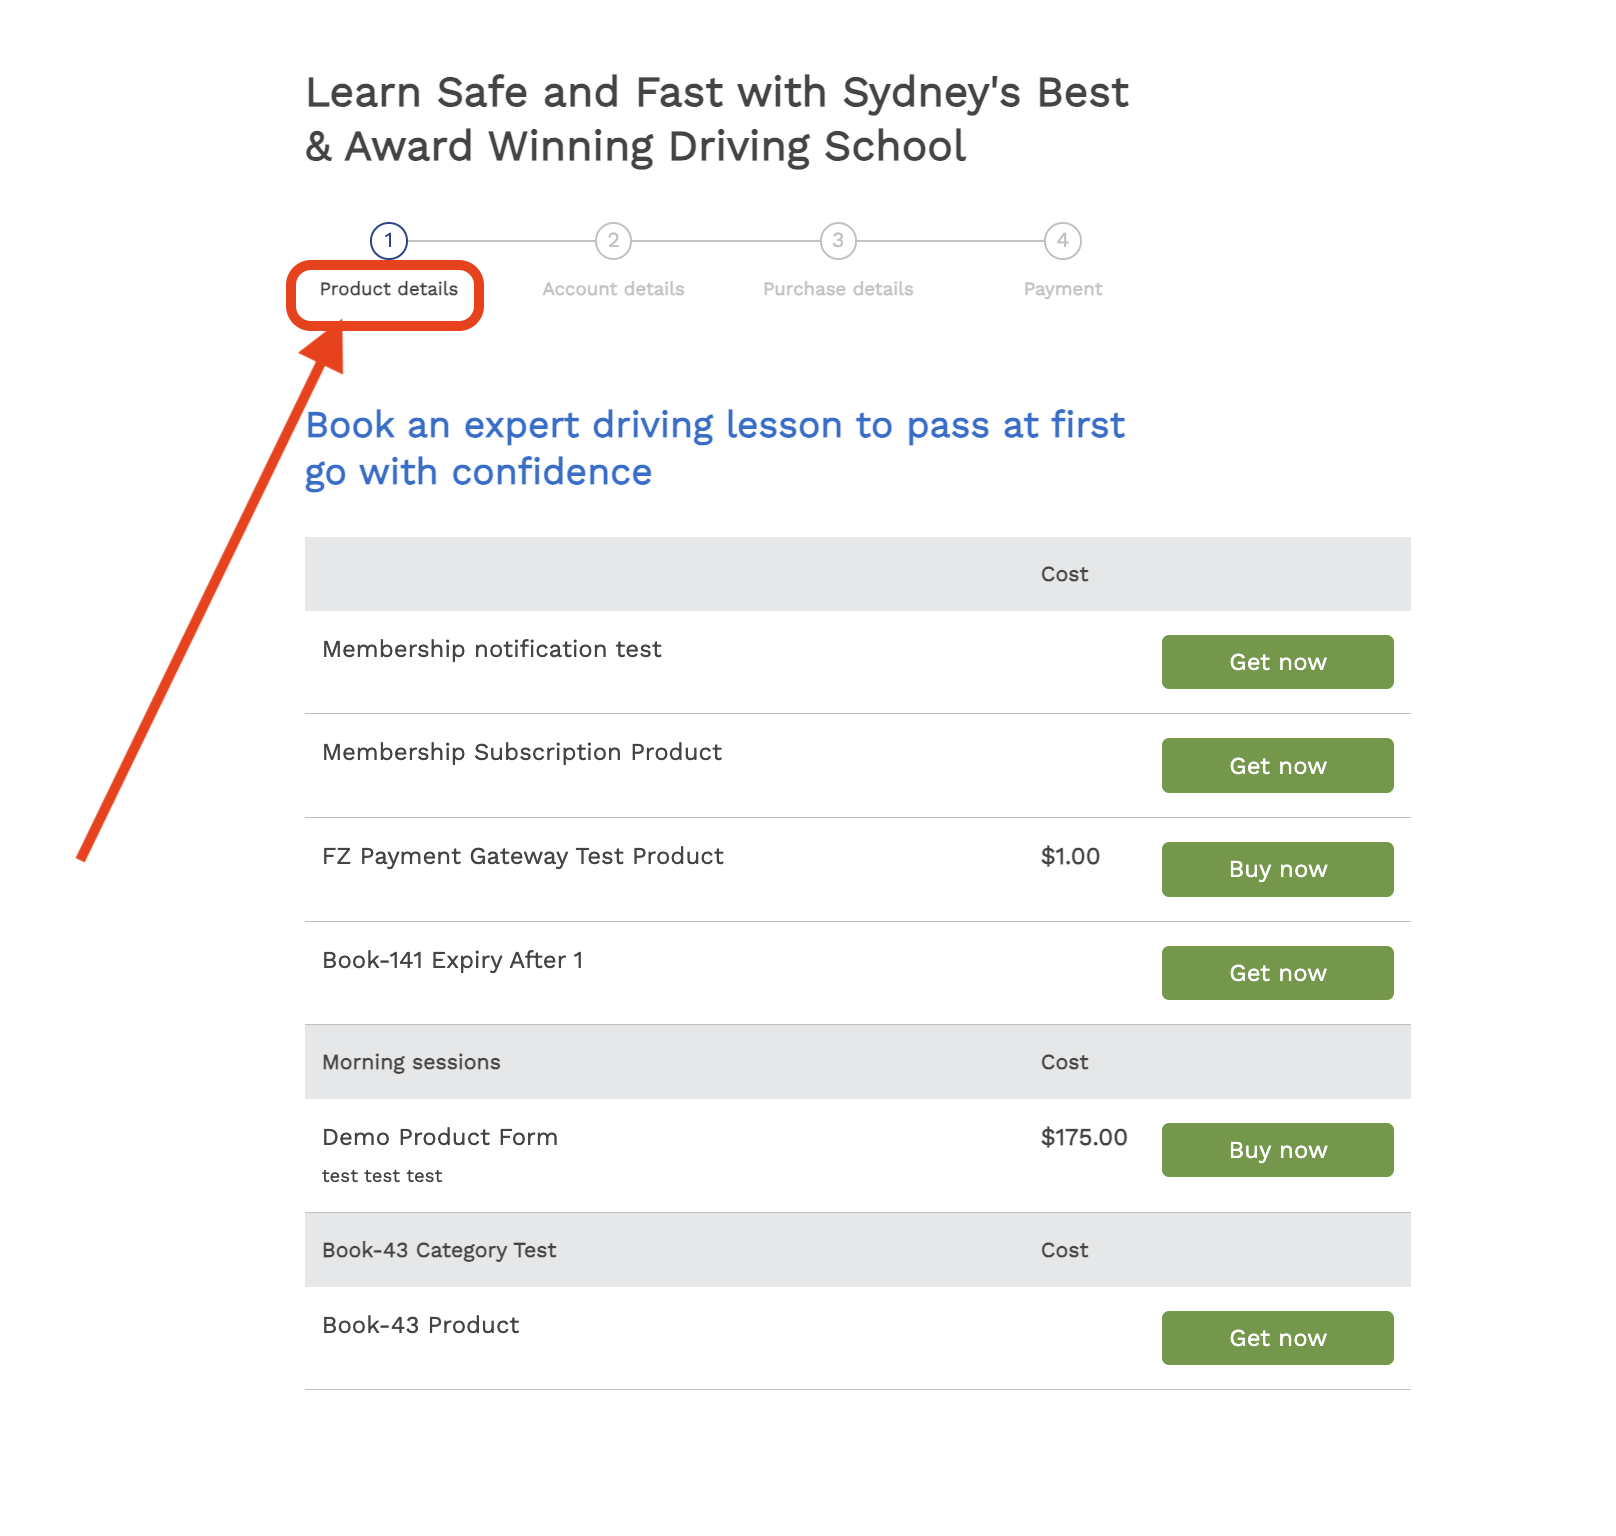
- The Mini Website displays the entire combined catalogue of publicly-listed Services, Events, and Products that your business provides to public visitors (new and return customers).
- Configuration tab - Add, edit, and delete the details of business Services, Resources, Locations, Events and Products offerings.
- Settings tab - contains several sections:
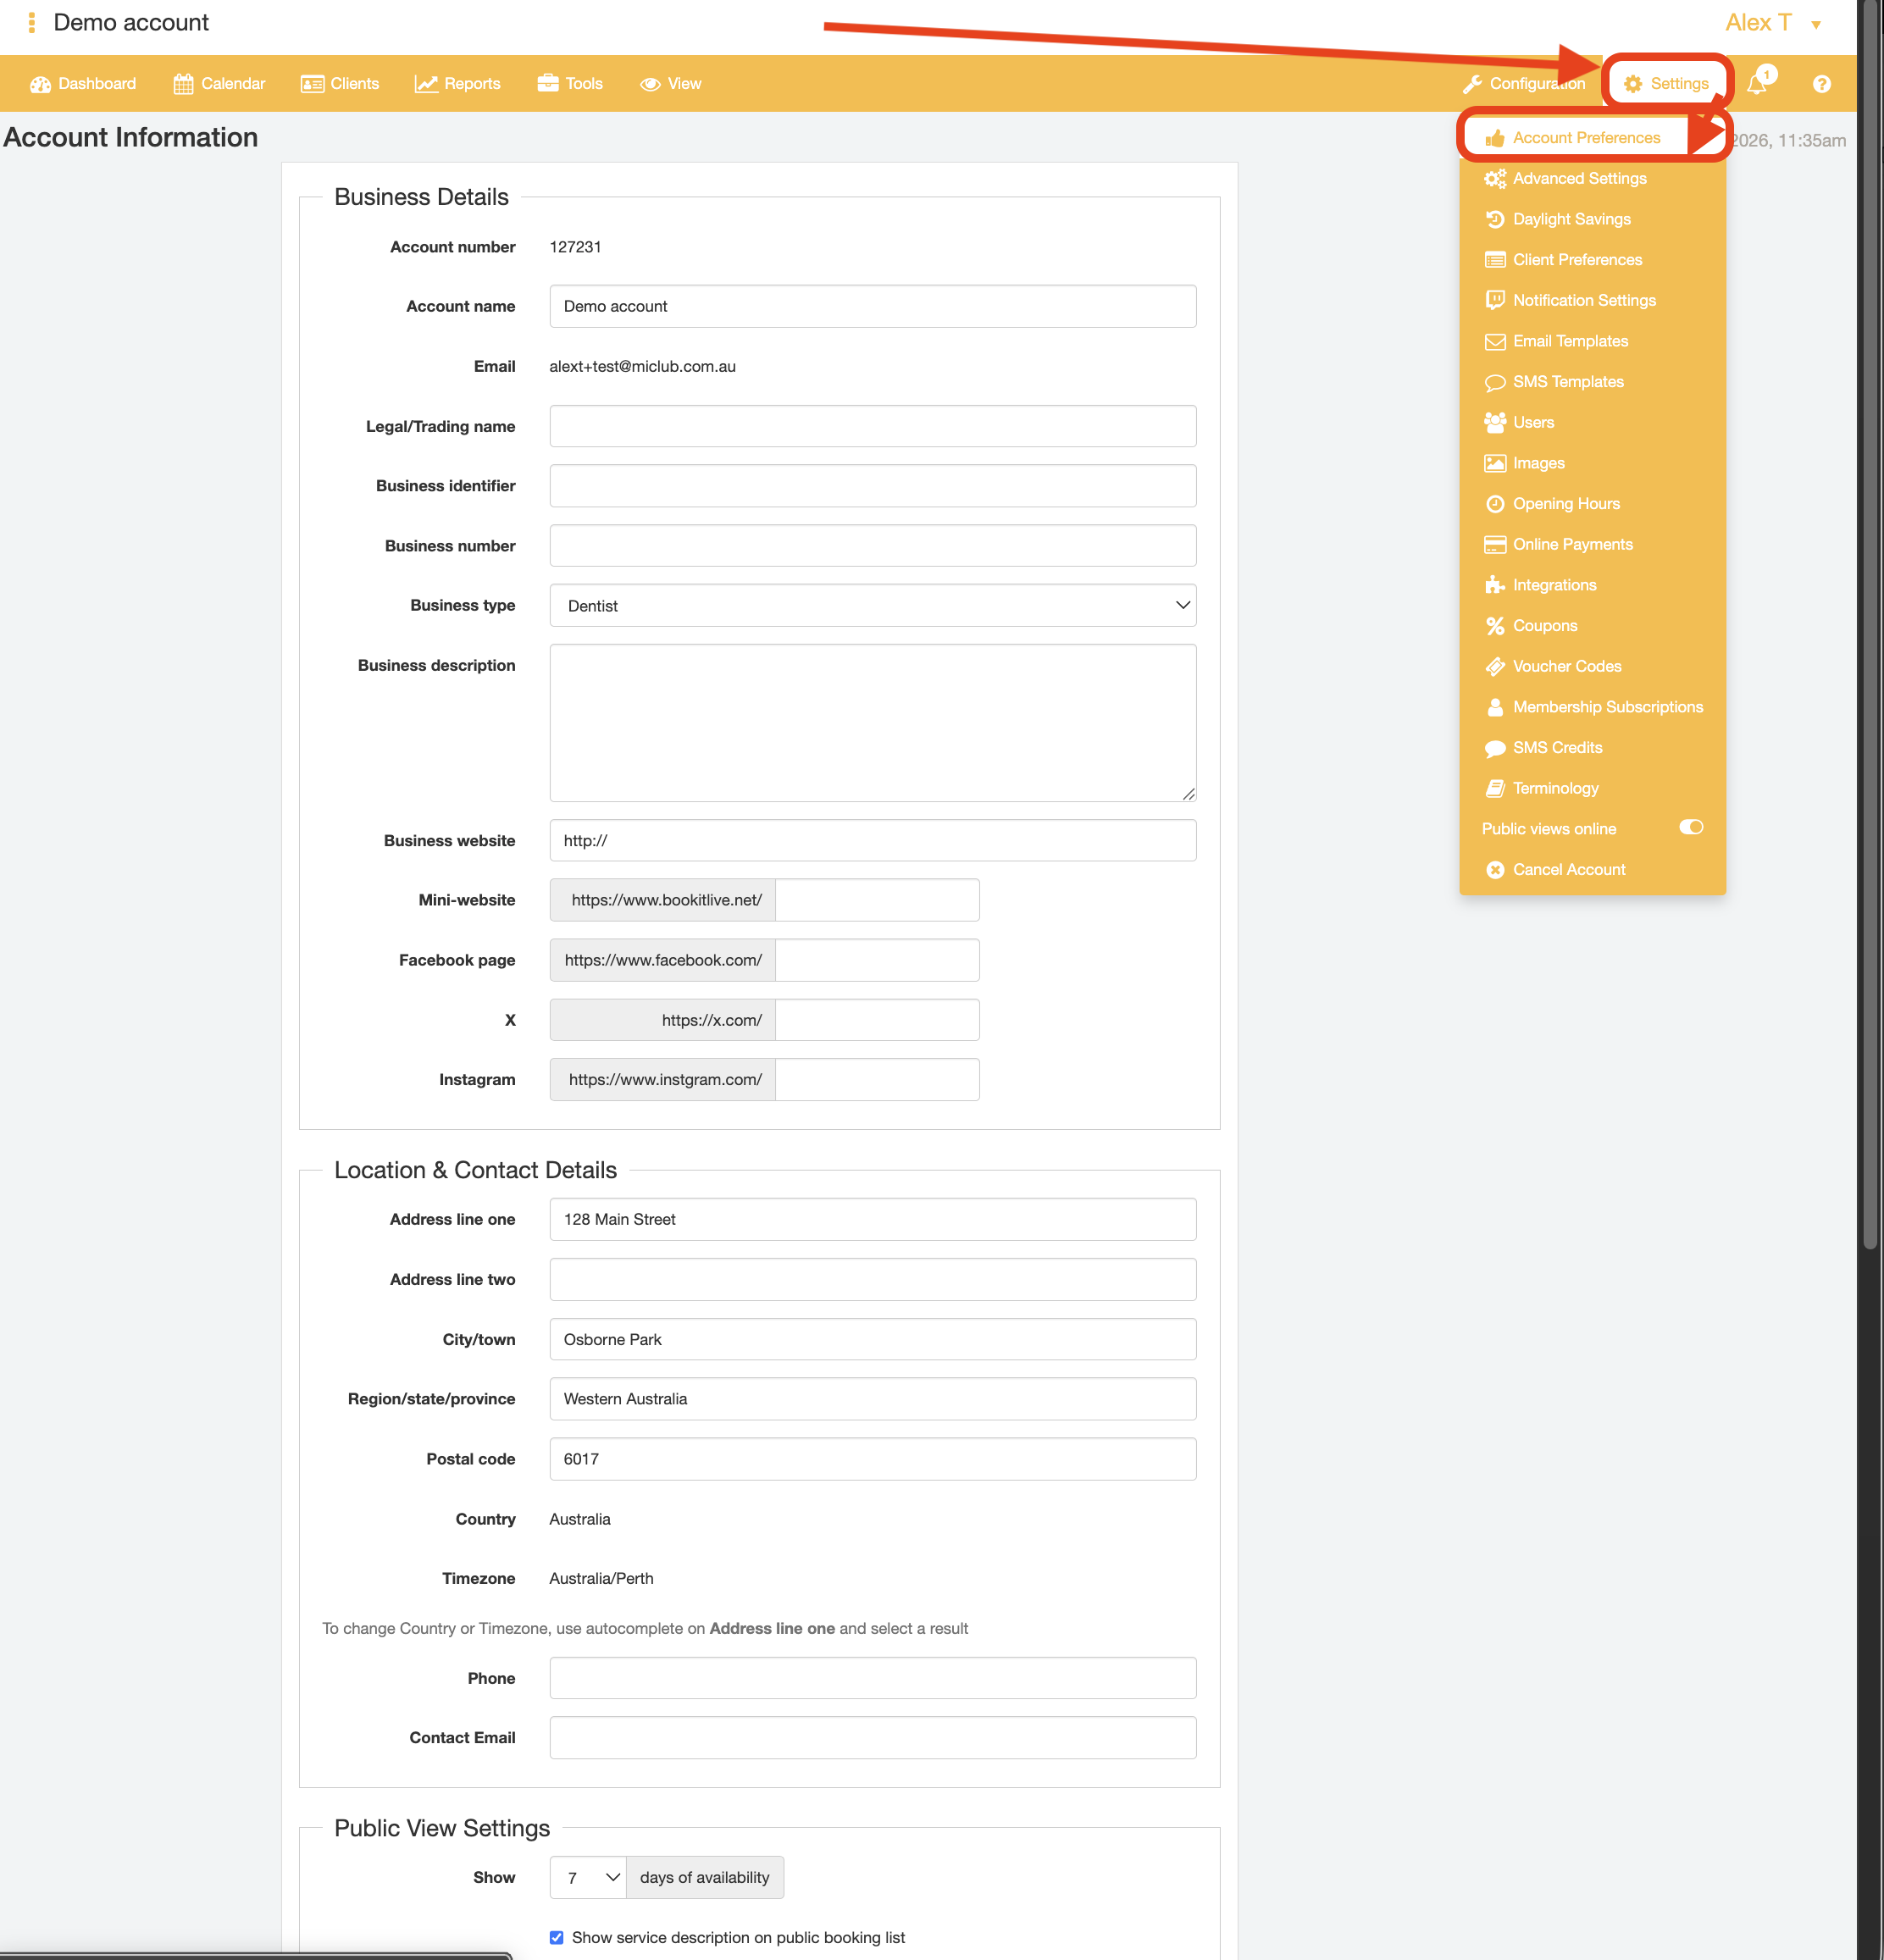
- Account Preferences - Add, delete and edit your business details.
- Advanced Setting - Contains Google analytics and various enabling settings.
- Daylight Savings - Define Daylight Saving hours.
- Client Preferences - Add, delete and edit client detail preferences.
- Notifications Settings - Customise how notifications are sent to your clients.
- Email Templates & SMS Templates - Customise email and SMS template features.
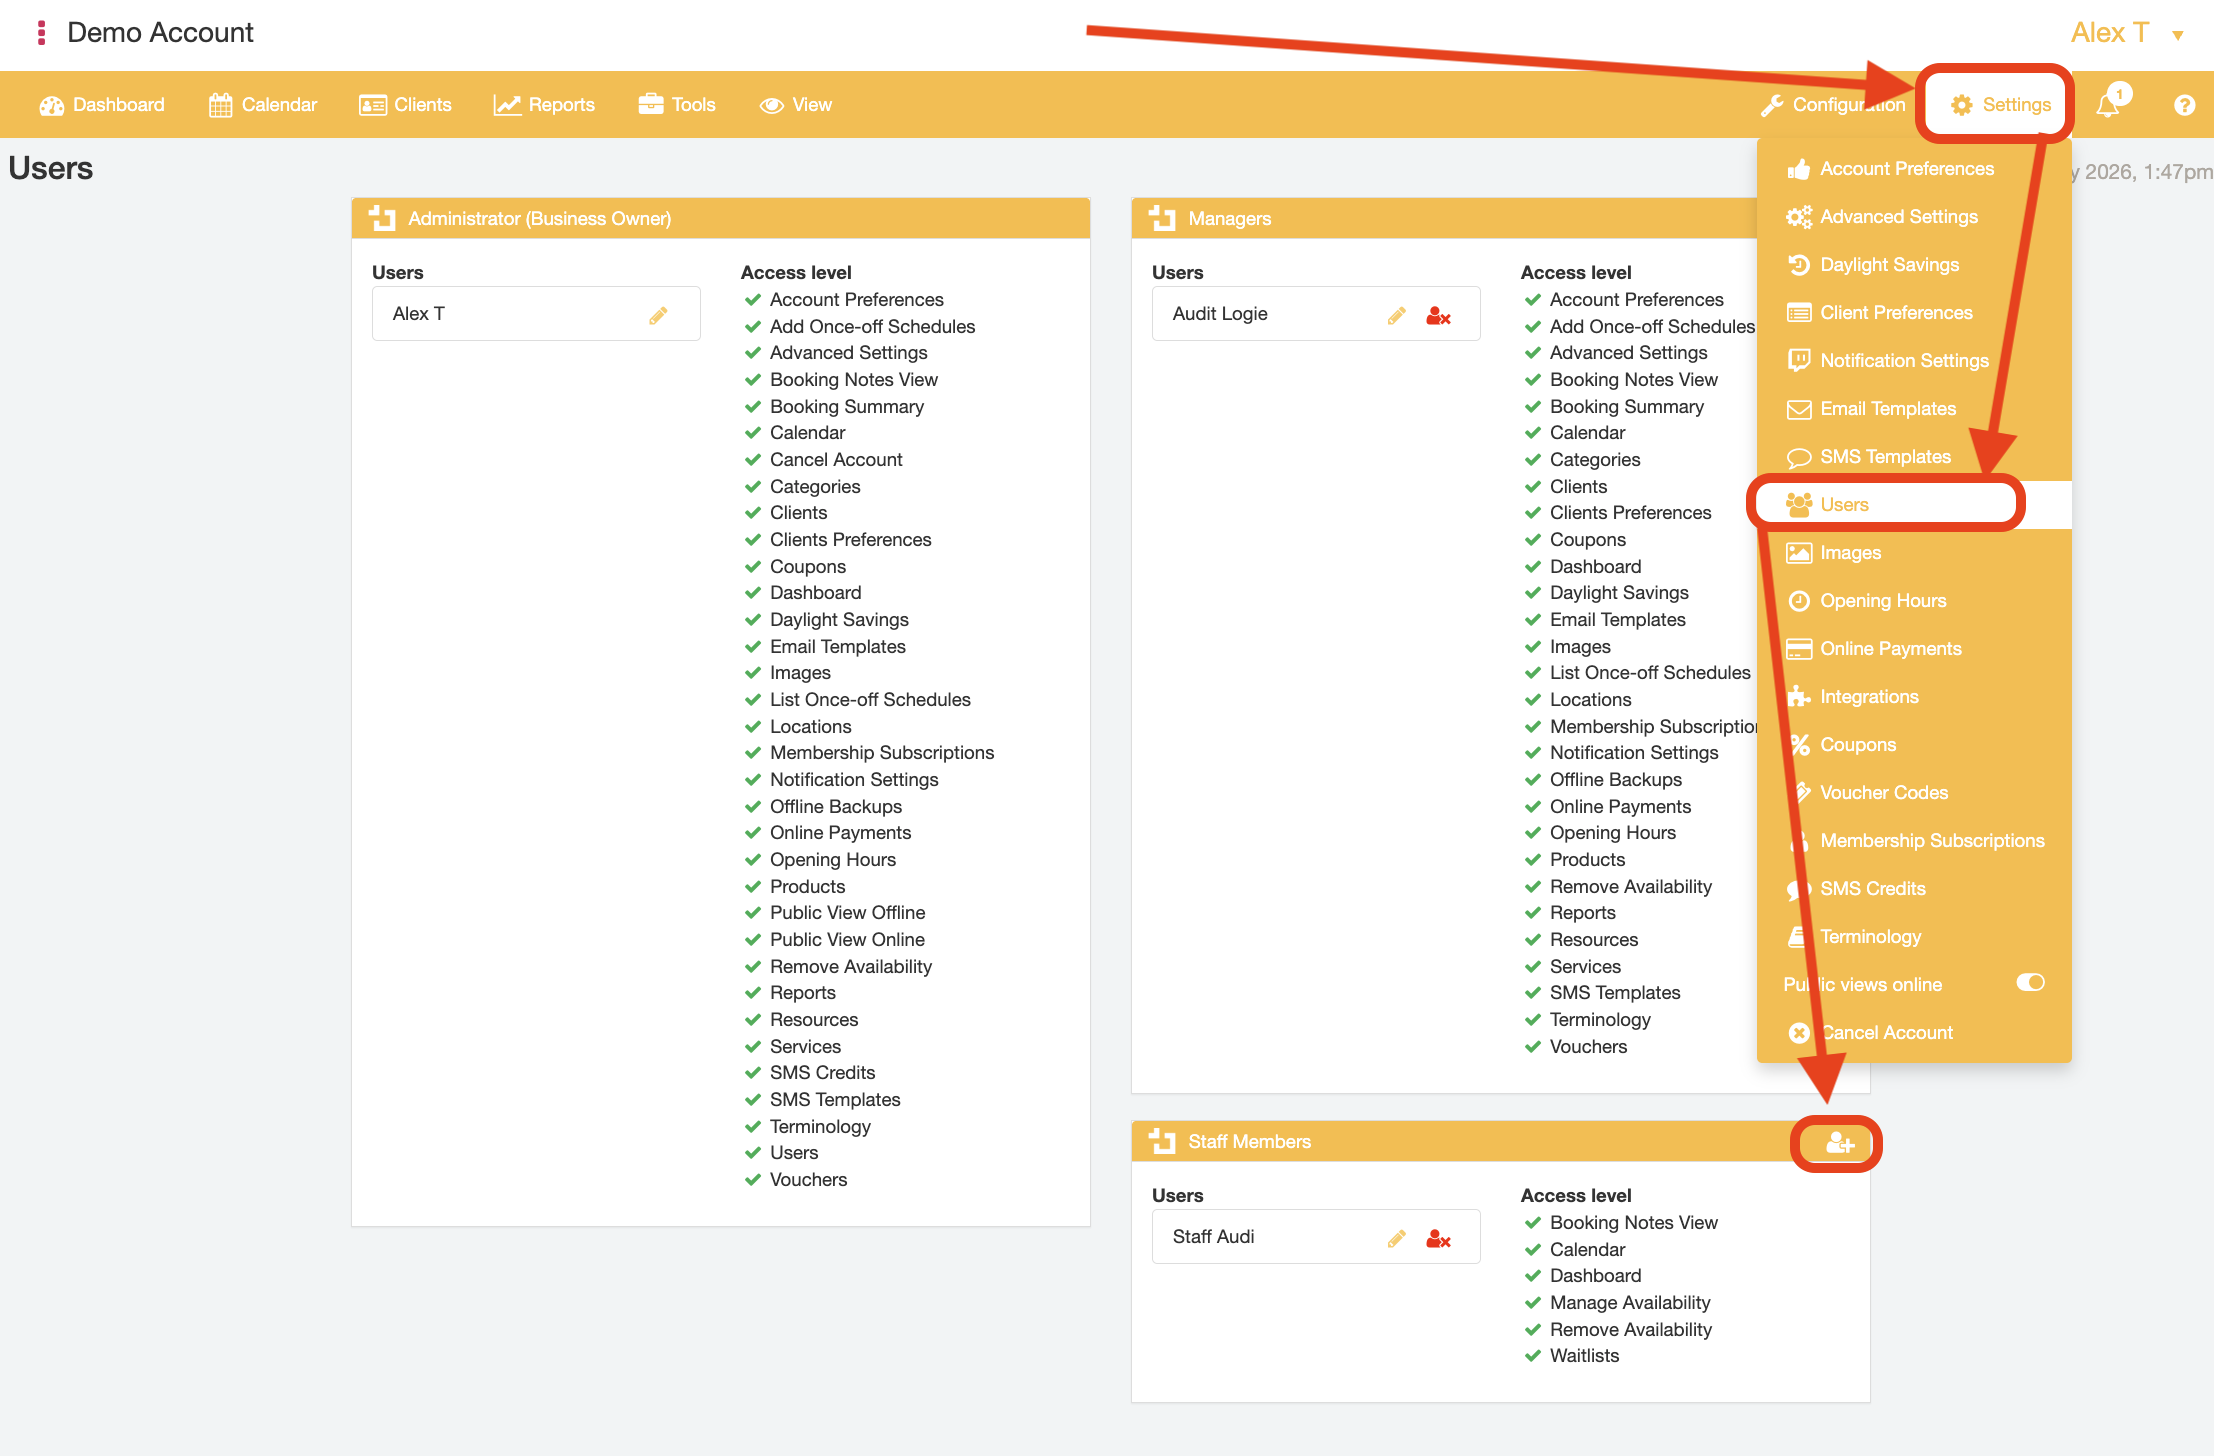
- Users - Add, edit and delete users.
- Images - Add and delete company logo and business images.
- Opening hours - Change the opening hours of the business.
- Online Payments - View and modify Payment gateway settings.
- Integrations - Connect or remove external links (EG Client File Storage, Video conferencing etc.) to your account.
- Coupons - This section appears if you are using Coupons and Gift cards custom feature for issuing gift cards and allowing your clients to have some discounts.
- Voucher codes - Add, edit and delete voucher codes.
- Membership subscriptions - Appears if you use Membership custom feature and allows you to create different kinds of memberships for your clients.
- SMS Credits - Purchase or top up SMS credits.
- Terminology - Add, edit or delete descriptions for business resources and services.
- Public views online - Toggle to make the booking page visible or non-visible to the public.
How to set up your Services for Booking
- Adjust the default account settings to match your business preferences. Many of the core account settings related to your business details, links to your customer-facing website and social media pages, booking rules, and Dashboard display information can be modified to your liking via the "Account Preferences" Settings page
- Create user accounts for other staff members of your business to allow them to access your business account as a sub-user.
Enter the staff/manager user details in the subsequent user details. This will create a user login that your staff members can login to themselves to access the business account without using the business admin's credentials.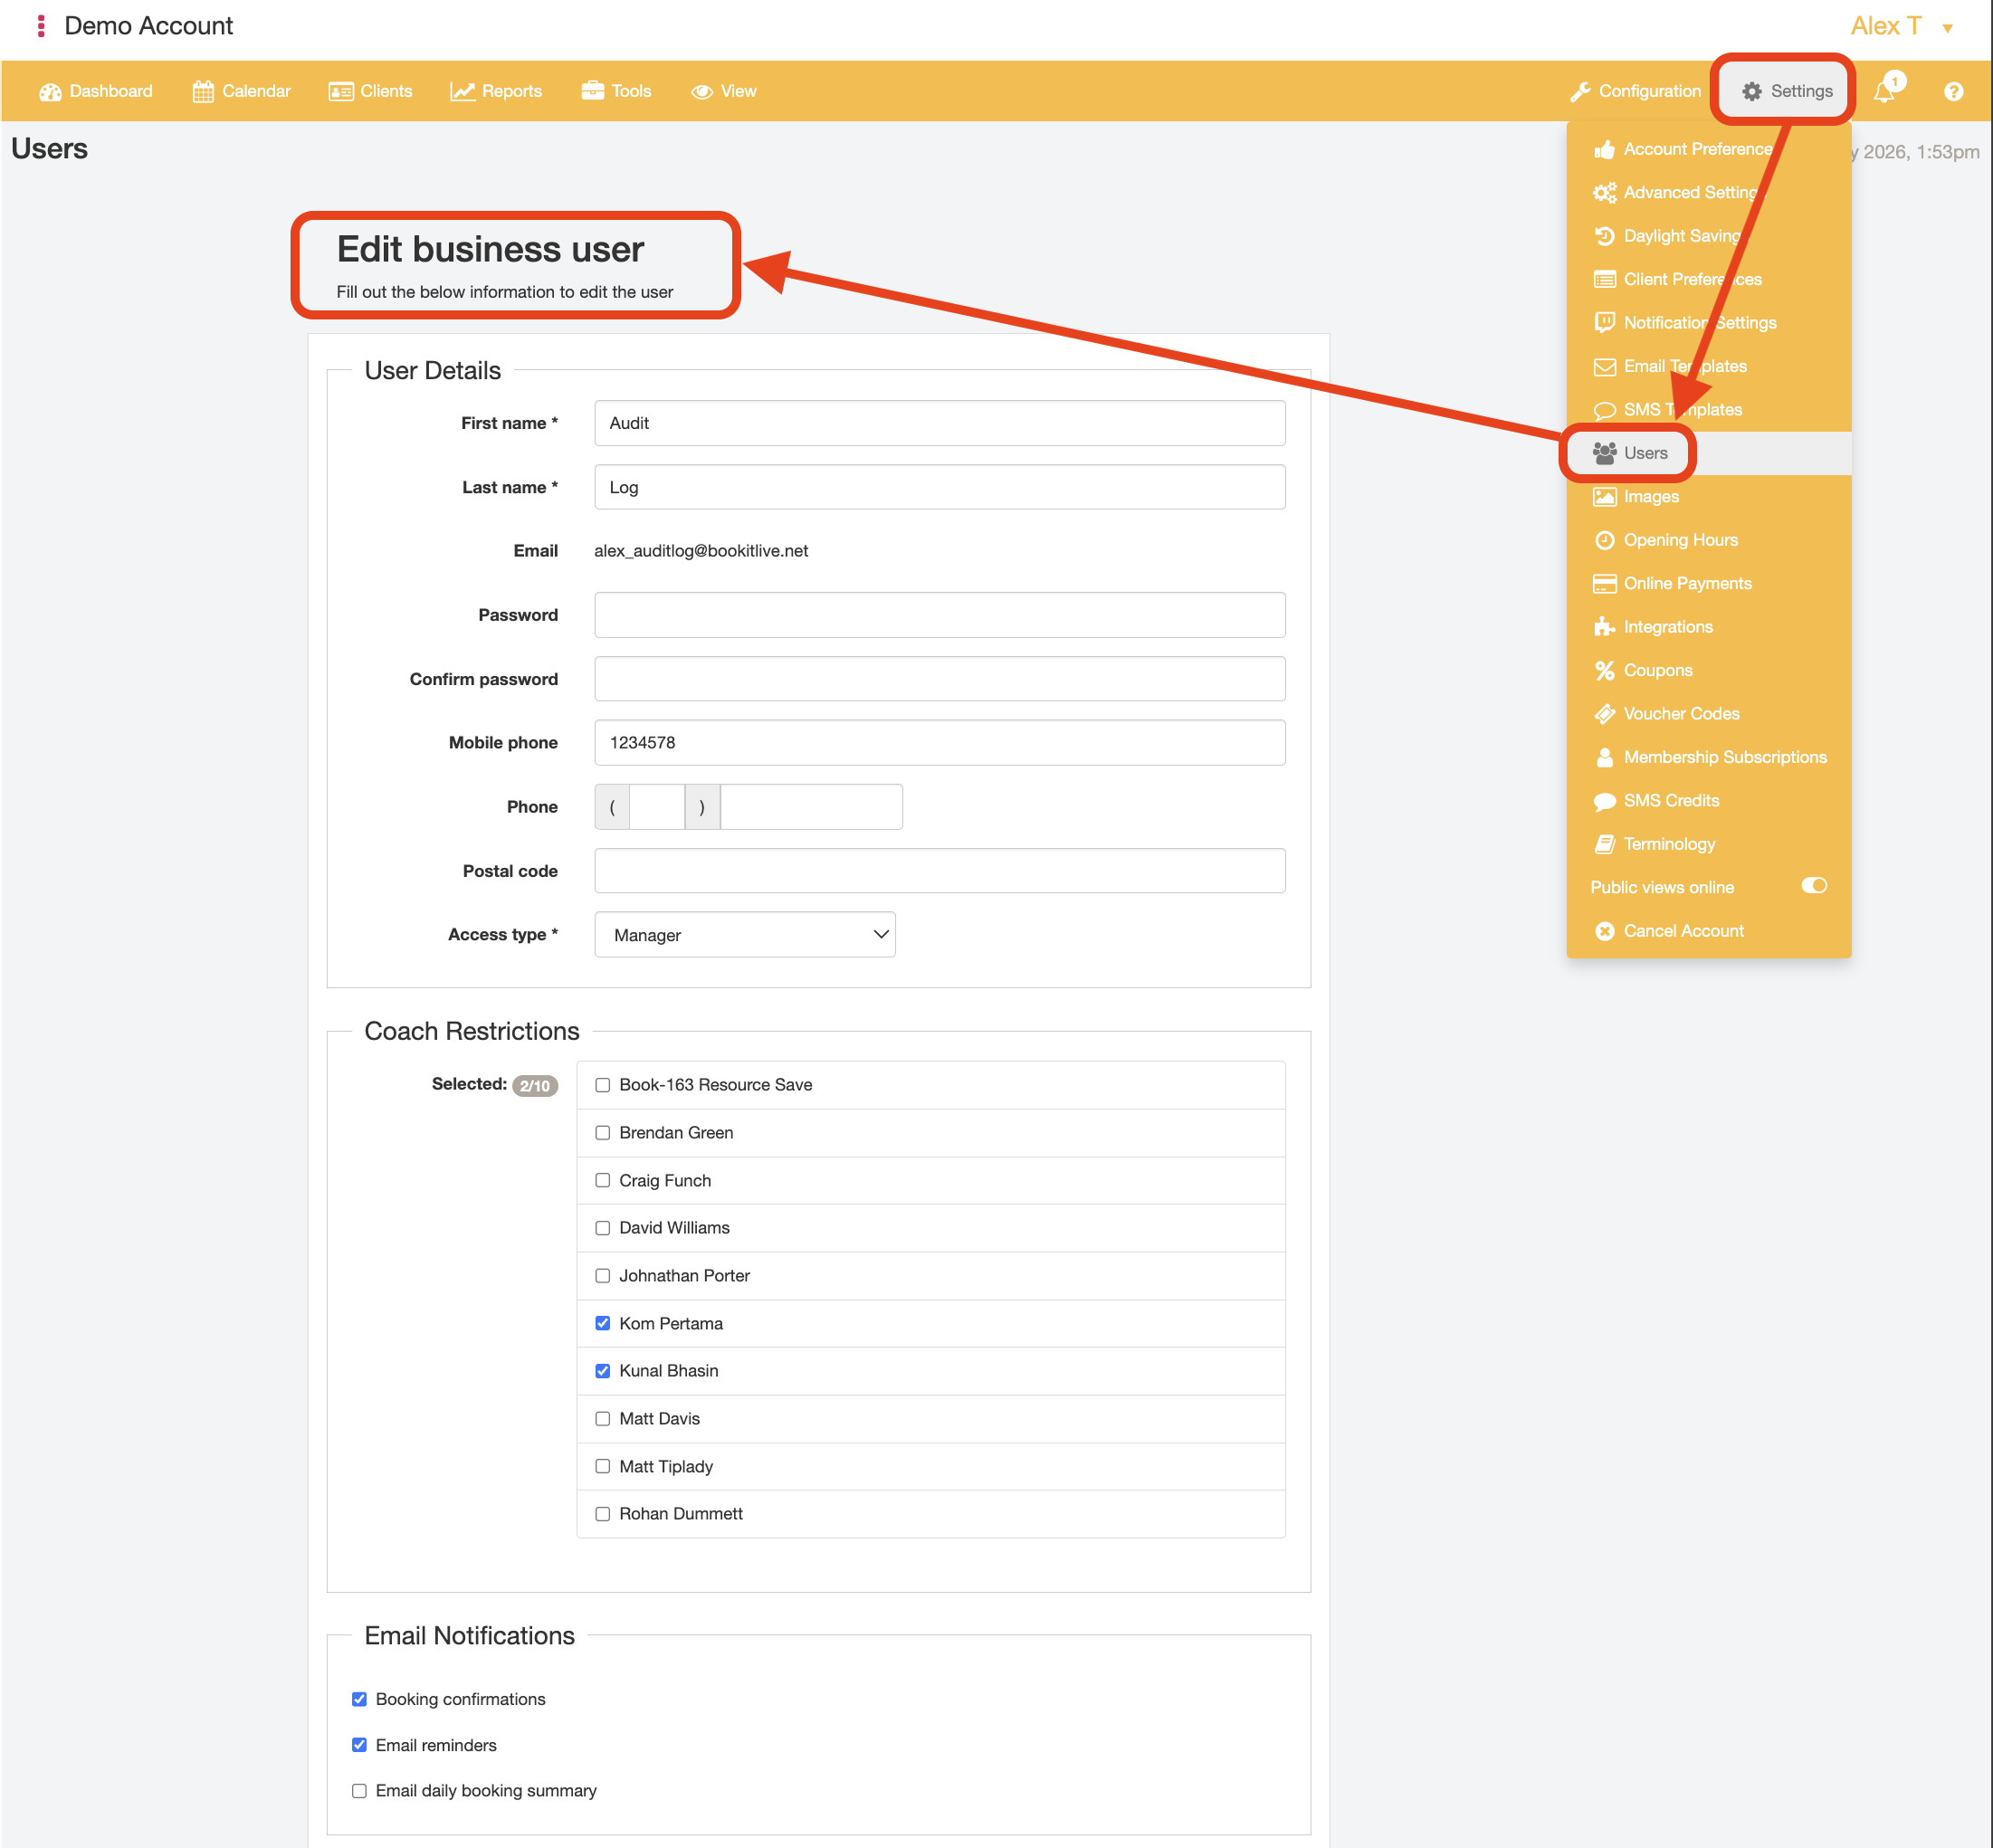
- Set the data fields that your customers will need to provide under the "Client Preferences" Settings page. Any mandatory fields that you require your customers to provide in order to complete a booking with your organisation are marked by a ticked field name. You can also provide non-mandatory fields to capture a additional customer's details if you wish to do so.
NOTE: by default, email information is mandatory regardless of Client Preference selections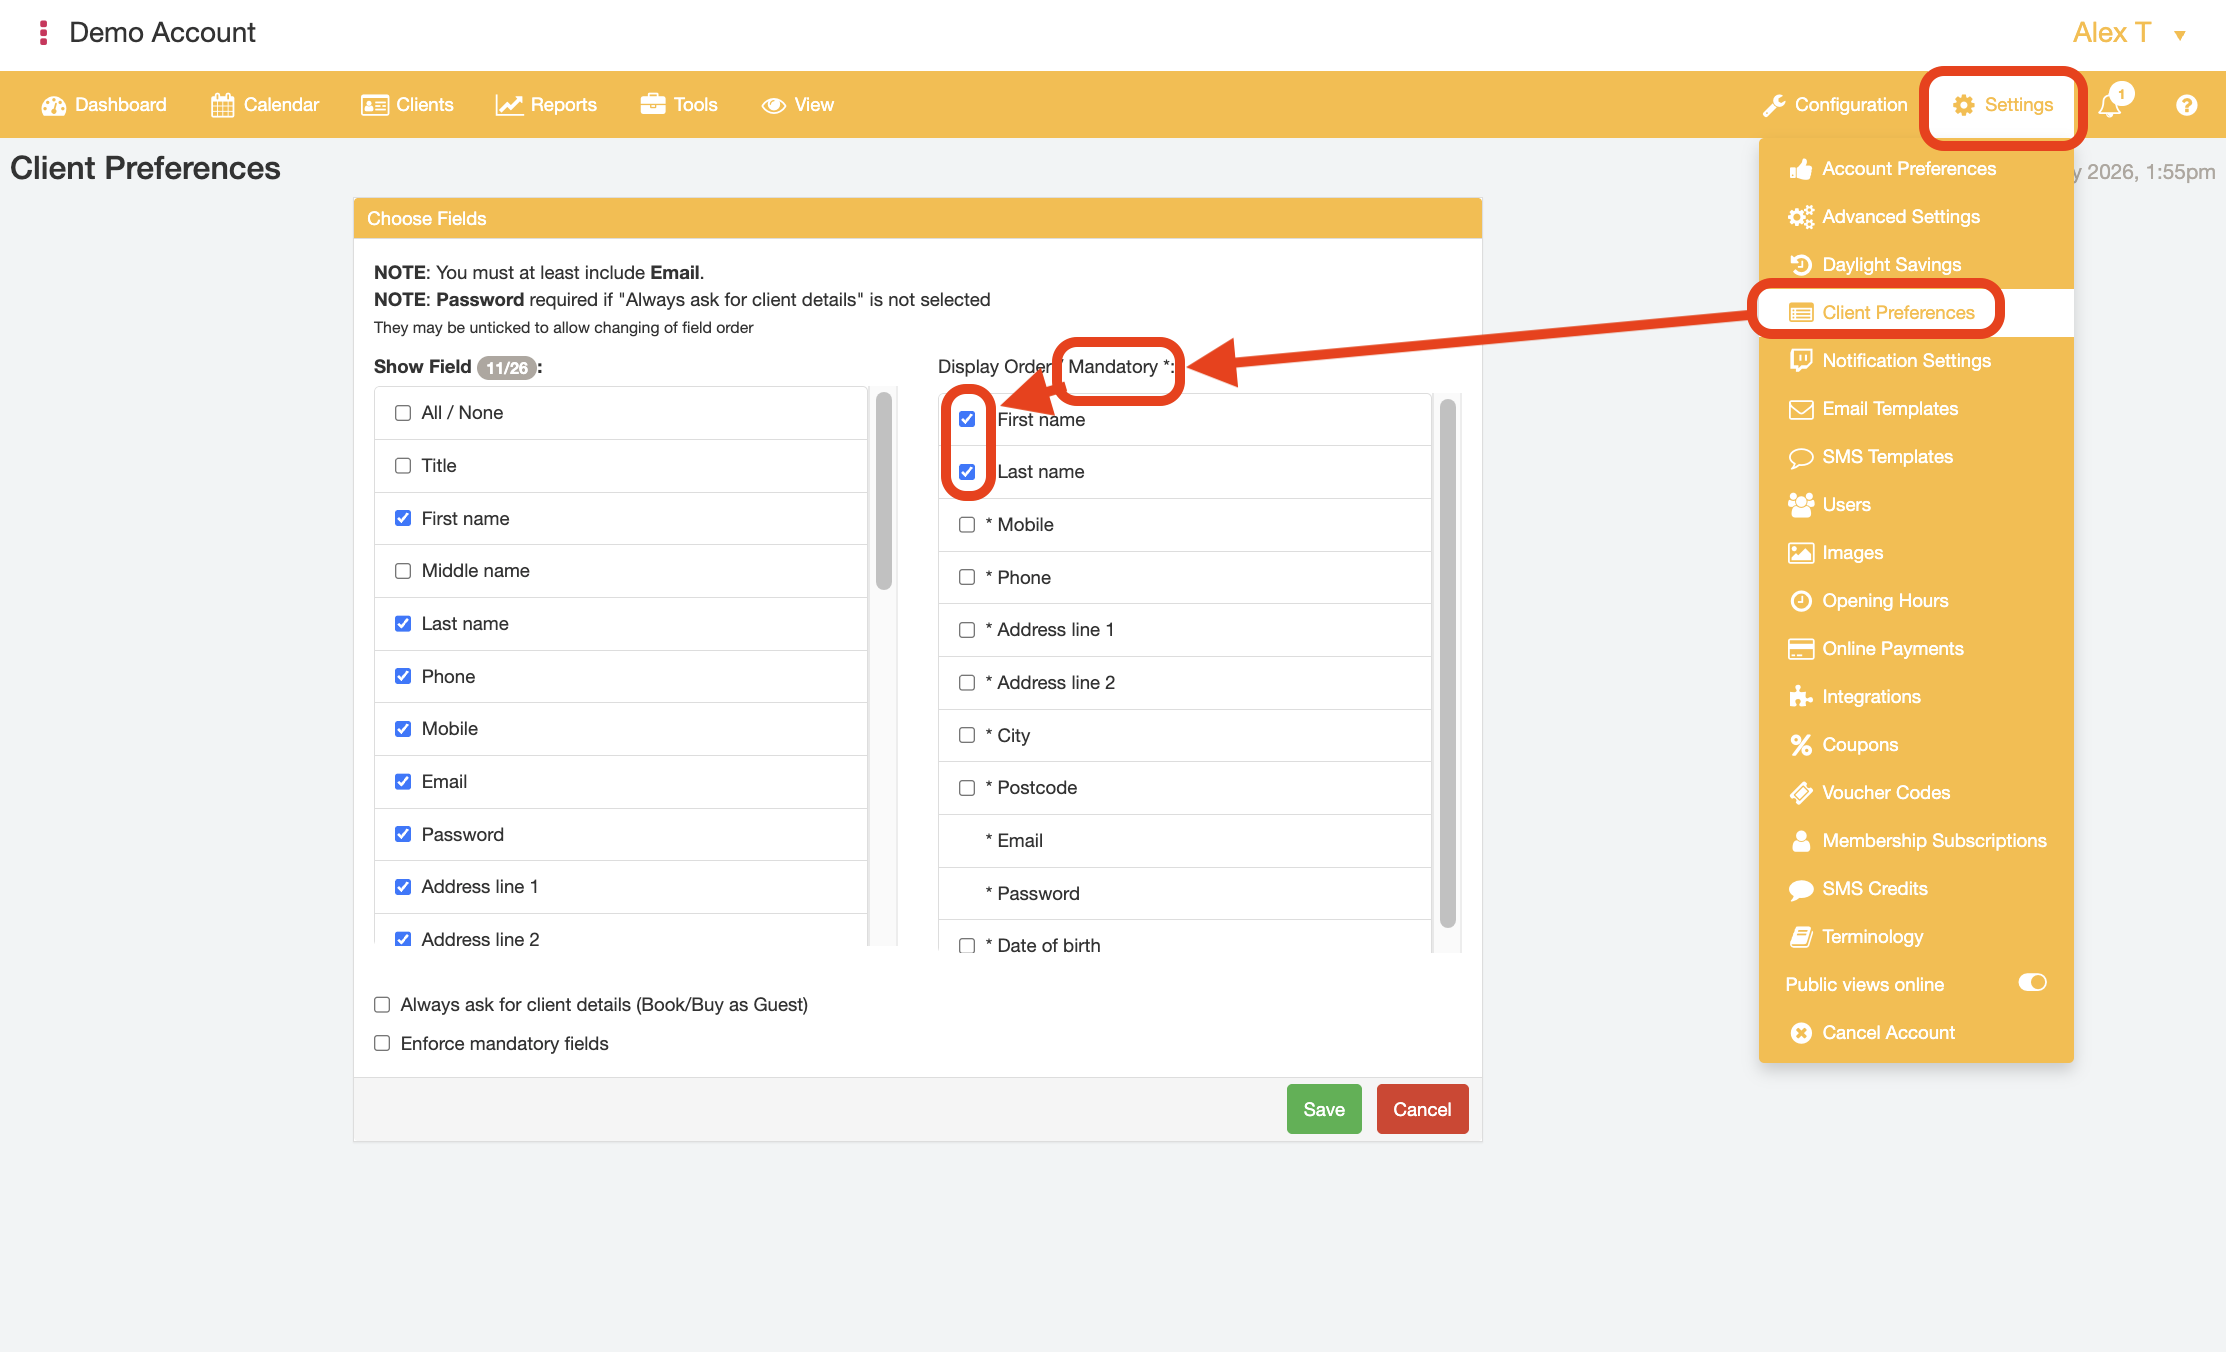
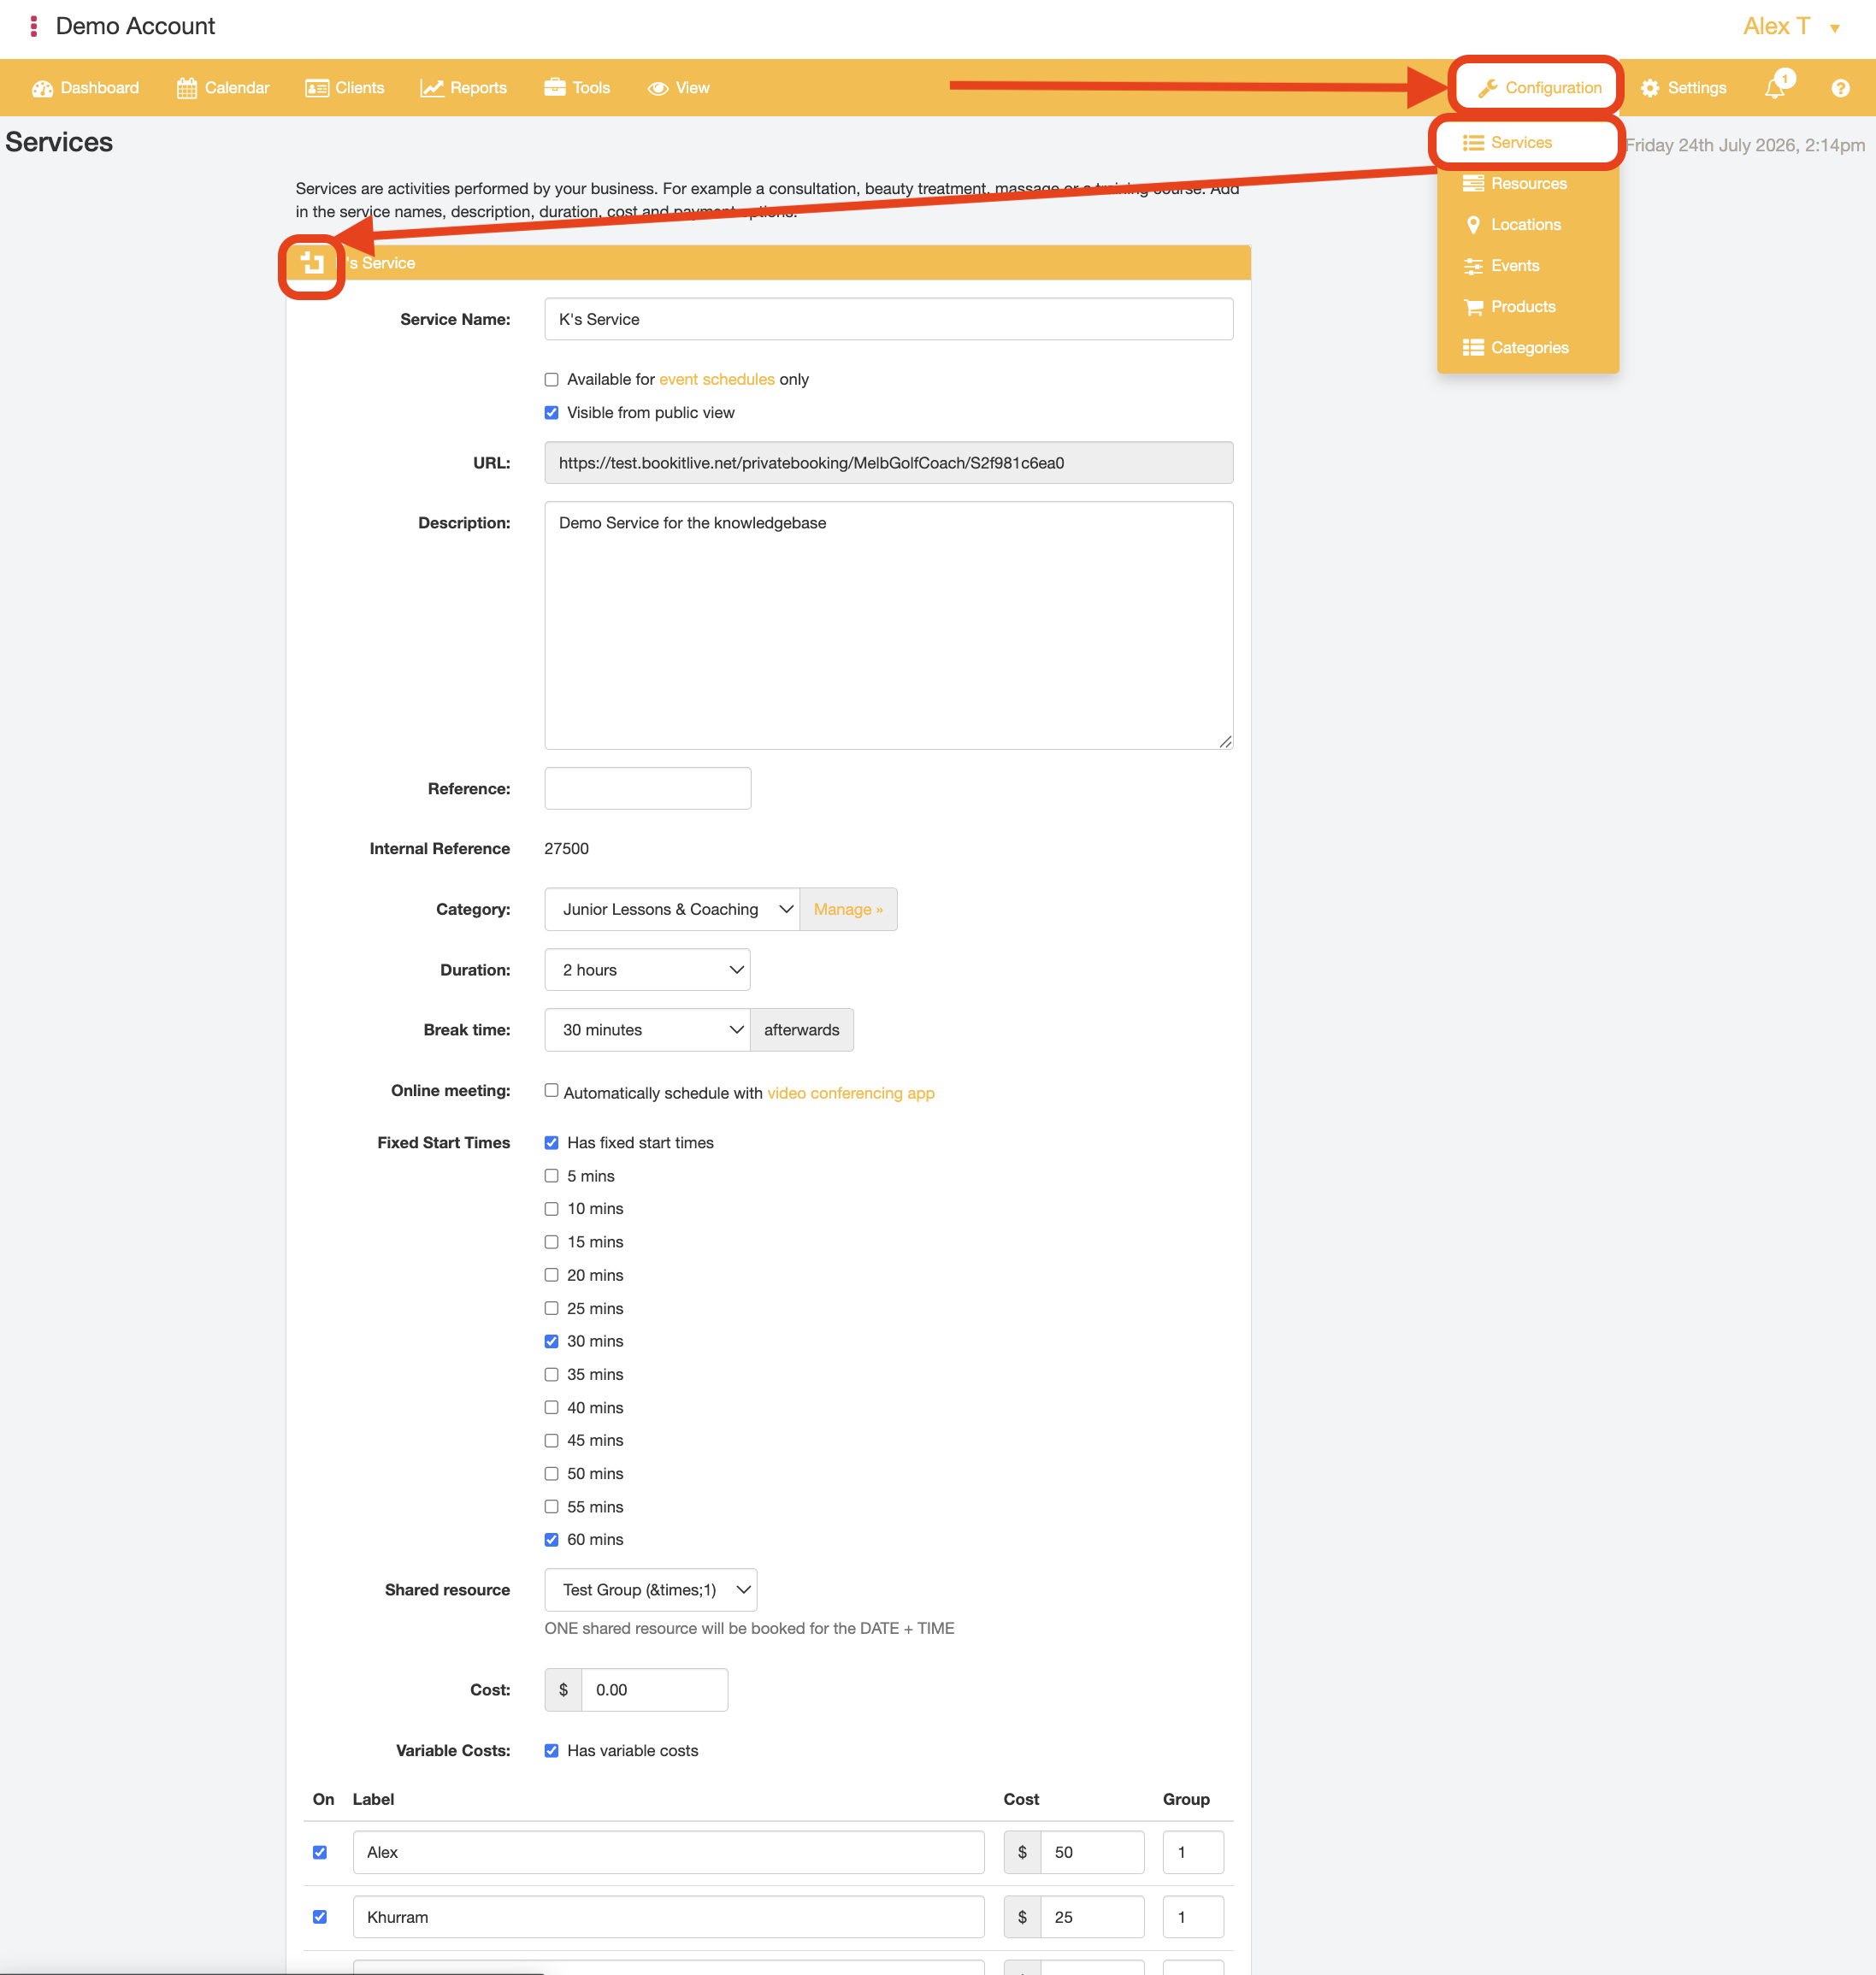
- Add the Service and its details that your business offers from the "Configuration" tab "Services" page. From here, you can set what the Service name is, whether the Service can be booked from the public-facing BookItLive business booking page or not, how long the Service last for, the Service booking costs, and Service booking payment options.
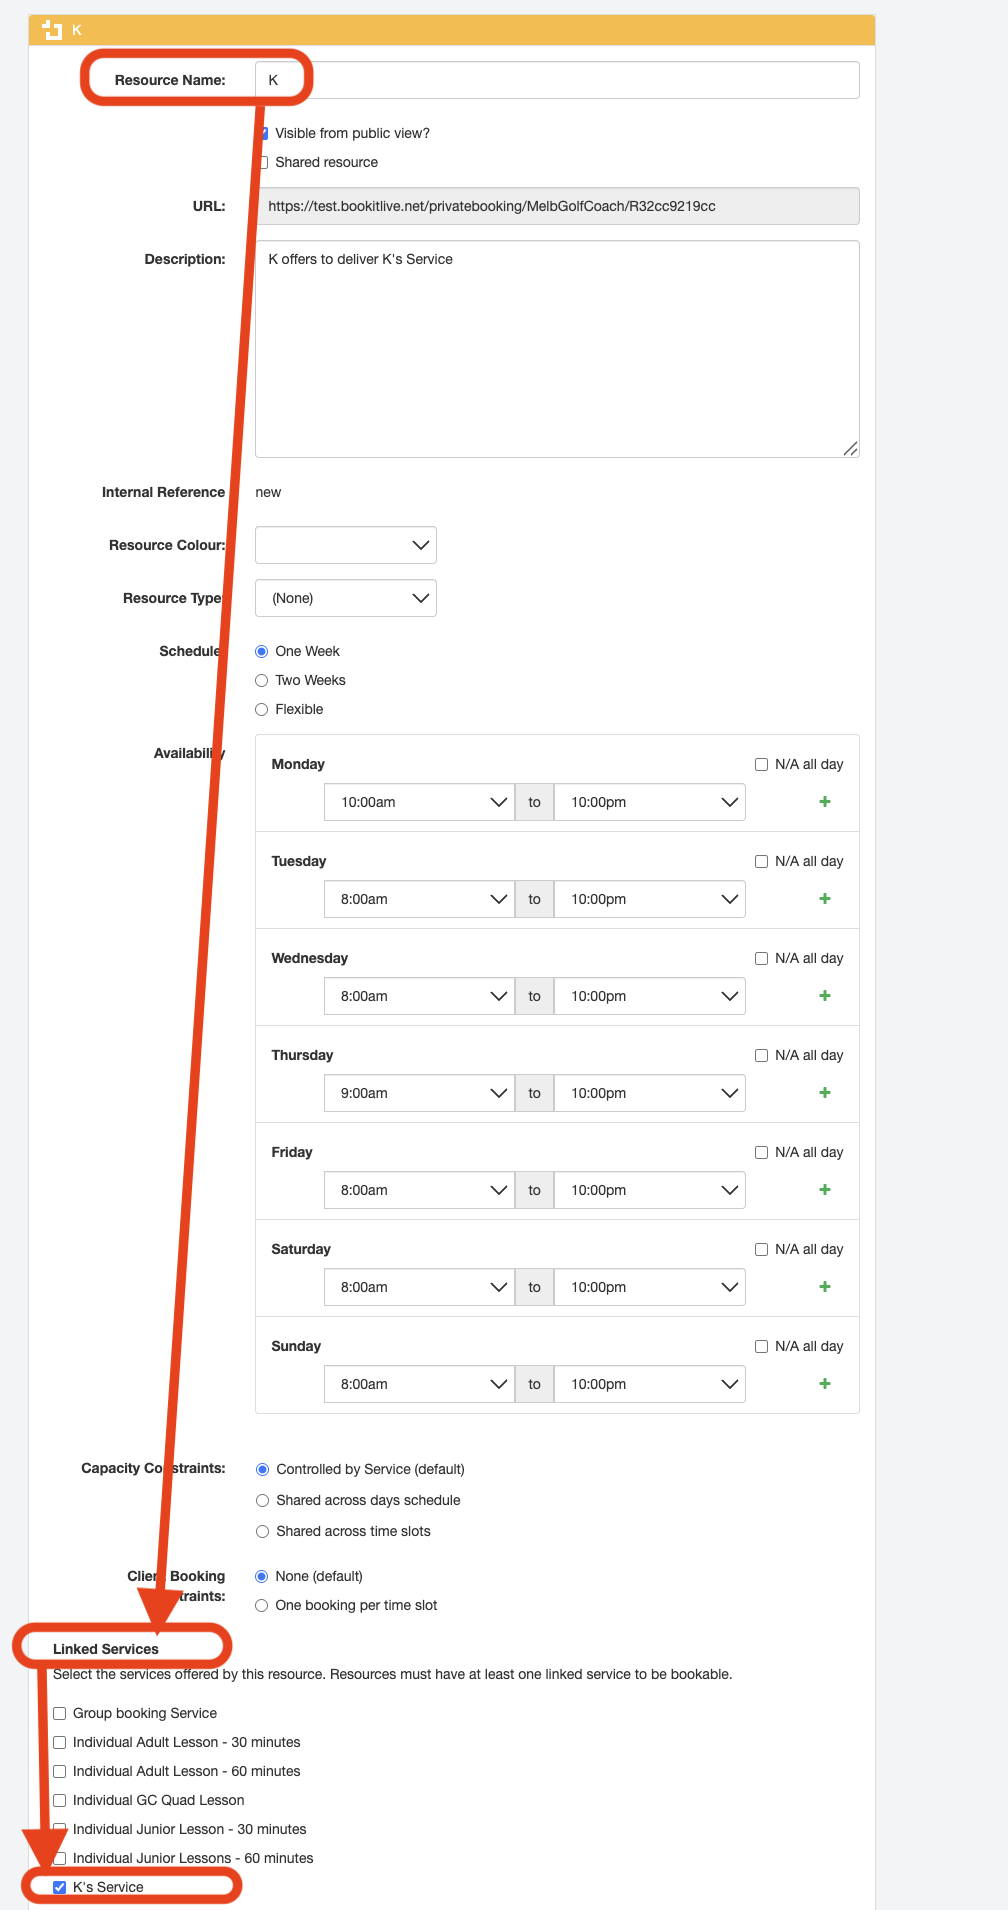
- From the "Configuration" tab "Resources" page, Resources records for each employee that provide a Service set up in the previous step and link the appropriate Resource record(s) to the Services they offer by ticking the Service name under the "Linked Services" field.
From the Resource page, you can also add details about the Resource themselves, like their weekly or fortnightly booking availability for the business, and set a quote on number of bookings the Resource accommodate for over a day or at specific times on a given day.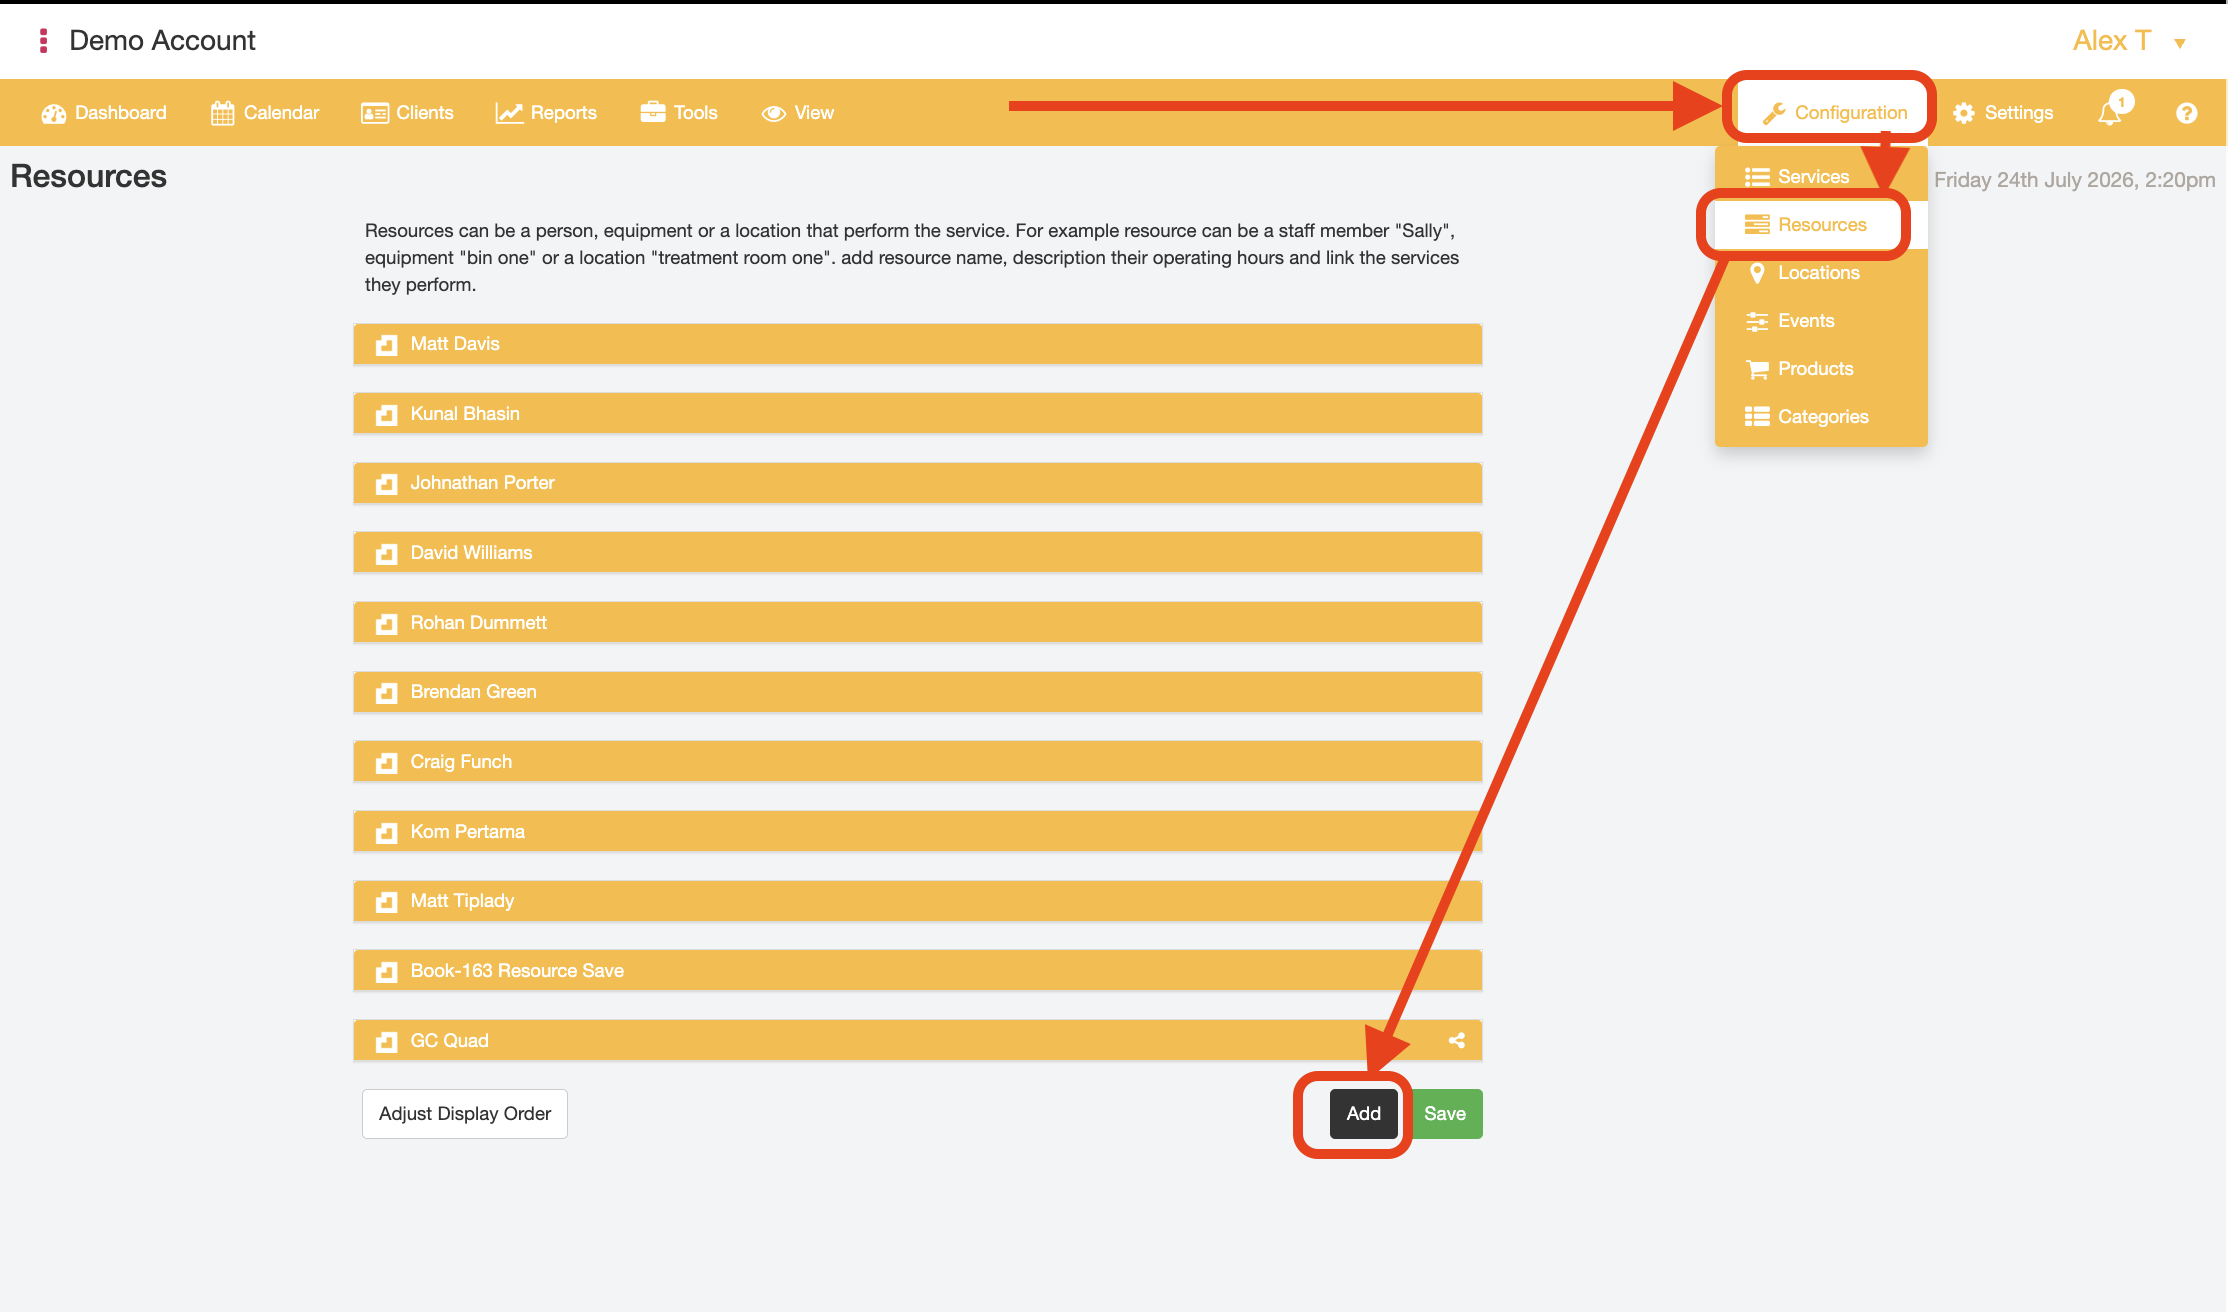
Customers making bookings through your public-facing BookItLive booking page can then find that Service and make a booking at a desired time that is within the offering Resource's availability schedule.
Once the booking is confirmed, the booking record will appear on the Dashboard for that Resource's user account as well as any other user account within the business who has visibility on the booked Resource's diary.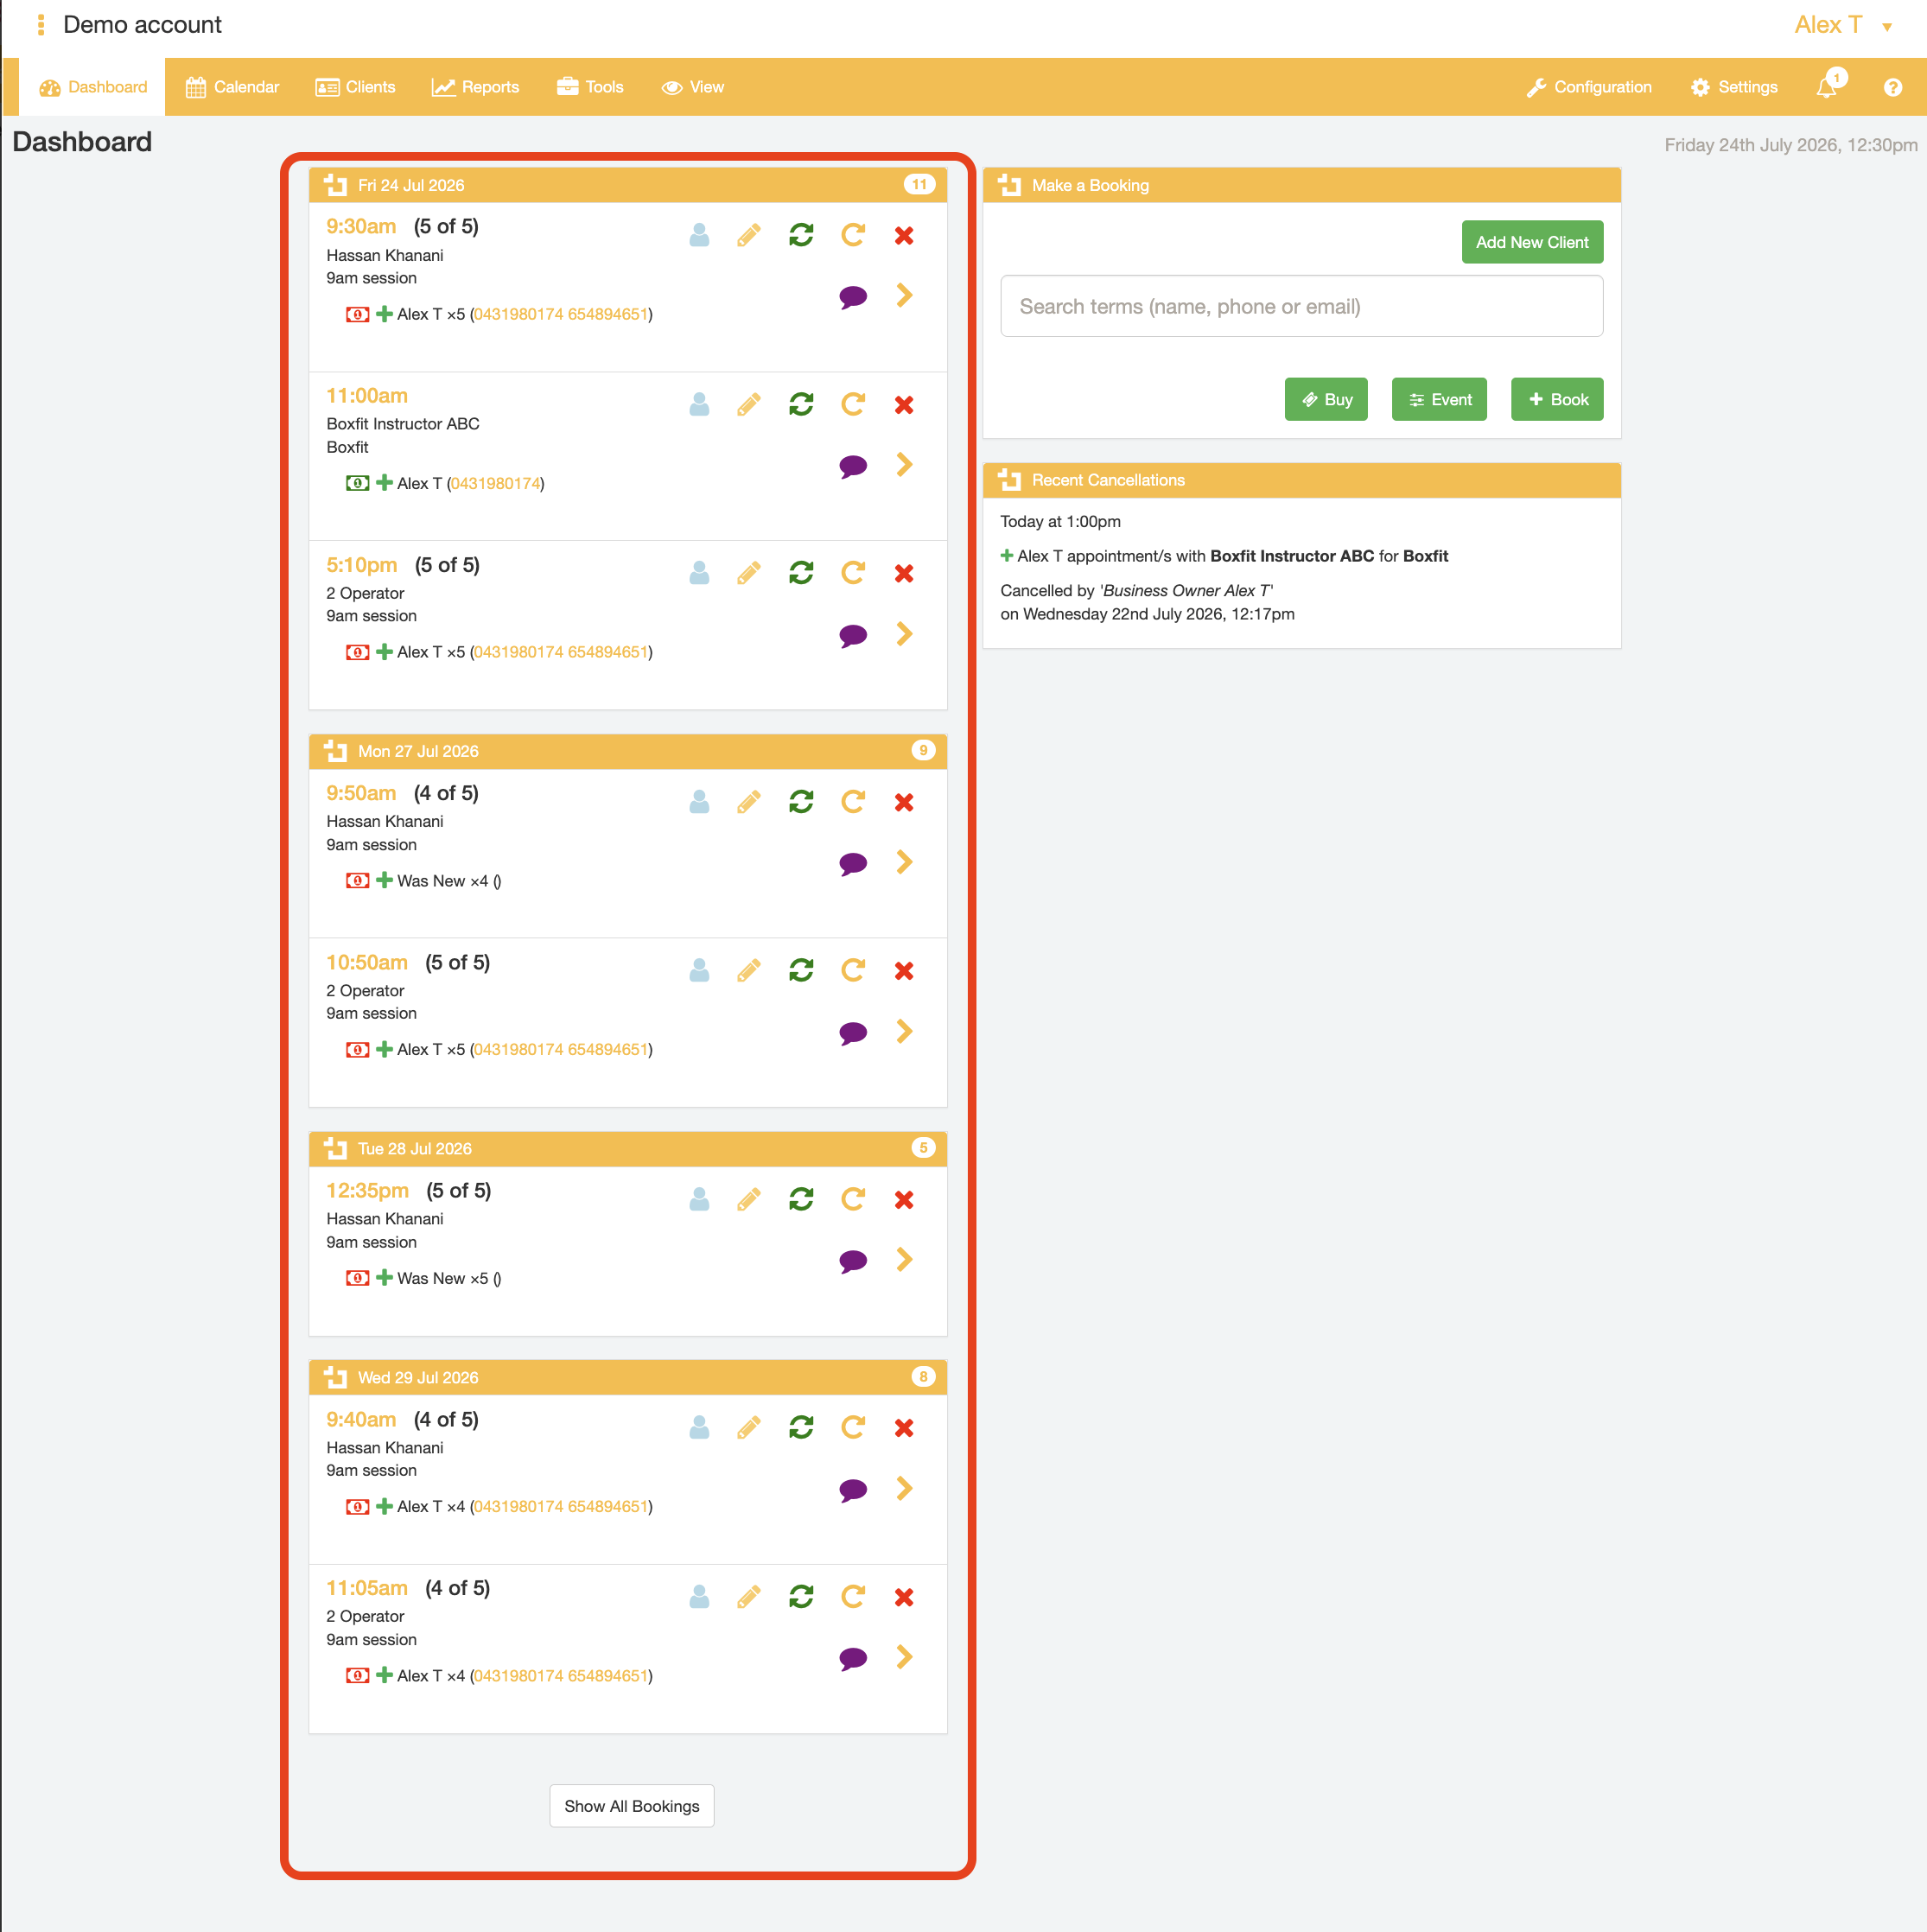
Additionally, the public booking page will automatically be updated following booking confirmation to block out the timeslot that was just (fully) booked out to prevent overbookings from occurring.
General Configuration
When you create an account, the system automatically creates three pages for you:
- A business Mini website
- A public booking page
- A product purchasing page
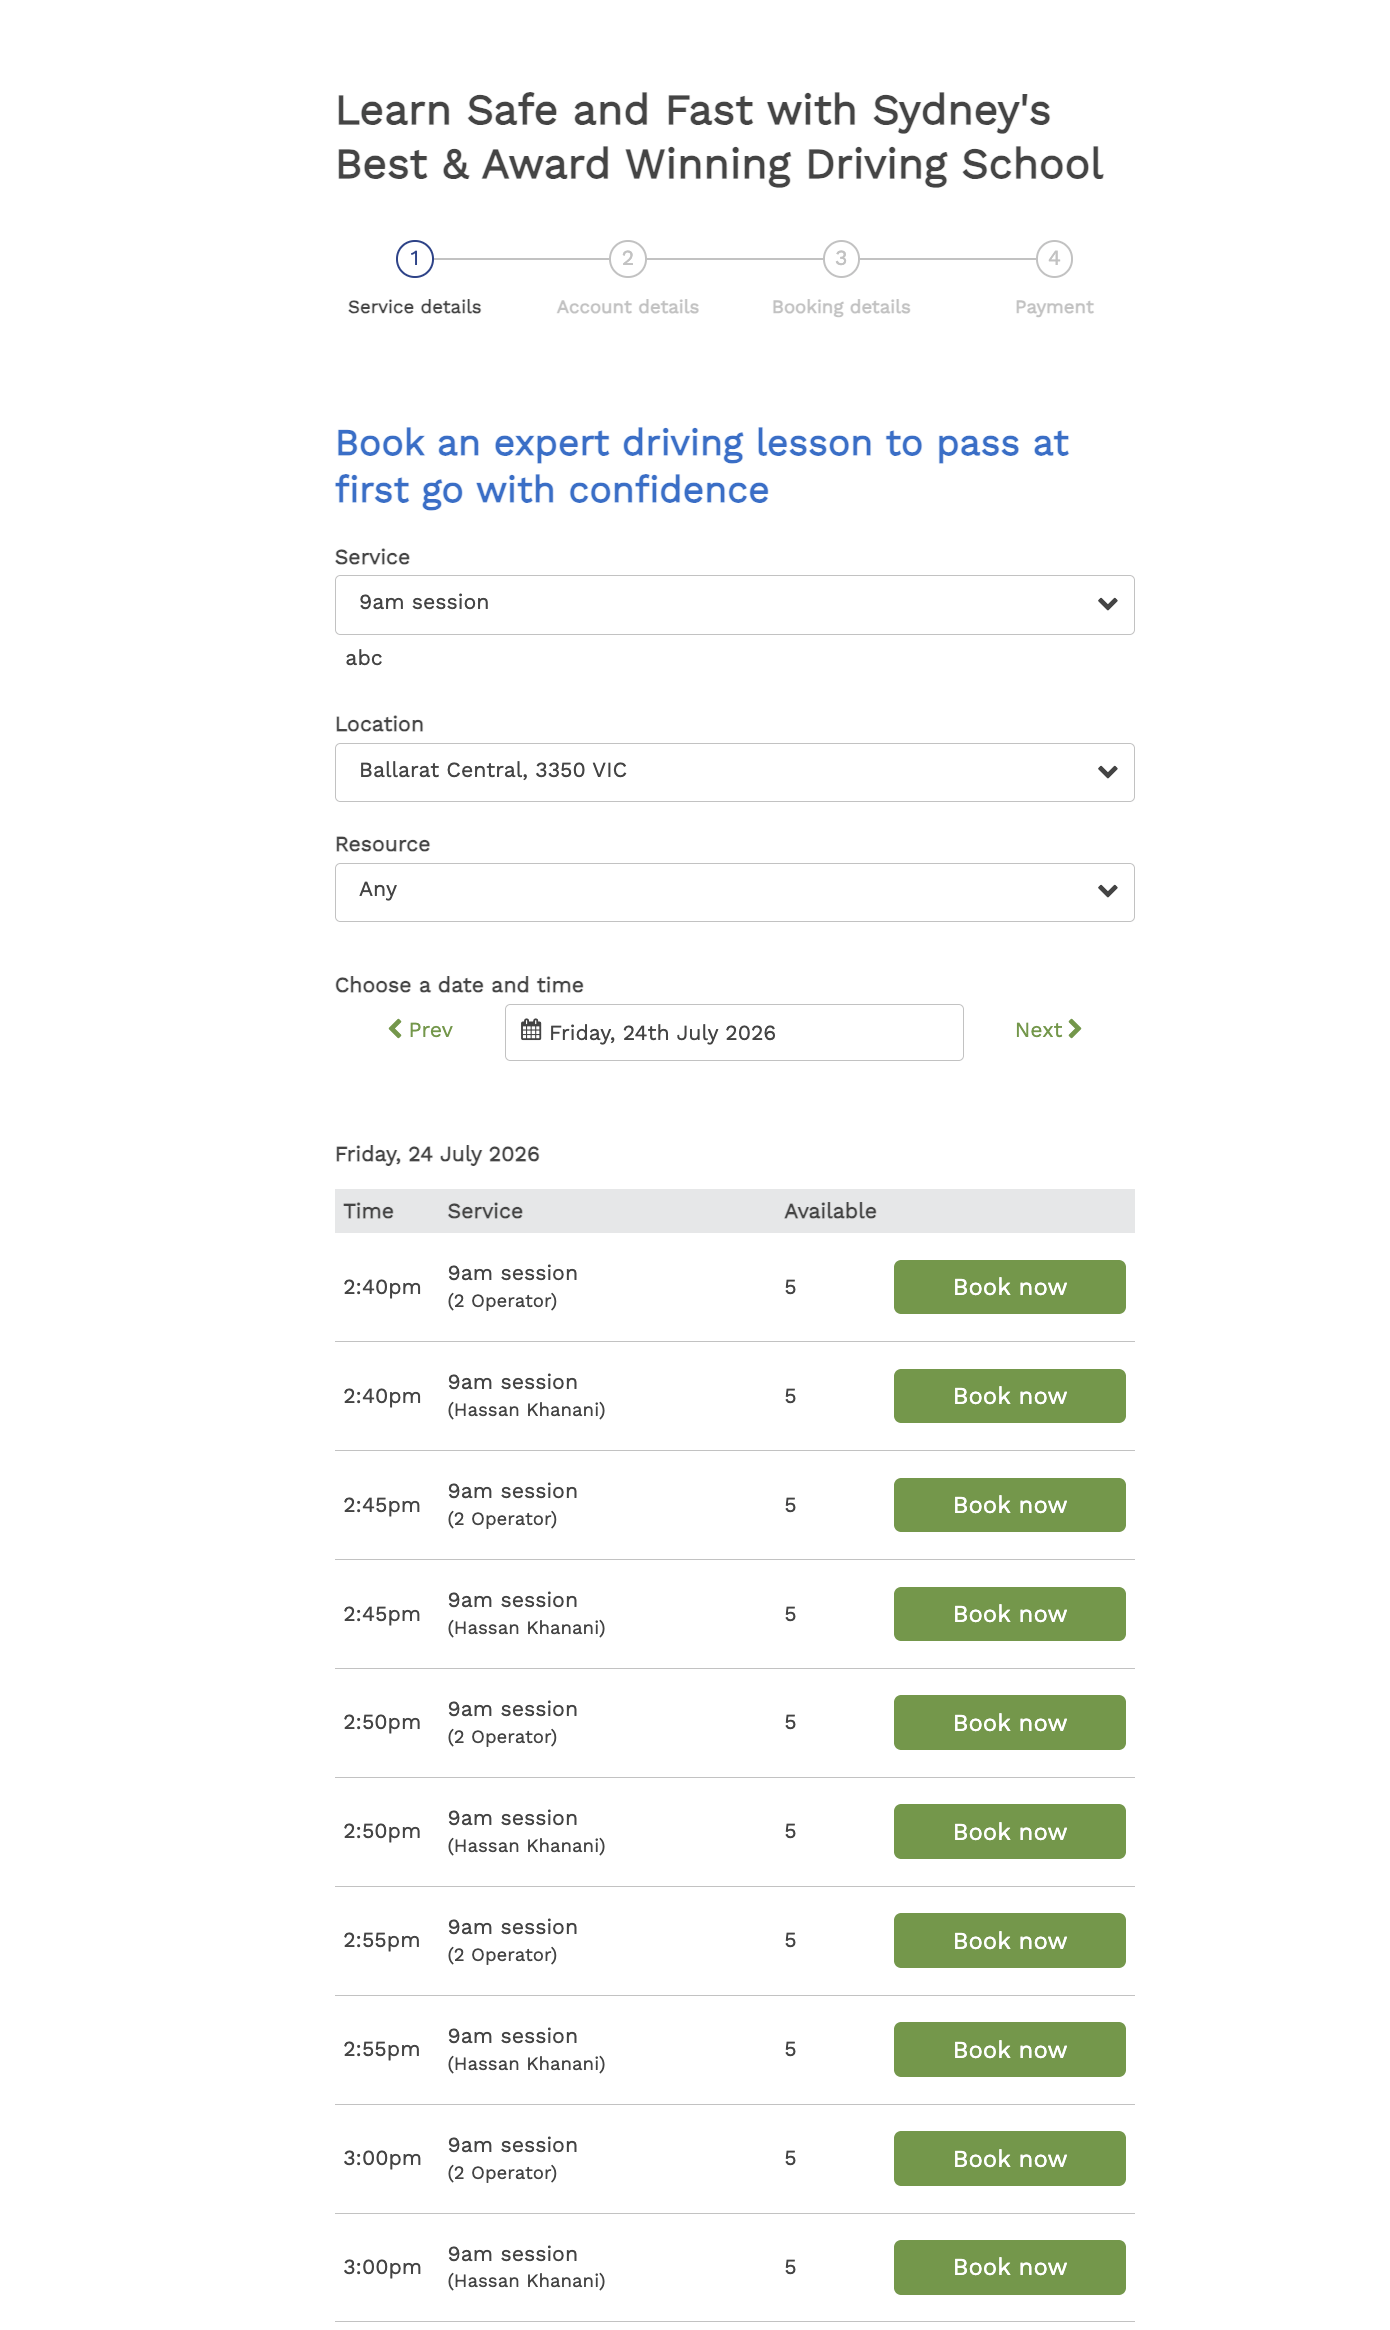
The public booking page is the interface for and accessible to your business' customer ("Clients"). Each business that uses BookItLive to handle online bookings will have its own public booking page URL. On this page, they can book your services and leave contact info.
To access your public booking page:
- Login to your BookItLive business account
- Hover over the "View" tab and select the "Public Booking" option.
You will be transferred to the booking page and you can copy and send the URL to your clients will see so that they can find your company and make bookings with you.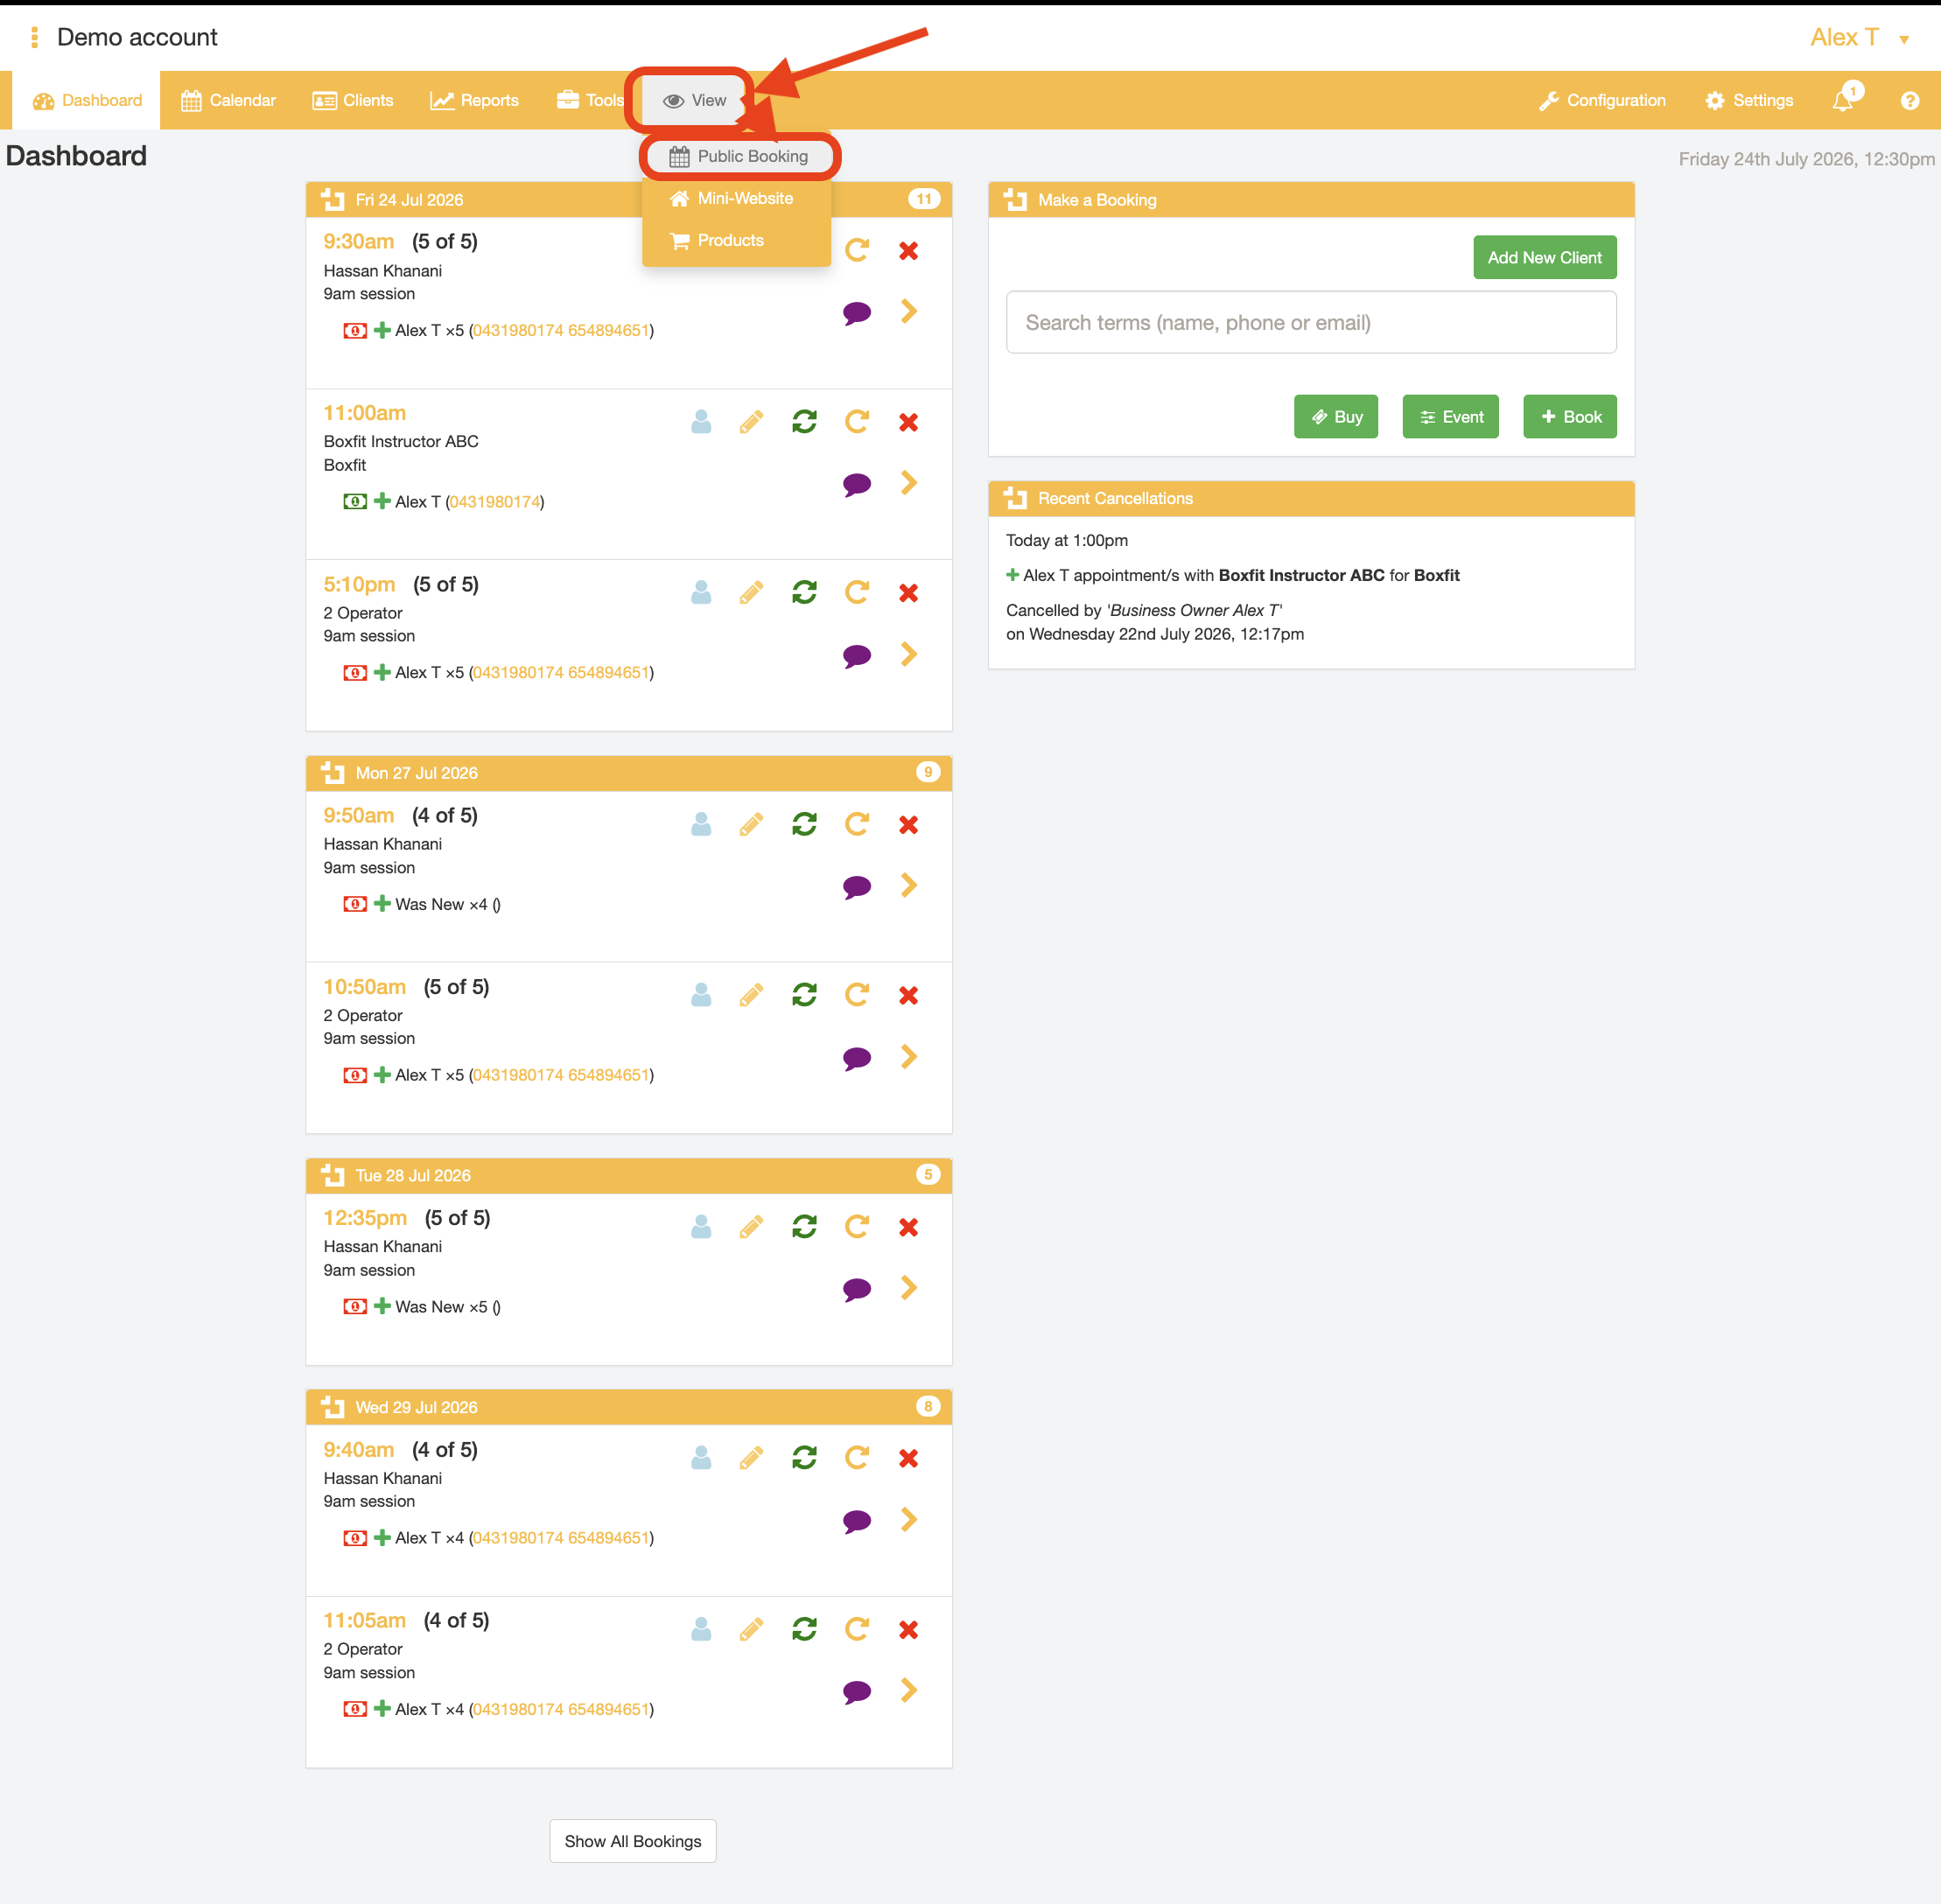
Was this article helpful?
That’s Great!
Thank you for your feedback
Sorry! We couldn't be helpful
Thank you for your feedback
Feedback sent
We appreciate your effort and will try to fix the article